
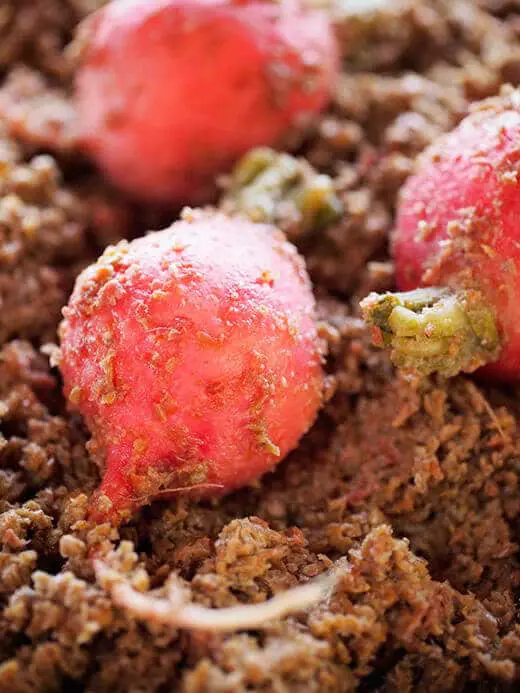
Every fall, a casual stroll through our garden proves to be quite precarious. Why?
Because the ground looks like this.

Dozens of feijoas lay scattered across the mulch, dropping from our two-story-tall feijoa tree with a plop so loud, I sometimes hear them from inside the house. Most of the time, they drop because they’re ripe and ready, as feijoas tend to do — but occasionally we find a few with nibbles on the ends, the castoffs of squirrels enjoying a little snack.


It’s not uncommon to harvest over 10 pounds of fruit in a day, and because I was on the road more than I was at home this year, I frequently let a week or two go by without picking them off the ground. When I finally got around to tidying up the yard, these two baskets were only one-third of what I eventually brought in at the end of the day.

Needless to say, I’ve been swimming in feijoas! I’ve sliced and diced them for salads and blended them into smoothies and vinaigrettes, and you might remember the salsa, fruit canned in light syrup, chunky preserves, and more preserves that I’d made over the years. But this chutney recipe is currently my favorite way to use feijoas because the flavors fit the season so well.
For most people, chutneys evoke a fruity relish or jam, cooked and preserved in sugar and vinegar. But did you know this method is actually a British take on the Indian chutneys that inspired it?
In traditional Indian cuisine, chutney is made from grinding together a wide variety of ingredients, including fruits and vegetables, lentils and peanuts, dried fish and dried shrimp, even yogurt and coconut. Some are pasty while others are chunky, some sweet while others spicy. The local ingredients and specialties of each region mean there are many versions of chutney found all over India.
During the British rule of India in the late 19th century and early 20th century, the British adapted some of the local dishes to their palate, creating classics like mulligatawny and kedgeree. Their fondness for fruit preserves led to the preserved chutney, which became a hallmark of Anglo-Indian cuisine.
Made by boiling fruit and spices in sugar and vinegar, preserved chutneys (as most people know them today) have little to do with Indian food despite their origins. It’s believed that apples made their way into chutney because their sweet, tart, and crisp profile resembled that of green mangoes, a common Indian ingredient. But the winter fruit became a chutney mainstay mostly because it was the seasonal bounty of English orchards (along with pears, plums, and quinces).
Over the years, the list of ingredients expanded to include a plethora of other fruits: figs, peaches, apricots, cranberries. The British preparation of boiling the ingredients together in a pot until they broke down — similar to making jam — became the de facto method for making chutney.
These days, any cooked combination of fruit, sugar, and vinegar is usually called a chutney, and it’s a delicious way to preserve fruit when you’re tired of jam. Because of their complex blend of savory, sweet, and sour, chutneys are much more versatile in the kitchen. They can be stirred into hummus or stuffed into grilled cheese sandwiches, or heated and whisked with olive oil to make a glaze. They can be served on a cheese board or charcuterie platter, with grilled or roasted meats, and on top of baked potatoes or roasted sweet potatoes.
No matter what I use to make chutney, this master recipe has more or less worked for me. You may occasionally need to adjust the amount of vinegar, depending on how juicy your fruits are, but that’s the beauty of chutney: it will come out different — yet delicious — every time.
Master Recipe for Making Any Chutney
Makes 4 half-pints
Ingredients
5 cups chopped fresh fruit
1 cup dried fruit
1 cup chopped onion
1 cup vinegar
1 cup sugar
1 citrus fruit, zested and juiced
Mixed herbs and spices to taste
Fresh fruit: You can use a single fruit or any combination of fruits, such as apples, pears, peaches, plums, mangoes, figs, blueberries, cranberries, or even rhubarb (technically a vegetable). Play around with a mix of sweet and sour if you’re feeling adventurous, and always choose the freshest fruits that are in season.
Dried fruit: Raisins are a traditional choice for chutneys, but I also like dried cranberries, orange cranberries, cherries, dates, figs, and apricots. They offer a nice counterpoint to the fresh fruit, texture- and flavor-wise, and complementary combinations (like apple-raisin, plum-cherry, rhubarb-date, or blueberry-raspberry-cranberry, for instance) work really well together.
Onion: As far as aromatics go, onions are a must. I like to pair sweet onions (like Walla Walla or Vidalia) with tart fruits, while yellow and red onions go great with sweeter fruits. You can also add in other alliums, such as shallots or garlic.
Vinegar: I usually prefer apple cider vinegar for its warm, mellow acidity, but any vinegar will work. Malt vinegar, with its mild, somewhat lemony, and slightly sweet flavor, is a traditional favorite for chutneys, but white vinegar and wine vinegar can be used as well. You can even add a splash of balsamic vinegar at the end of cooking for a deeper layer of flavor.
Sugar: Sweetness is an important component of chutney to balance the sharpness of the vinegar. You can never go wrong with white sugar, but brown sugar, turbinado sugar, and coconut sugar are also good options.
Citrus: Using the zest and juice of an orange or lemon adds brightness and tang to the overall flavor.
Herbs and spices: While they aren’t necessary, the right seasonings can truly elevate a chutney. Some of my favorite combinations include fresh mint with a medley of summer berries, cracked black pepper with a strawberry chutney, crystallized ginger with a stone fruit chutney, or cinnamon, clove, nutmeg, and allspice (pretty much “pumpkin pie spice”) with an apple-pear chutney.

With their sweet-tart character, feijoas (also known as pineapple-guavas or guavasteens) seem made for chutneys. I only use the flesh in this recipe, and find that the easiest way to “peel” the fruit (without actually peeling it) is to slice the feijoa in half lengthwise, then scoop the flesh out with a grapefruit spoon. The pear, onion, and raisins round out the flavor with a touch of sweetness, while ginger, mustard seeds, and red pepper flakes add a little zing.


Feijoa-Pear Chutney
Makes 4 half-pints
Ingredients
4 cups chopped feijoas (flesh only)
1 cup chopped pear
1 cup chopped sweet onion
1 cup raisins
1 cup apple cider vinegar
1 cup packed brown sugar
1 orange, zested and juiced
1-inch piece fresh ginger, minced
1 teaspoon ground cinnamon
1/2 teaspoon ground cloves
1/2 teaspoon mustard seeds
1/4 teaspoon crushed red pepper flakes
Making Your Feijoa-Pear Chutney
In a large, wide pot, combine all of the ingredients over high heat and bring to a boil.

Once the mixture starts bubbling consistently, reduce the heat to medium. Simmer until the fruits are tender and the mixture is thickened, 25 to 30 minutes, stirring occasionally. How to tell when your chutney is done? Scrape a spoon across the bottom of the pot; if the channel it leaves behind doesn’t immediately fill in with liquid, the chutney is ready.
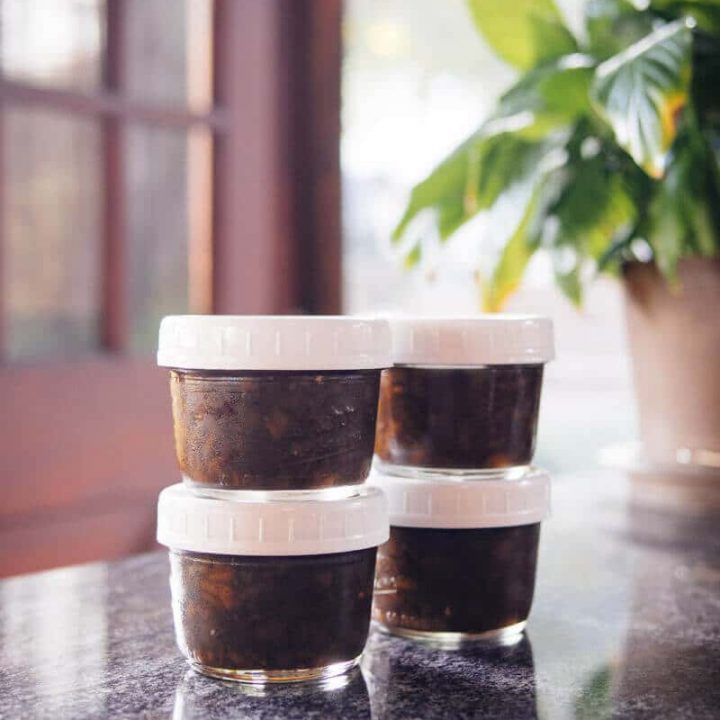
Ladle the chutney into jars, wipe the rims clean with a towel, and seal with lids. Let the jars cool to room temperature before storing in the fridge. The chutney will keep for up to one month, refrigerated.
Alternatively, you can process the jars in a boiling water bath for 10 minutes, adjusting the time for altitude as needed. Properly sealed and unopened jars are shelf stable for at least one year. (Please note that the white lids shown in these pictures are not suitable for water bath canning. Always use proper canning rings and lids.)


(By the way, I recently stocked up on these wide-mouth plastic lids and they’ve been so useful for sealing jars that don’t need to go in a water bath canner. I often wash and reuse the rings and lids on my mason jars for everyday storage, but they’ve always eventually rusted. The plastic lids solve that problem and come in one convenient piece! There’s also a regular-mouth version available.)
Feijoa-Pear Chutney
No matter what I use to make chutney, this master recipe has more or less worked for me. You may occasionally need to adjust the amount of vinegar, depending on how juicy your fruits are, but that’s the beauty of chutney: it will come out different — yet delicious — every time.
Ingredients
- 4 cups chopped feijoas (flesh only)
- 1 cup chopped pear
- 1 cup chopped sweet onion
- 1 cup raisins
- 1 cup apple cider vinegar
- 1 cup packed brown sugar
- 1 orange, zested and juiced
- 1-inch piece fresh ginger, minced
- 1 teaspoon ground cinnamon
- 1/2 teaspoon ground cloves
- 1/2 teaspoon mustard seeds
- 1/4 teaspoon crushed red pepper flakes
Instructions
- In a large, wide pot, combine all of the ingredients over high heat and bring to a boil.
- Once the mixture starts bubbling consistently, reduce the heat to medium. Simmer until the fruits are tender and the mixture is thickened, 25 to 30 minutes, stirring occasionally.
- Ladle the chutney into jars, wipe the rims clean with a towel, and seal with lids.
- Let the jars cool to room temperature before storing in the fridge.
- The chutney will keep for up to one month, refrigerated.
- Alternatively, you can process the jars in a boiling water bath for 10 minutes, adjusting the time for altitude as needed.
Notes
How to tell when your chutney is done? Scrape a spoon across the bottom of the pot; if the channel it leaves behind doesn’t immediately fill in with liquid, the chutney is ready.
Recommended Products
As an Amazon Associate and member of other affiliate programs, I earn from qualifying purchases.


Can’t wait to make chutney using your recipe above and the plastic lids. It is new to my family but not me. I love it on ham, etc. Random, I know, but Catherine Middleton had to decide what to give HRH Queen Elizabeth as her Grand-MIL on Christmas and decided something homemade but what? Then she remembered her own grandmother’s recipe. She presented her gift to the Queen on Christmas Eve and of course Catherine wondered if the Queen would like it. The next morning it was on the buffet for Christmas morning breakfast. What a hit!
I hope you enjoy the chutney Kathy!
i am so jealous of your tree. my tree is still a baby only 4ft tall.
My tree is decades old (planted long before I ever moved into this house)… yours will be raining fruits before you know it. 🙂