Around this time of year, I always feel a little dry. My lips are chapped, my hands are scaly, and my wooden spoons are looking thirsty after months of mixing and stirring. It’s the perfect time to whip out a jar of spoon oil and give everything a good rub-down.
What is spoon oil?
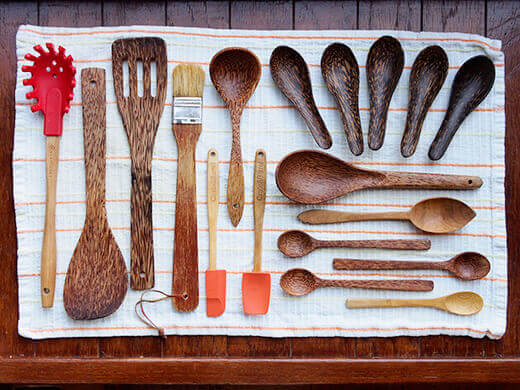
Just like your skin, which feels fabulous and smooth after some silky conditioning, your wooden utensils are healthier, sturdier, and lovelier after a swipe of spoon oil. This hydrating mixture is sometimes also called spoon butter, wood butter, board butter, cutting board cream, or cutting board conditioner, because it works on all types of wooden things: spoons, turners, cutting boards, butcher blocks, bowls, trays, and utensil handles.
The mixture helps protect the wood from splits and cracks, and regular oiling offers a layer of water resistance. I often oil up my entire collection of wooden utensils when my hands are dry and overworked—usually early winter to late spring—because spoon butter moisturizes your skin as well!
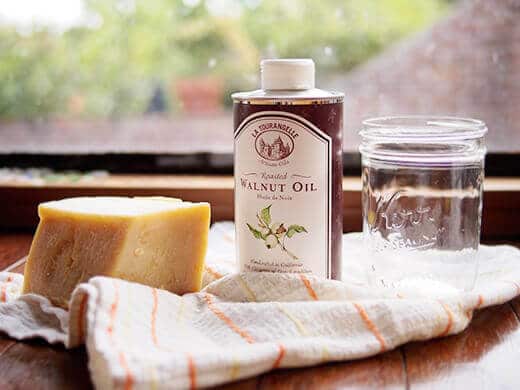
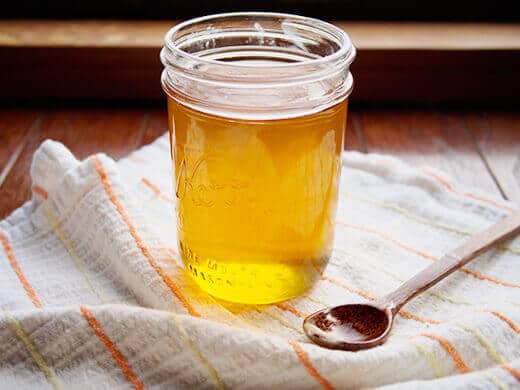
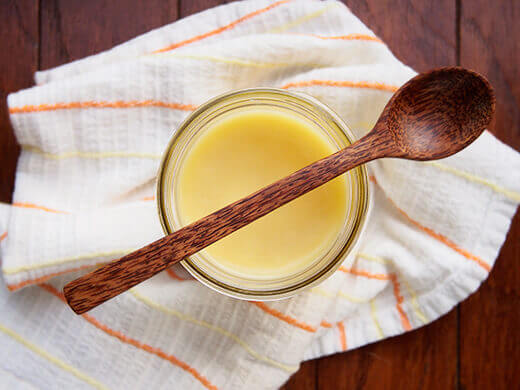
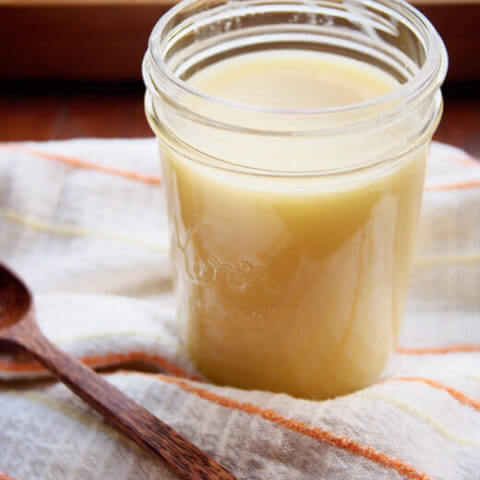
My spoon butter (or as I like to call it, spoon butta!) is a mixture of walnut oil and beeswax. Walnut oil is known as a drying oil. That means it absorbs into the wood and then cures, or hardens. It gives the wood a satiny sheen that stands up to repeated use.
The beeswax adds another layer of protection and waterproofness. Together, they give new life to your parched wooden implements in a natural, effective, and food-safe way.
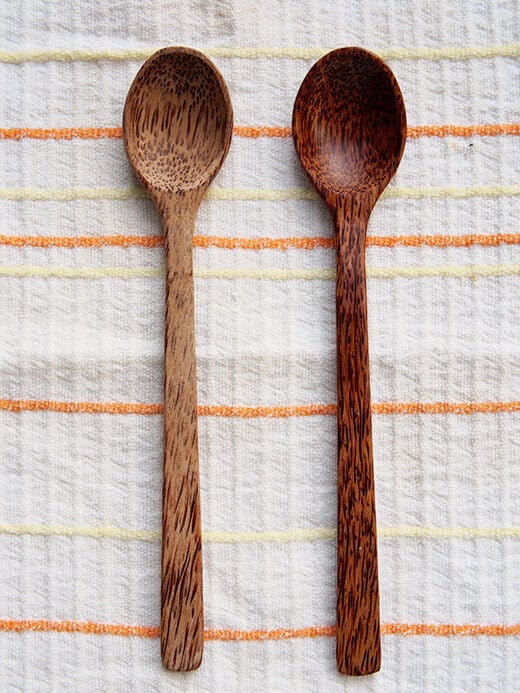
Behold the before and after…
Walnut oil vs. mineral oil
A lot of commercial spoon butters are a mixture of mineral oil and a hard wax (usually carnauba or beeswax). Mineral oil is known as a non-drying oil, meaning it washes away easily because it never cures.
While it’s often the standard for wooden cutting boards and butcher blocks, where repeated application helps the oil sink into the layers of pores and cracks to condition the wood, it’s less effective on wooden spoons, wooden spatulas, and other wooden utensils that are constantly washed with soap.
While you can use my homemade spoon butter for your cutting boards, keep in mind that walnut oil will cure. While this sounds ideal, theoretically it means repeated application of walnut oil will simply build on top of each other, so the oil isn’t able to absorb and fully sink in to a thick chopping board or butcher block countertop.
If you have a thin wood cutting board, or you scrub your cutting board with soap every day (rather than just wiping it down), then spoon butter is a great way to keep it from splintering.
The walnut oil in my recipe is also a good alternative for people who want to avoid mineral oil, a petroleum by-product.
Keep a jar in the kitchen for not only spoons, but for your hands as a natural moisturizer too! I like to leave a jar on my counter just for this purpose (but always remember to reach in with clean fingers). Use twice a year on all kinds of wooden objects, but your go-to spoons should get buttered up every couple of months.
Will spoon butter go rancid?
Walnut oil is highly resistant to oxidation (it’s used by many woodworkers for this reason) and your homemade spoon butter will keep for at least a year at moderate room temperature.
If you’re not able to source walnut oil, you can use another edible oil that’s high in linoleic acid (the property that causes it to cure) such as sunflower oil, though it’s more prone to going rancid.
To prolong the shelf life of any oil, you can add the contents of a vitamin E capsule to your spoon butter.
Disclosure: If you shop from my article or make a purchase through one of my links, I may receive commissions on some of the products I recommend.
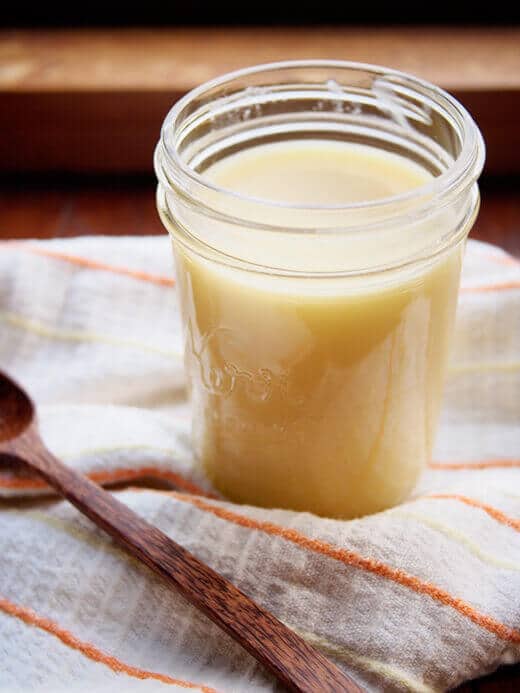
Homemade spoon oil (board butter)
Makes 1 pint
Ingredients
8 fluid ounces walnut oil![]()
2 ounces beeswax![]() , cut into chunks (or 2 ounces beeswax pellets/pastilles
, cut into chunks (or 2 ounces beeswax pellets/pastilles![]() )
)
1 vitamin E capsule (optional)
Instructions
Any brand of walnut oil will work; I simply use what’s available in my local store. I also use a wide-mouth mason jar to make it easier to scoop from.
Pour the walnut oil and beeswax into a pint-sized glass jar, then place the jar in a saucepan filled with 2 to 3 inches of water.
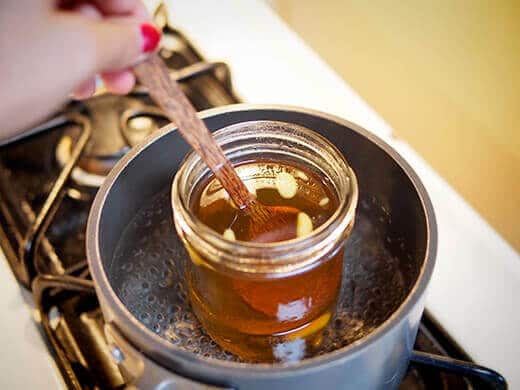
Heat the jar over medium heat, stirring until the oil and wax are well mixed. (I use one of my wooden spoons to get ahead of the game!) You want the water to be simmering, not boiling.
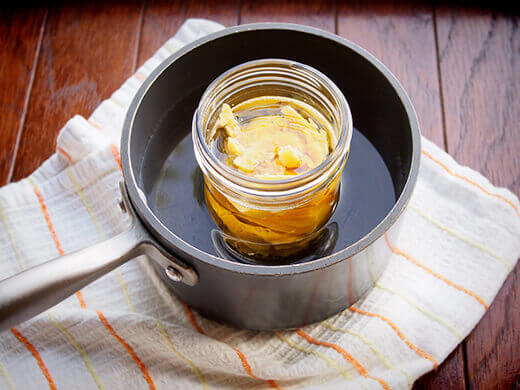
When the mixture has liquefied, remove the jar from the pan.
If using, break the vitamin E capsule and squeeze the oil into the mixture. Stir to combine, then wipe down your stirring spoon to ensure it’s evenly coated with the spoon oil.
Allow the spoon oil to cool before using; it will thicken and solidify to a balmy texture.
When you’re ready to start spoon-buttering, simply swipe a (clean) spoonful or fingerful of the butter onto your wooden spoons, handles, and other utensils and give them a good rub-down. Let the oil absorb overnight, then buff out any excess oil the next day with a soft rag.
Homemade spoon butter makes a thoughtful gift for an avid cook, so you can also divide the recipe between two half-pint jars for two of your favorite people!
Homemade spoon oil (board butter)
Spoon oil (also known as spoon butter or board butter) helps protect your wooden spoons, wooden spatulas, and other wooden utensils from splits and cracks, and regular oiling offers a layer of water resistance.
Materials
- 8 fluid ounces walnut oil
- 2 ounces beeswax, cut into chunks (or 2 ounces beeswax pellets/pastilles)
- 1 vitamin E capsule (optional)
Instructions
- Pour the walnut oil and beeswax into a pint-sized glass jar.
- Place the jar in a saucepan filled with 2 to 3 inches of water.
- Heat the jar over medium heat, stirring until the oil and wax are well mixed. (I use one of my wooden spoons to get ahead of the game!) You want the water to be simmering, not boiling.
- When the mixture has liquefied, remove the jar from the pan. If using, break the vitamin E capsule and squeeze the oil into the mixture. Stir to combine, then wipe down your stirring spoon to ensure it's evenly coated with the spoon oil.
- Allow the spoon oil to cool before using; it will thicken and solidify to a balmy texture.
Notes
To use, simply swipe a (clean) spoonful or fingerful of the butter onto your wooden spoons, handles, and other utensils and give them a good rub-down. Let the oil absorb overnight, then buff out any excess oil the next day with a soft rag.
This post updated from an article that originally appeared on November 6, 2013.
View the Web Story on DIY spoon oil and board butter.