No matter what climate you live in, growing tomatoes from seed always starts out the same way: figure out the best time to plant relative to your last frost date, start the seeds indoors, then transplant the seedlings after germination.
But where and how you transplant tomato seedlings makes all the difference between a mediocre tomato plant, and a staggeringly productive tomato plant that barely lets you keep up with it.
So what’s this trick that helps your tomato seedlings grow bigger and better from the get-go?
Transplanting the seedlings into bigger pots first, before you transplant them in the garden.
And you can do it while you wait for the soil outside to warm up. Here’s how!
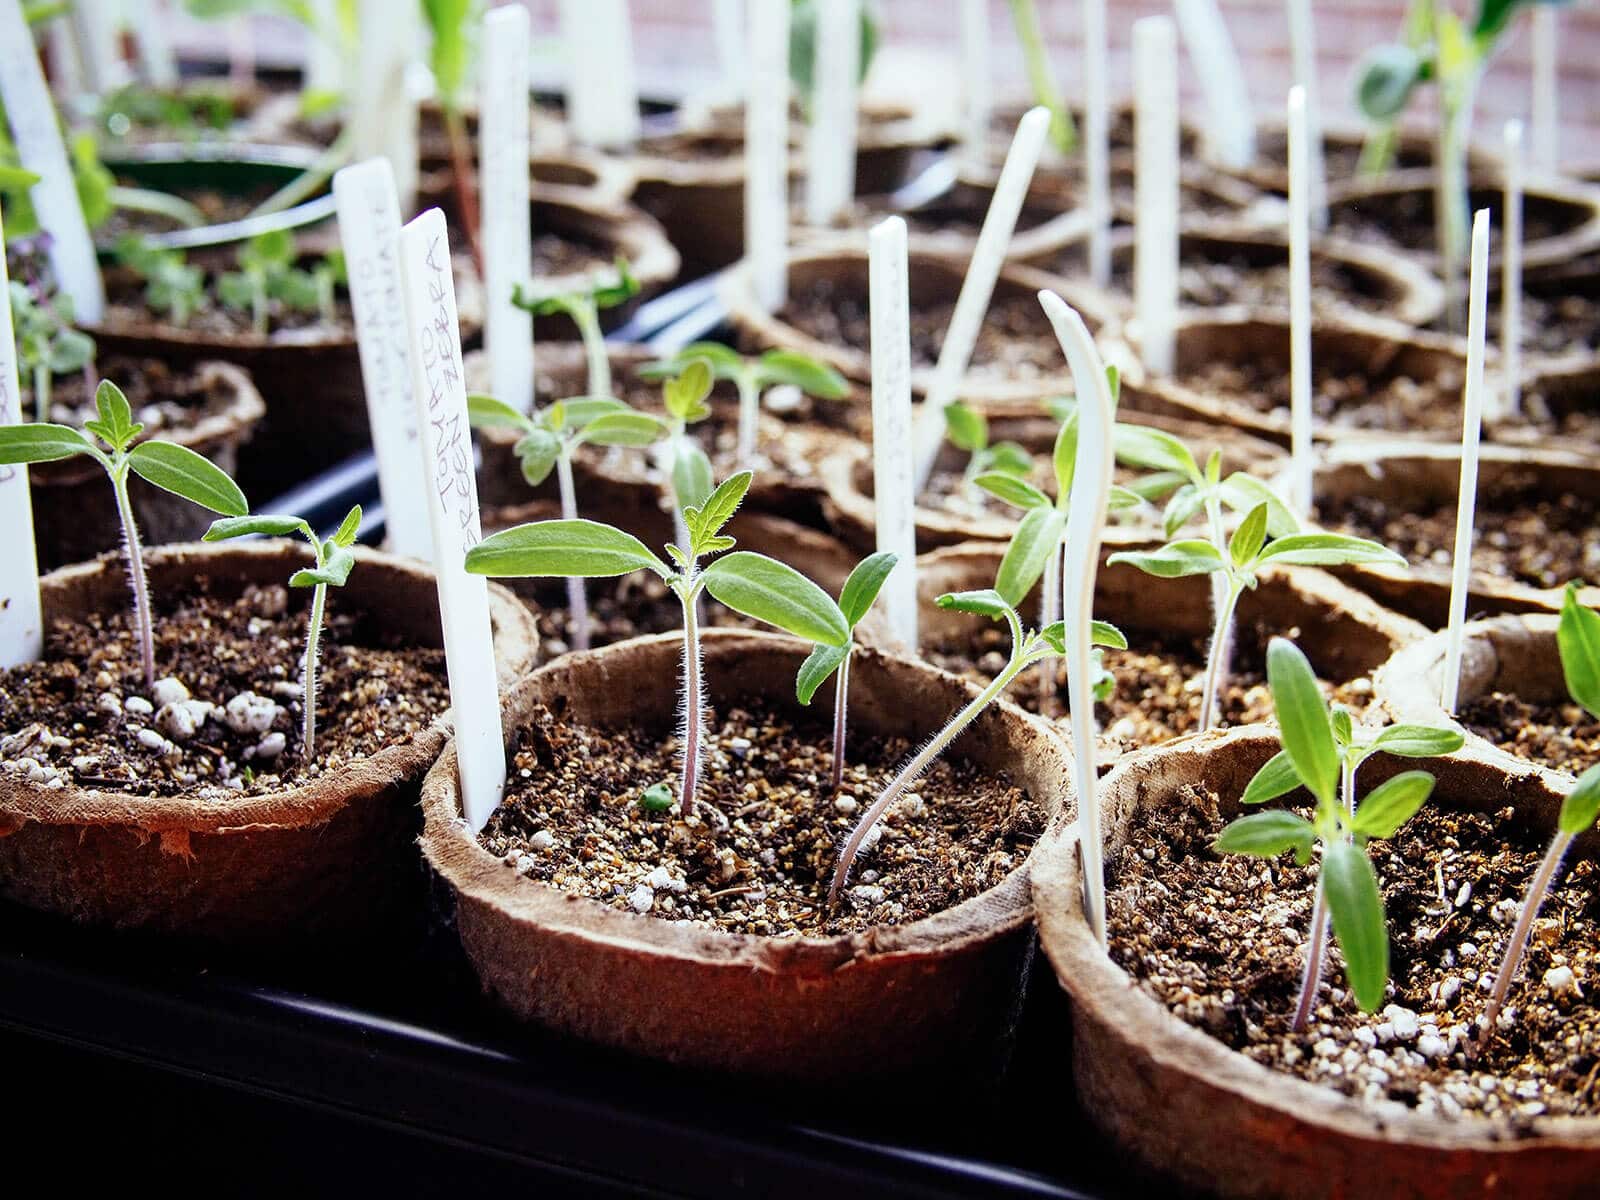
What are the benefits of repotting tomato seedlings?
Repotting tomato seedlings might feel like unnecessary work if you just want to move things along, but there’s a good reason for it: This extra step allows you to take advantage of their remarkable talent to grow roots along their stems.
Tomato seedlings are unique in that they like their stems buried deeply. They have the ability to form new roots (called adventitious roots) along their stems, which help the plants grow more vigorously.
In fact, if you live in a humid climate, you may have even noticed adventitious roots forming above ground from tiny bumps (nubs) on the stem.
(I like to call them “air roots,” and contrary to what many people think, the fuzzy hairs on the stems do not turn into roots themselves — they contain the oils responsible for the distinctive smell of tomato leaves.)
Yes, every single one of those bumps has the potential to be a root!
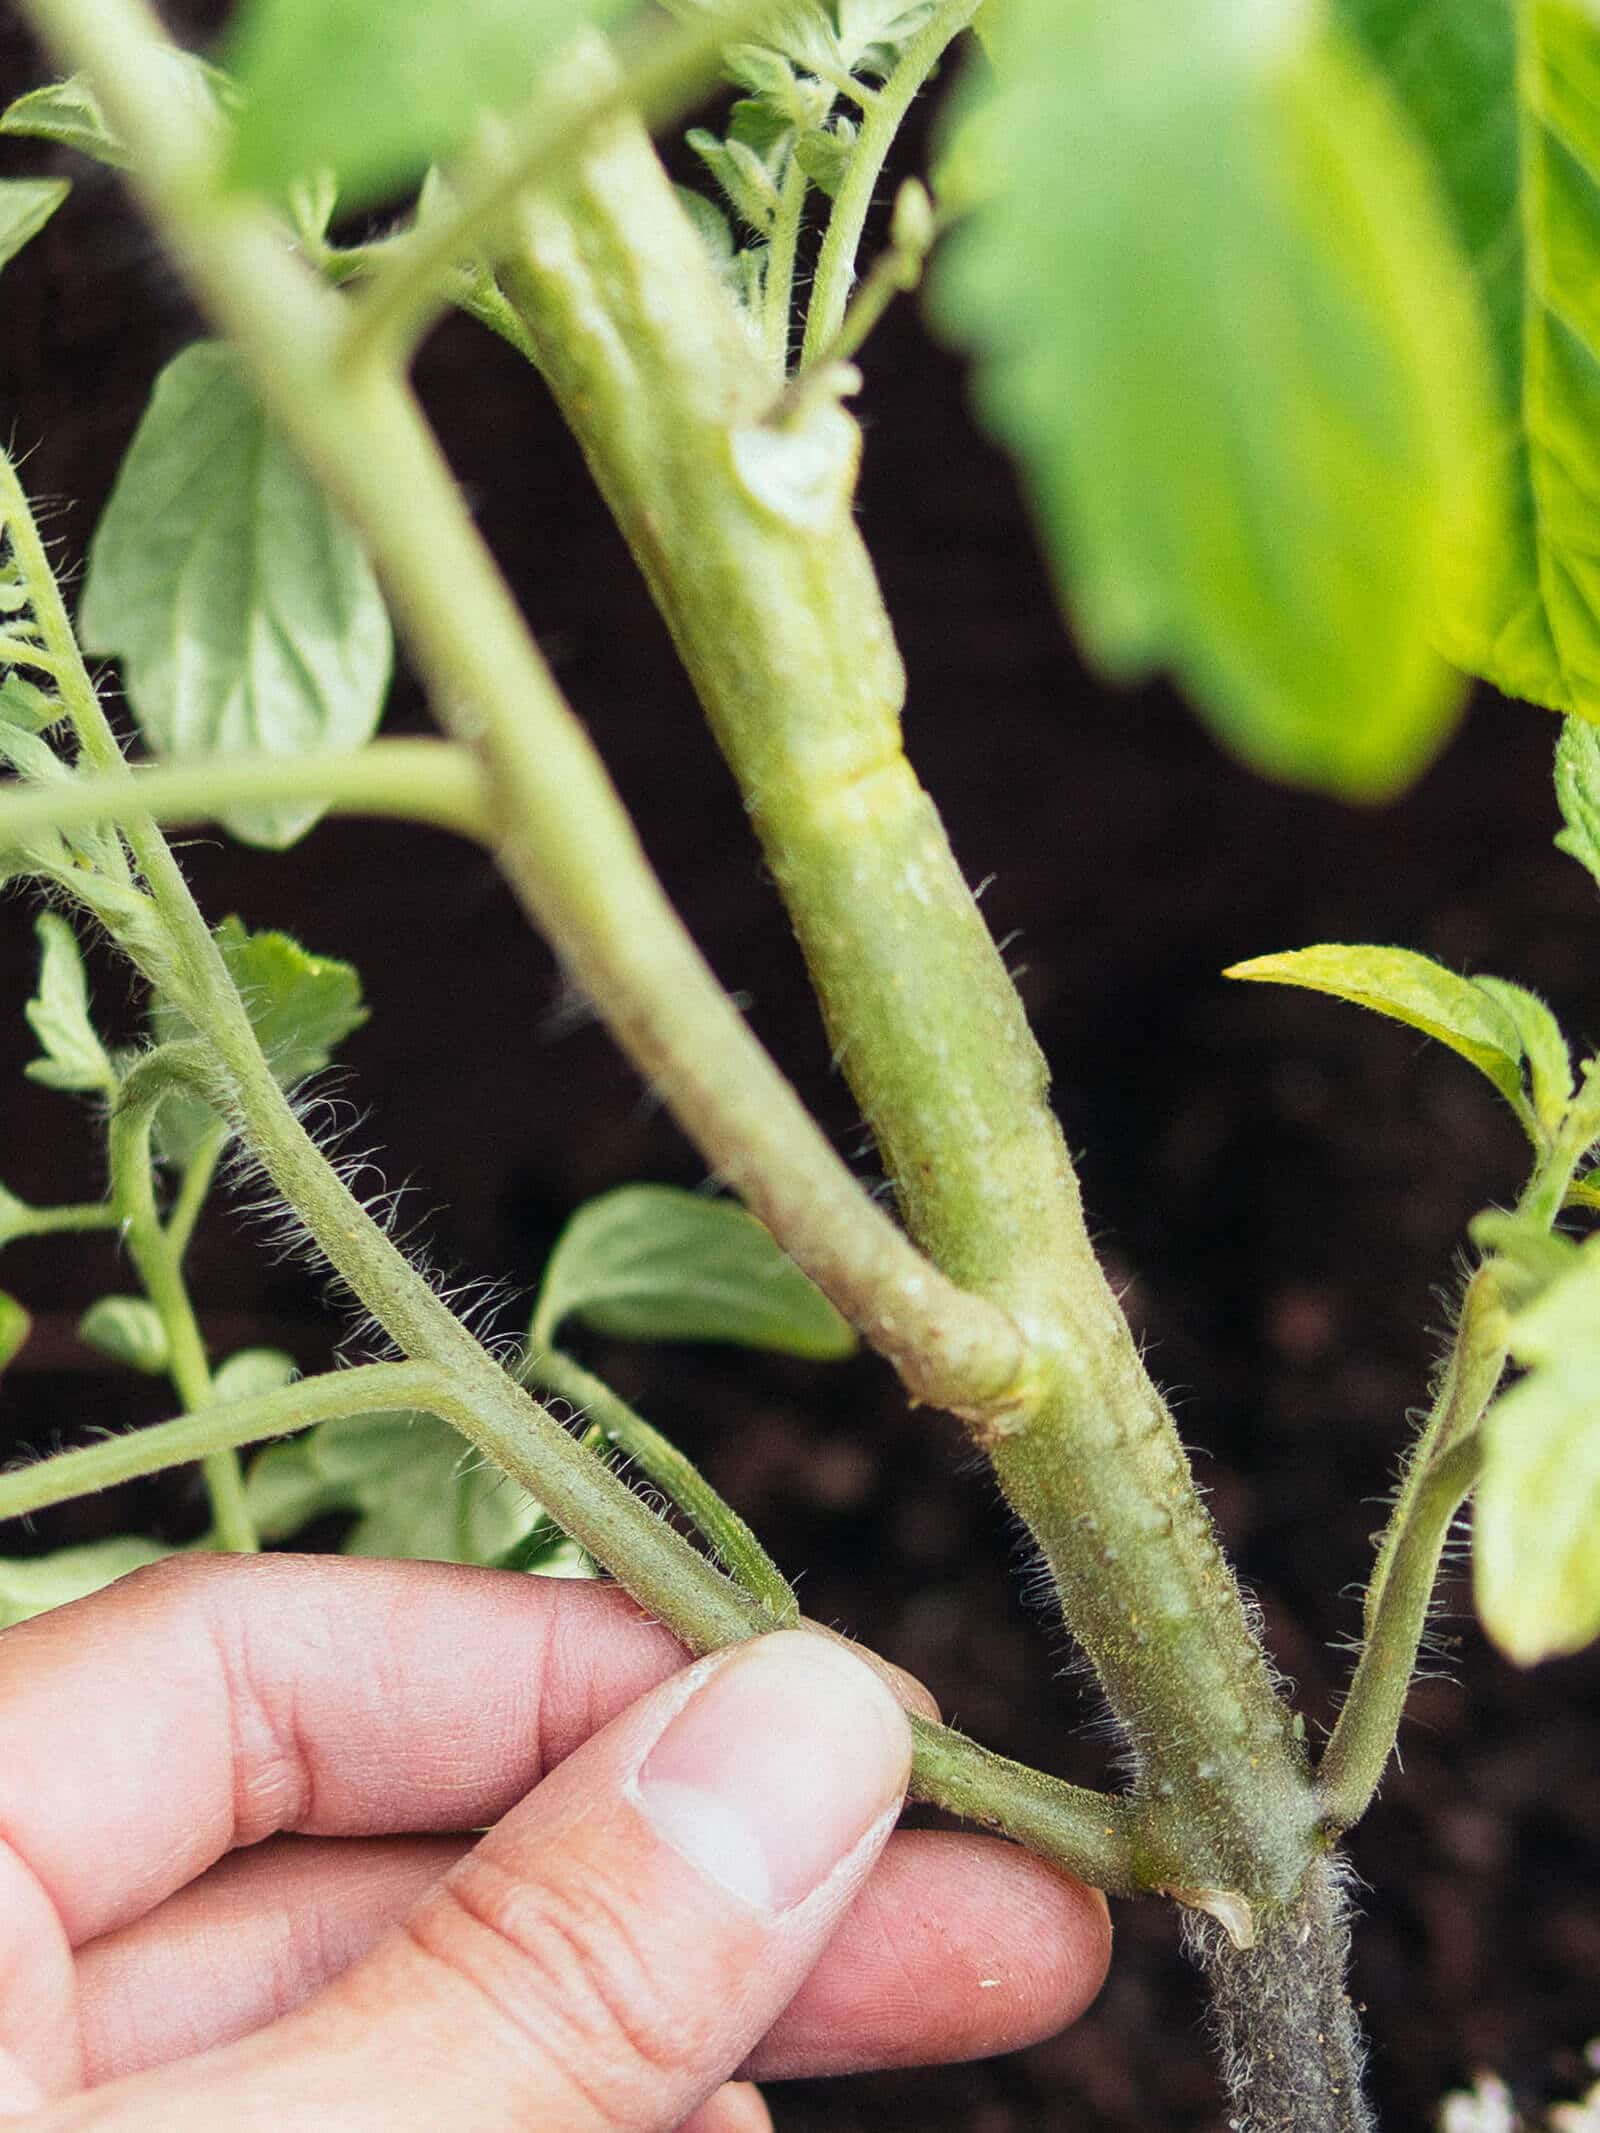
Given ample moisture and sunlight, these roots will continue to grow like the ones underground and can even plant themselves in the soil if they get long enough.
Transplanting tomato seedlings deep in the soil stimulates the adventitious roots and creates a larger and healthier root system that will take up more nutrients and anchor your plant when it finally goes in the ground.
When should you repot tomato seedlings?
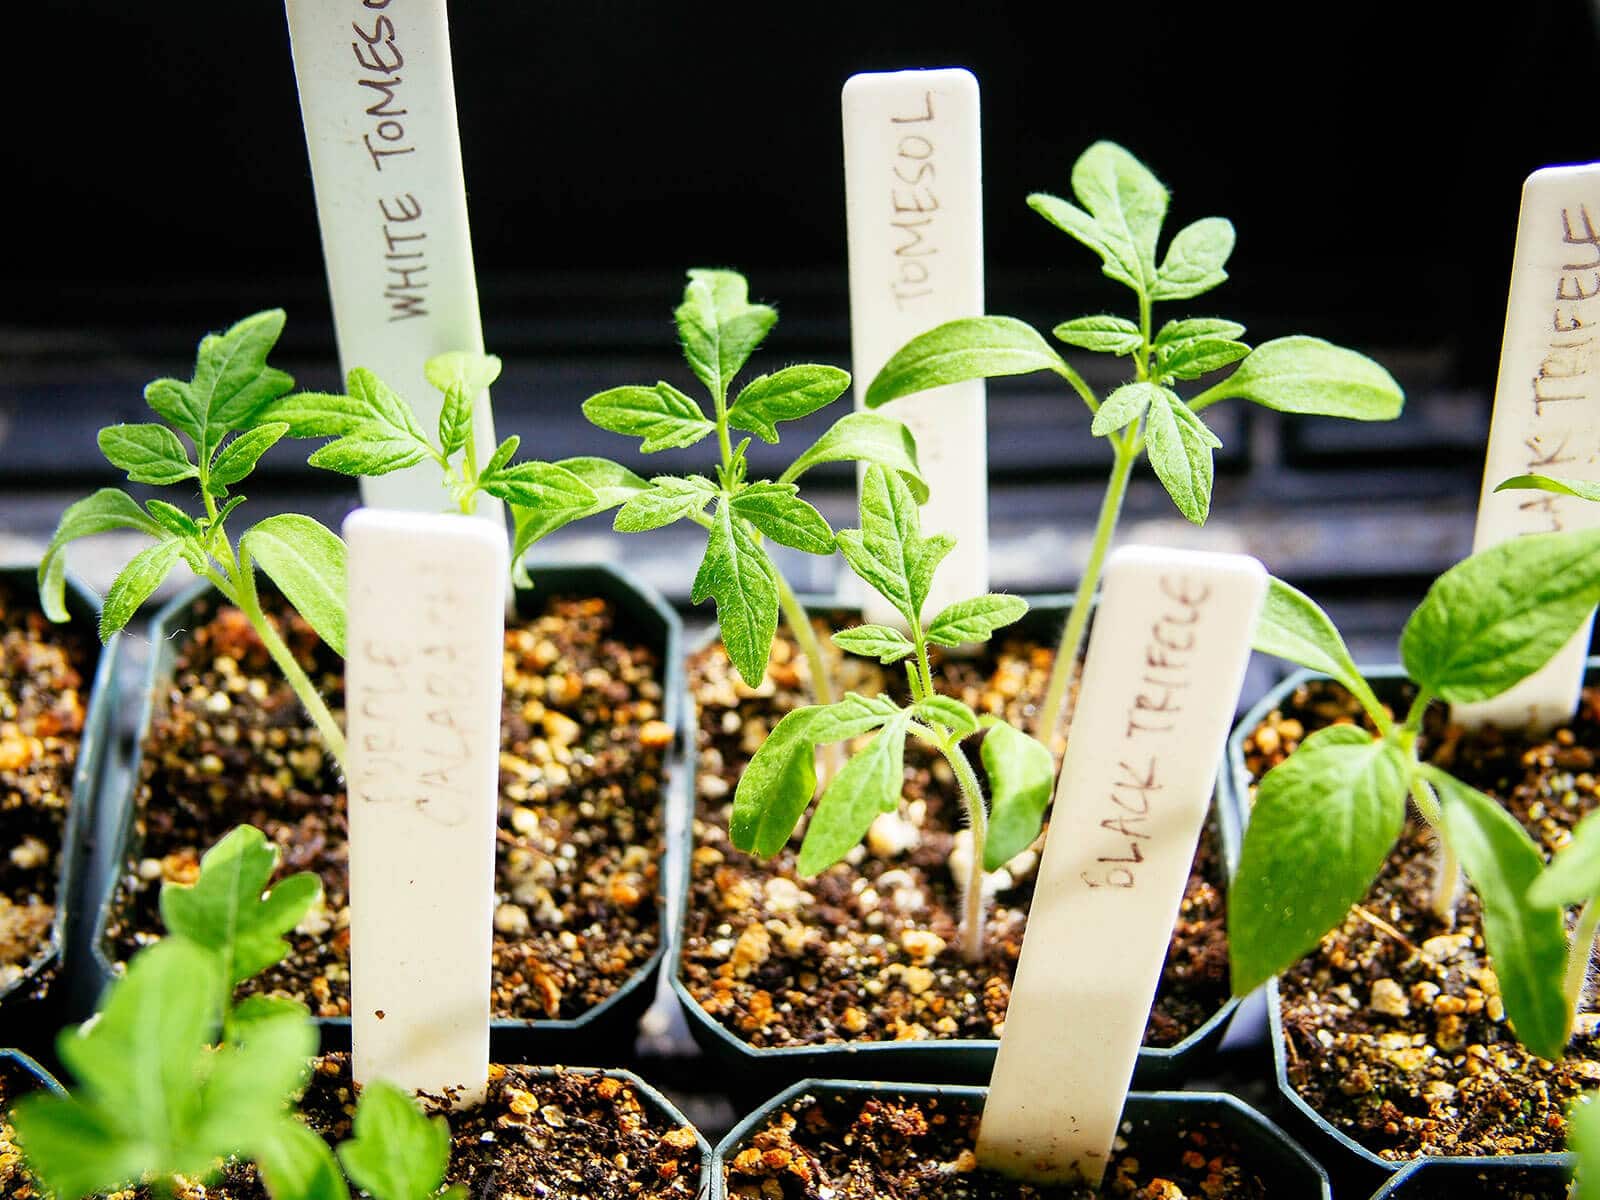
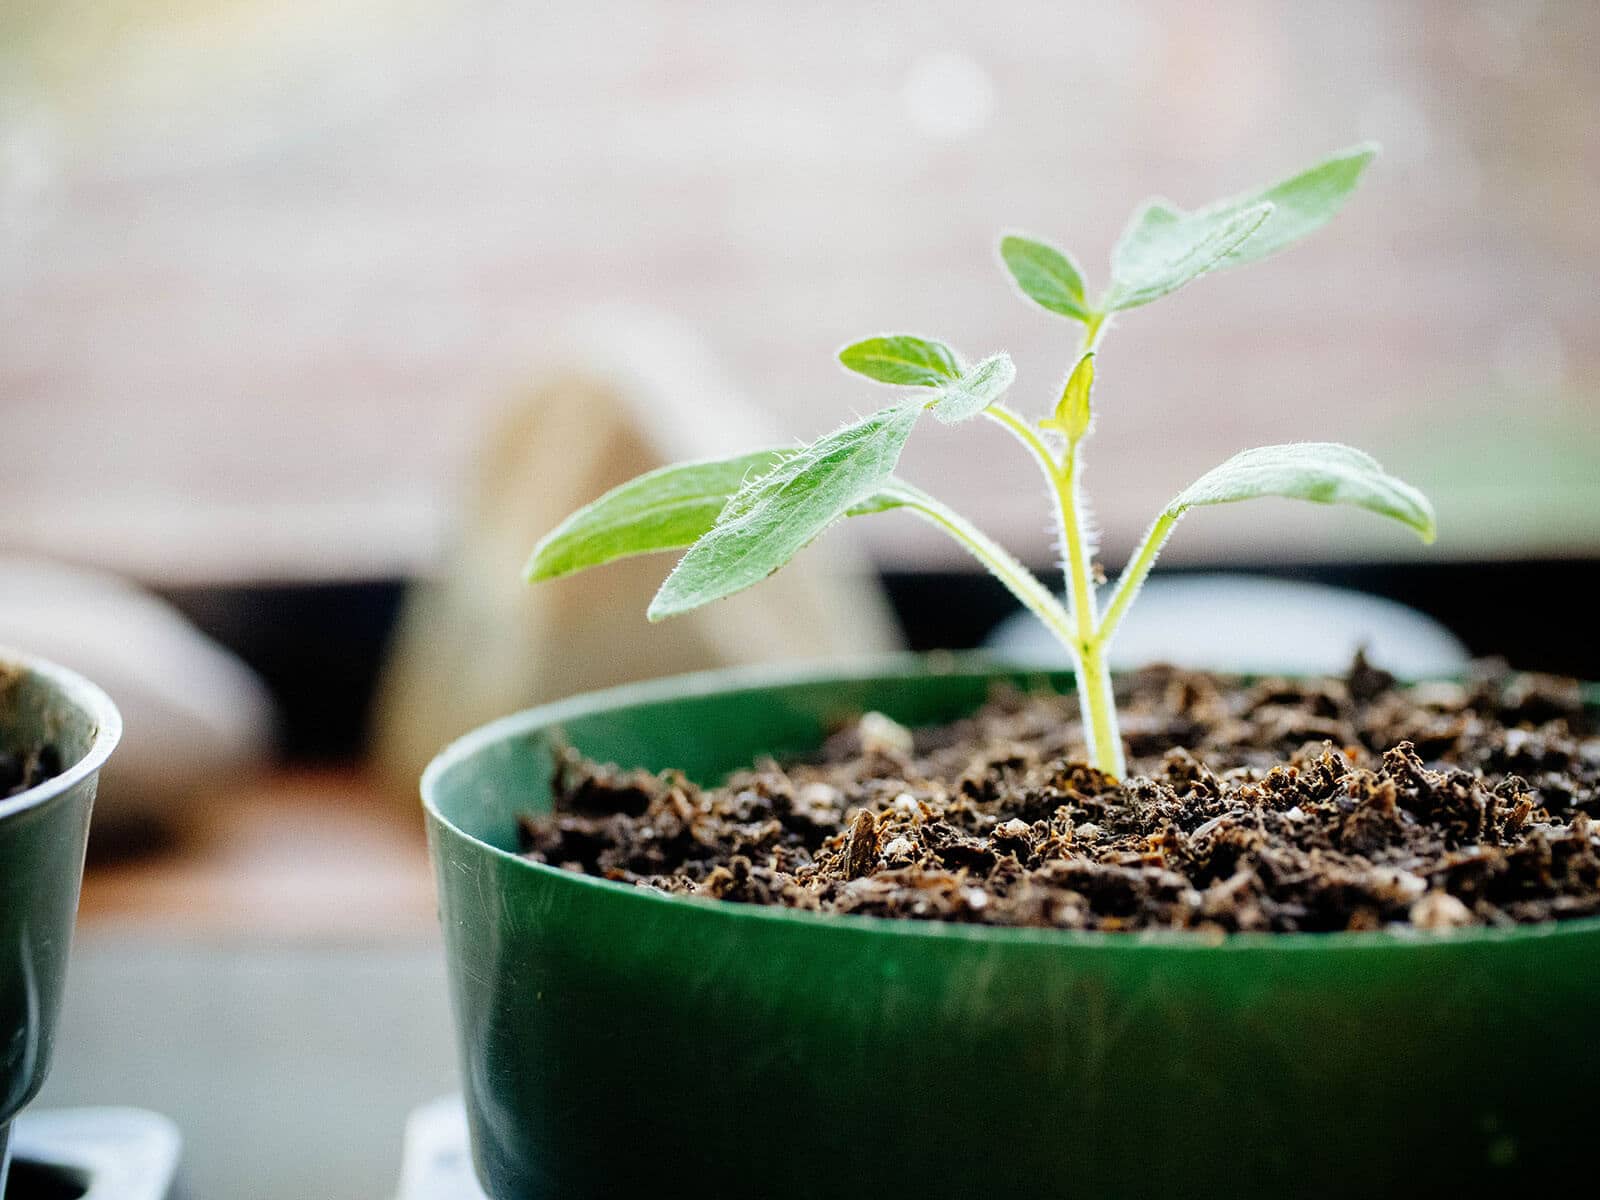
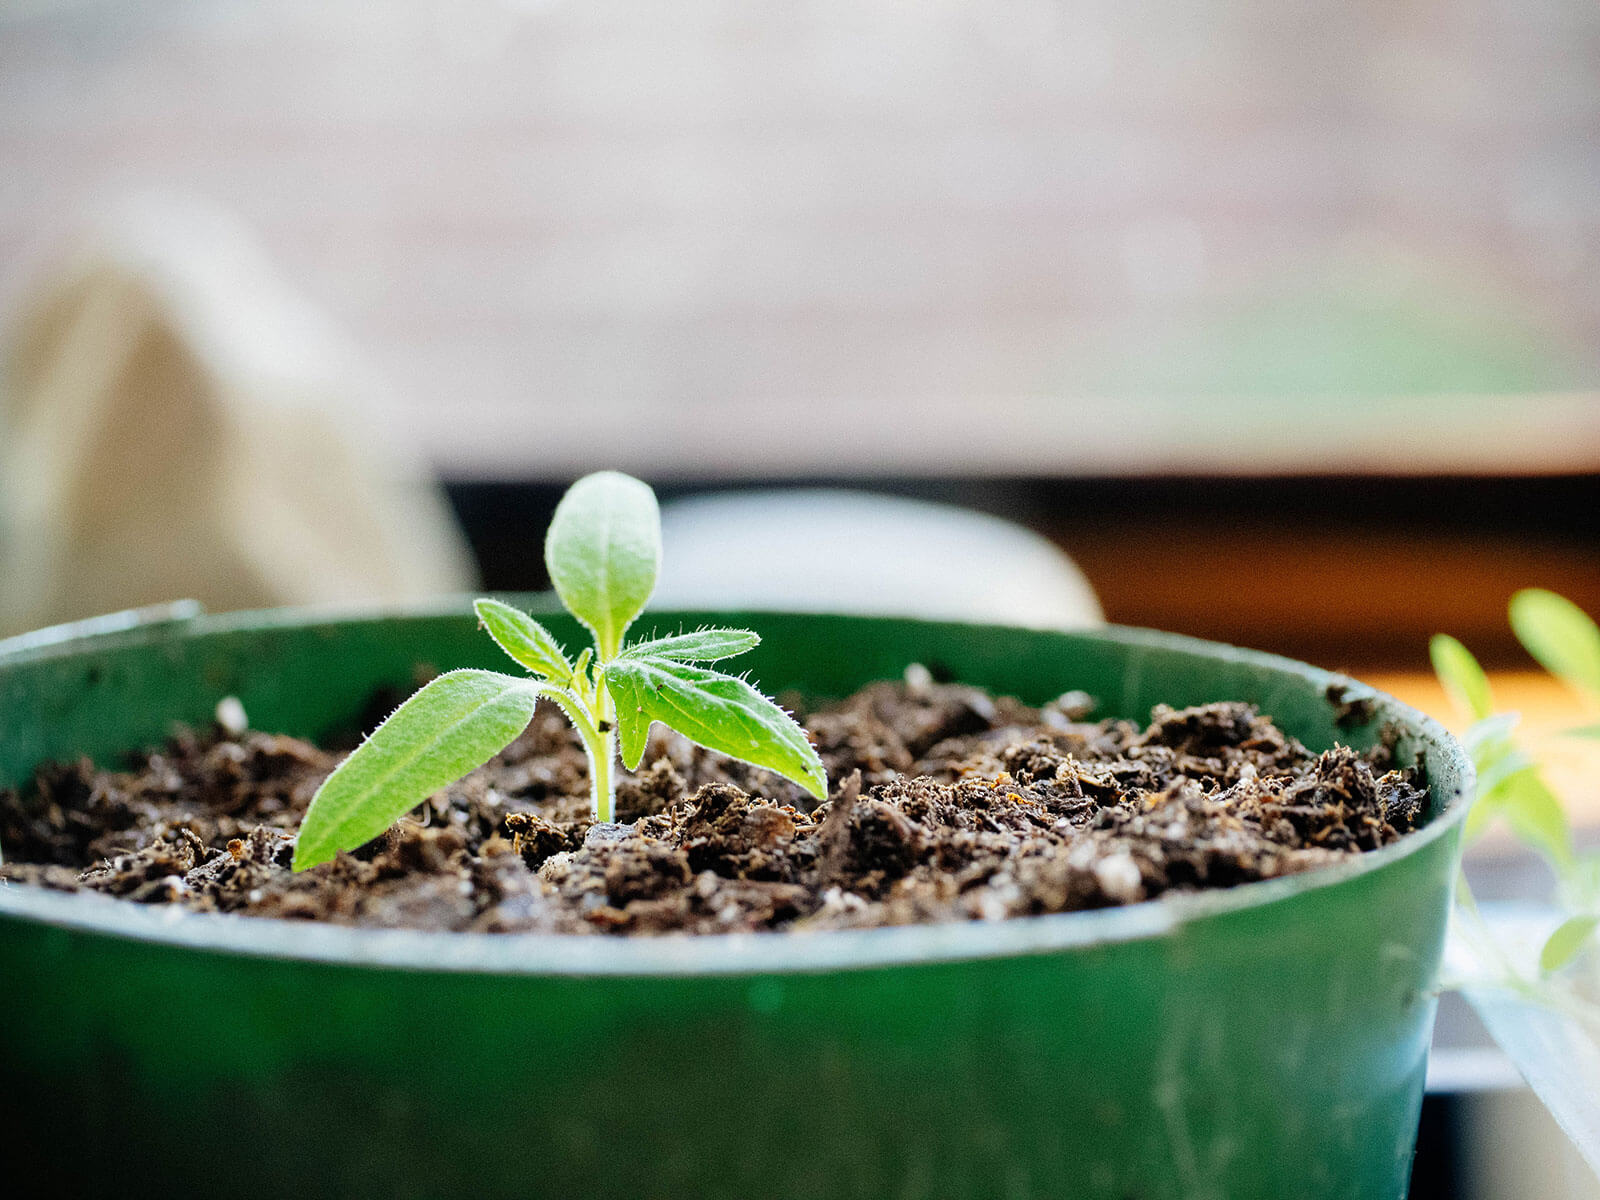
Tomato seedlings are ready to be transplanted when they are at least 3 inches tall, and have their first true leaves, which are the second and subsequent sets of leaves that appear.
The first leaves that sprout (called cotyledons) are not leaves at all, but embryonic structures from the seed that provide nutrition until the seedling can make its own food.
Cotyledons naturally drop off after a few days once the true leaves unfold and begin the task of photosynthesis, making way for adult growth on the plant.
You should also pot up leggy tomato seedlings to keep them from stretching any further and growing pale and spindly. Burying the stems will strengthen them and encourage new root development.
How to repot tomato seedlings in 4 easy steps
Step 1: Gather the supplies you’ll need to repot your tomato seedlings.
Start with clean 4-inch pots and pre-moistened, high-quality potting mix (you can also make your own potting mix at home).
Don’t skip this step. Peat-based potting mixes are difficult to wet thoroughly when they’re completely dry, and you could end up with uneven moisture or water that just drains out the pot without being absorbed.
If several seedlings are growing in the same pot, some people will snip off the extras and keep only the strongest seedling, so as not to disturb the roots during transplant.
But if you transplant the seedlings before they become root bound, it’s easy to separate tomato seedlings without harming them (especially if all the seedlings appear healthy).
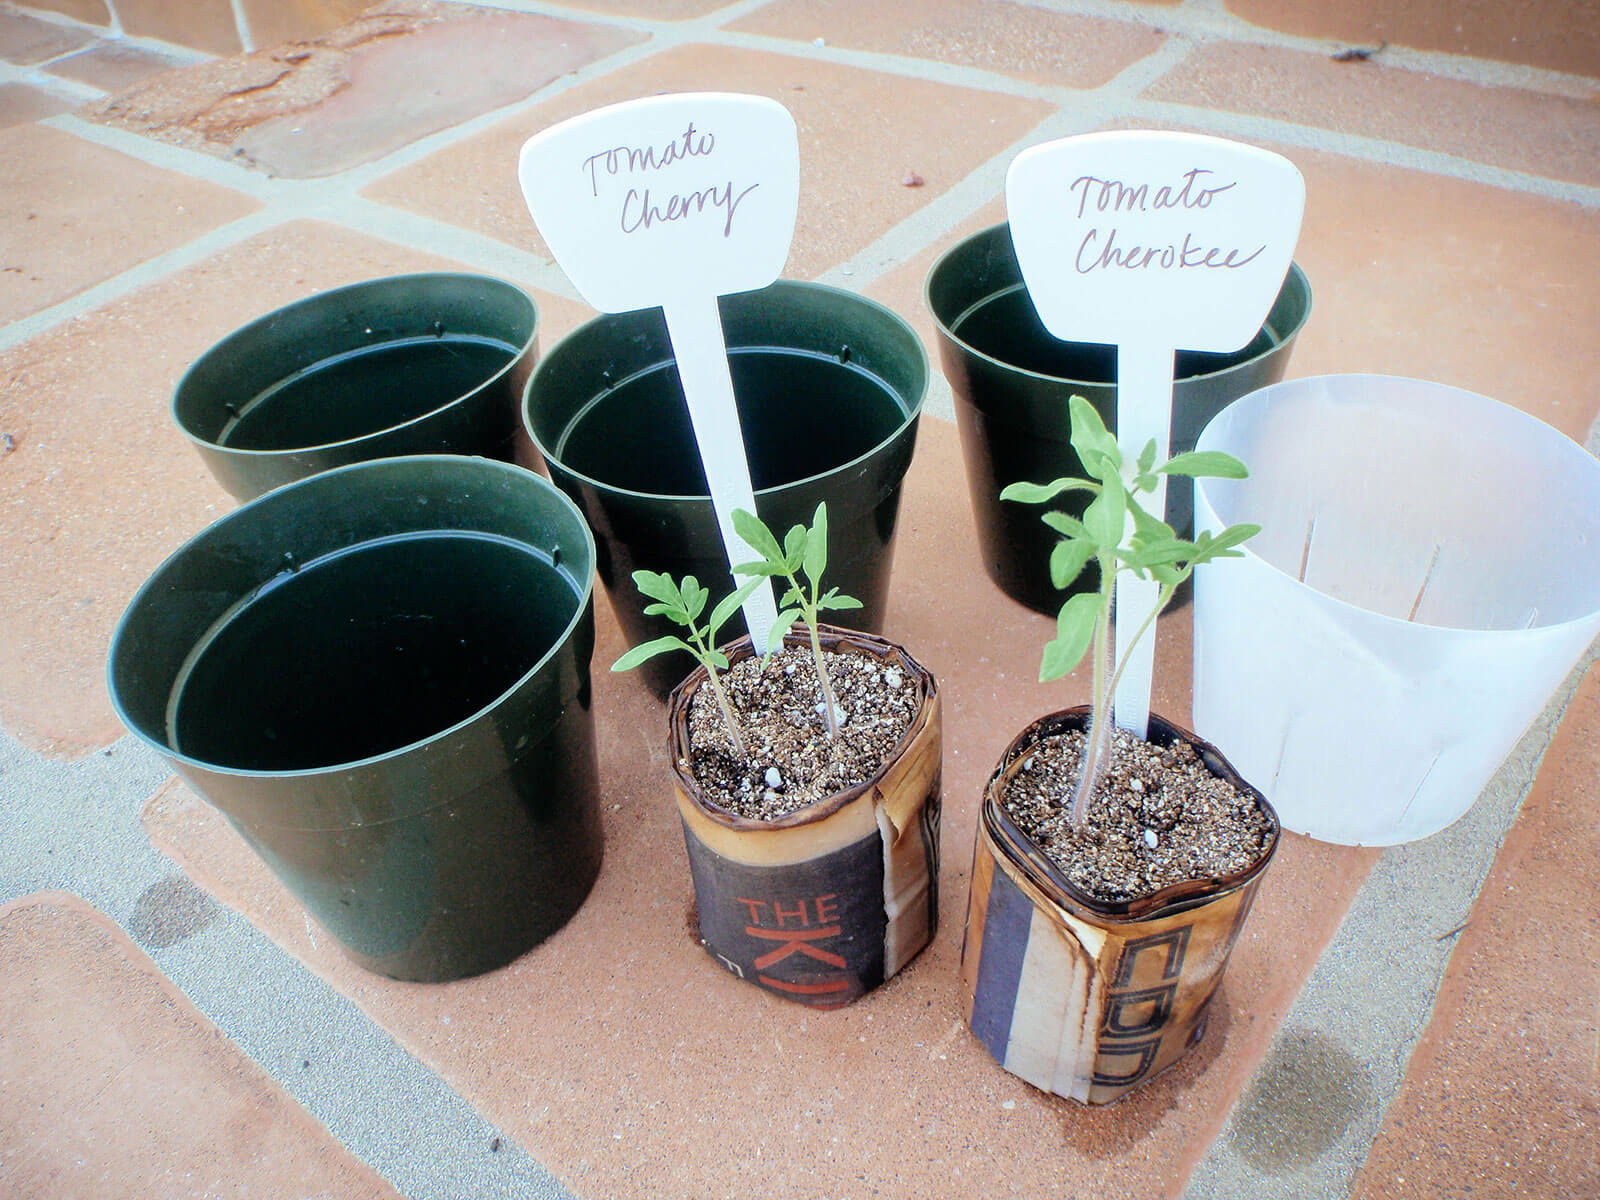
Step 2: Remove the seedlings from their seed starting pots.
Water your seedlings to loosen up the potting mix and keep the roots moist while you work.
If you started your seedlings in newspaper pots, unroll them. The roots should be nicely developed but not twisted around each other.
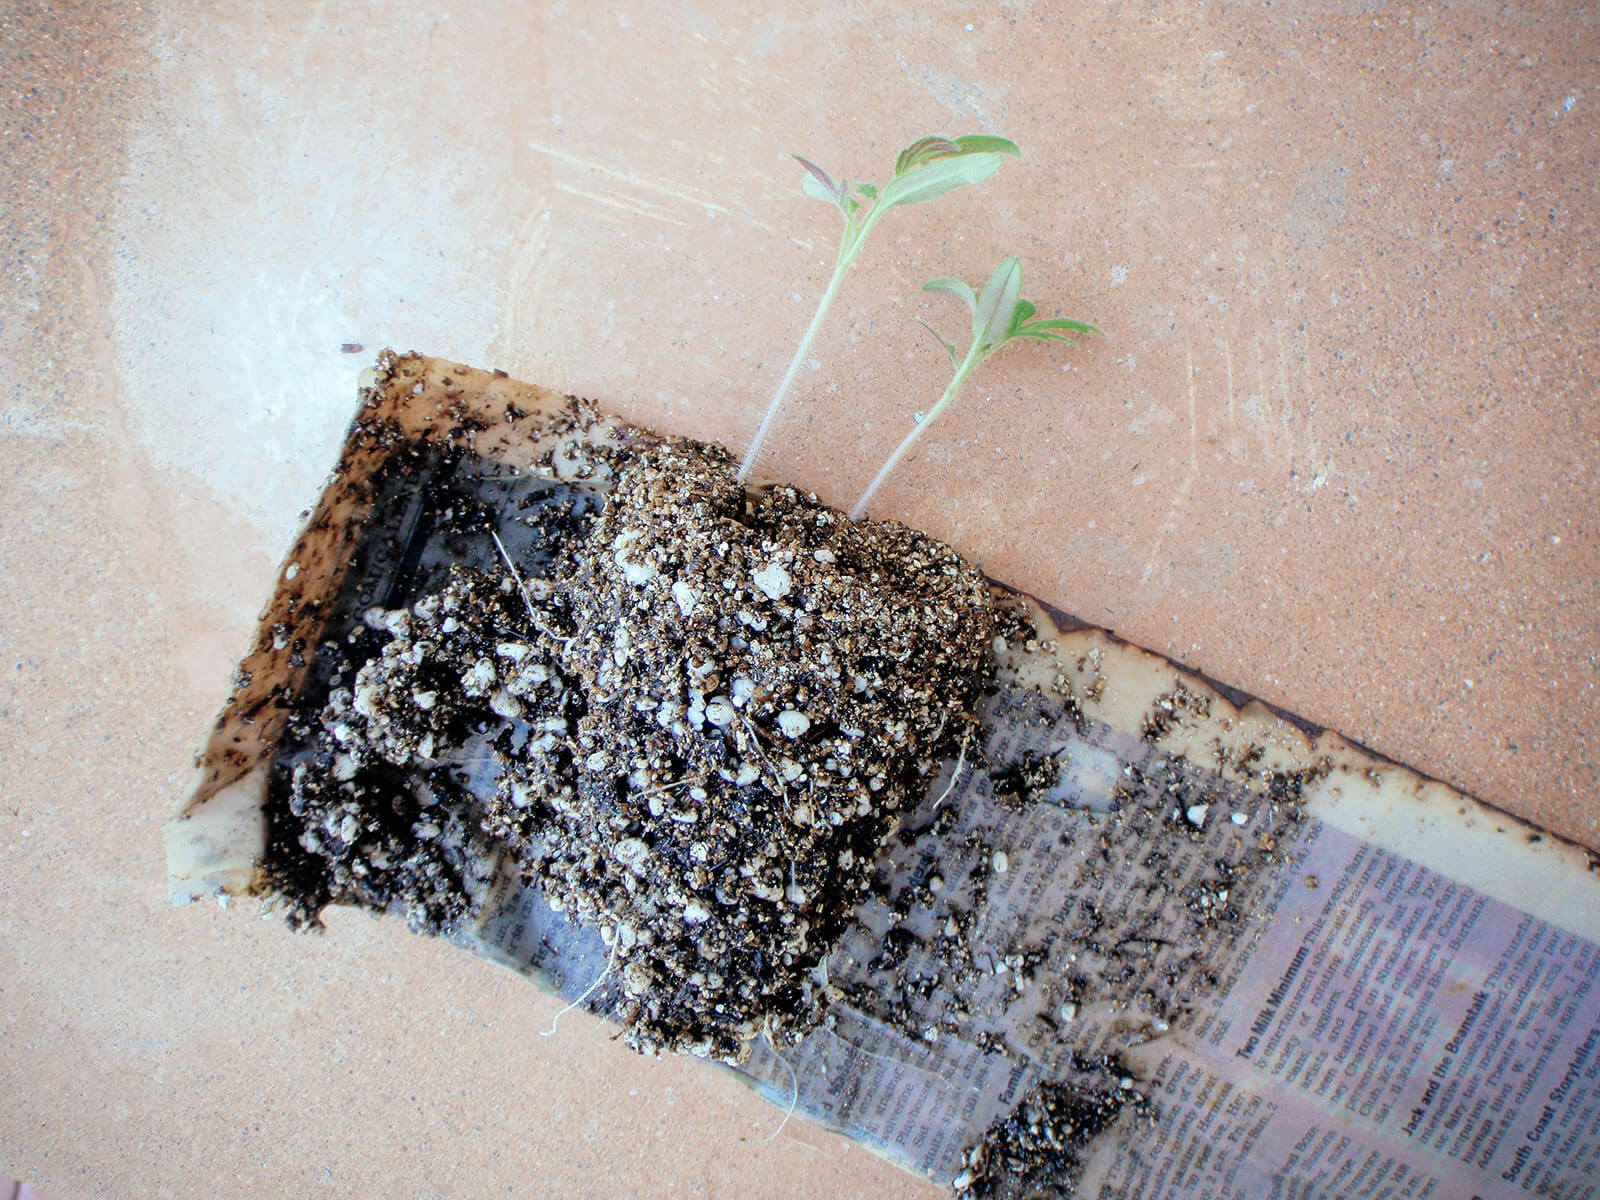
Step 3: Separate the seedlings.
Always handle tomato seedlings by their leaves, not their delicate stems. If a leaf pulls off, chances are it will grow back. But if the stem snaps, your seedling can’t be saved.
Separate the seedling by gently pulling on its leaves and wiggling it away from the potting mix. The roots should release easily.
Let the moist potting mix cling to the roots to protect them from drying out.
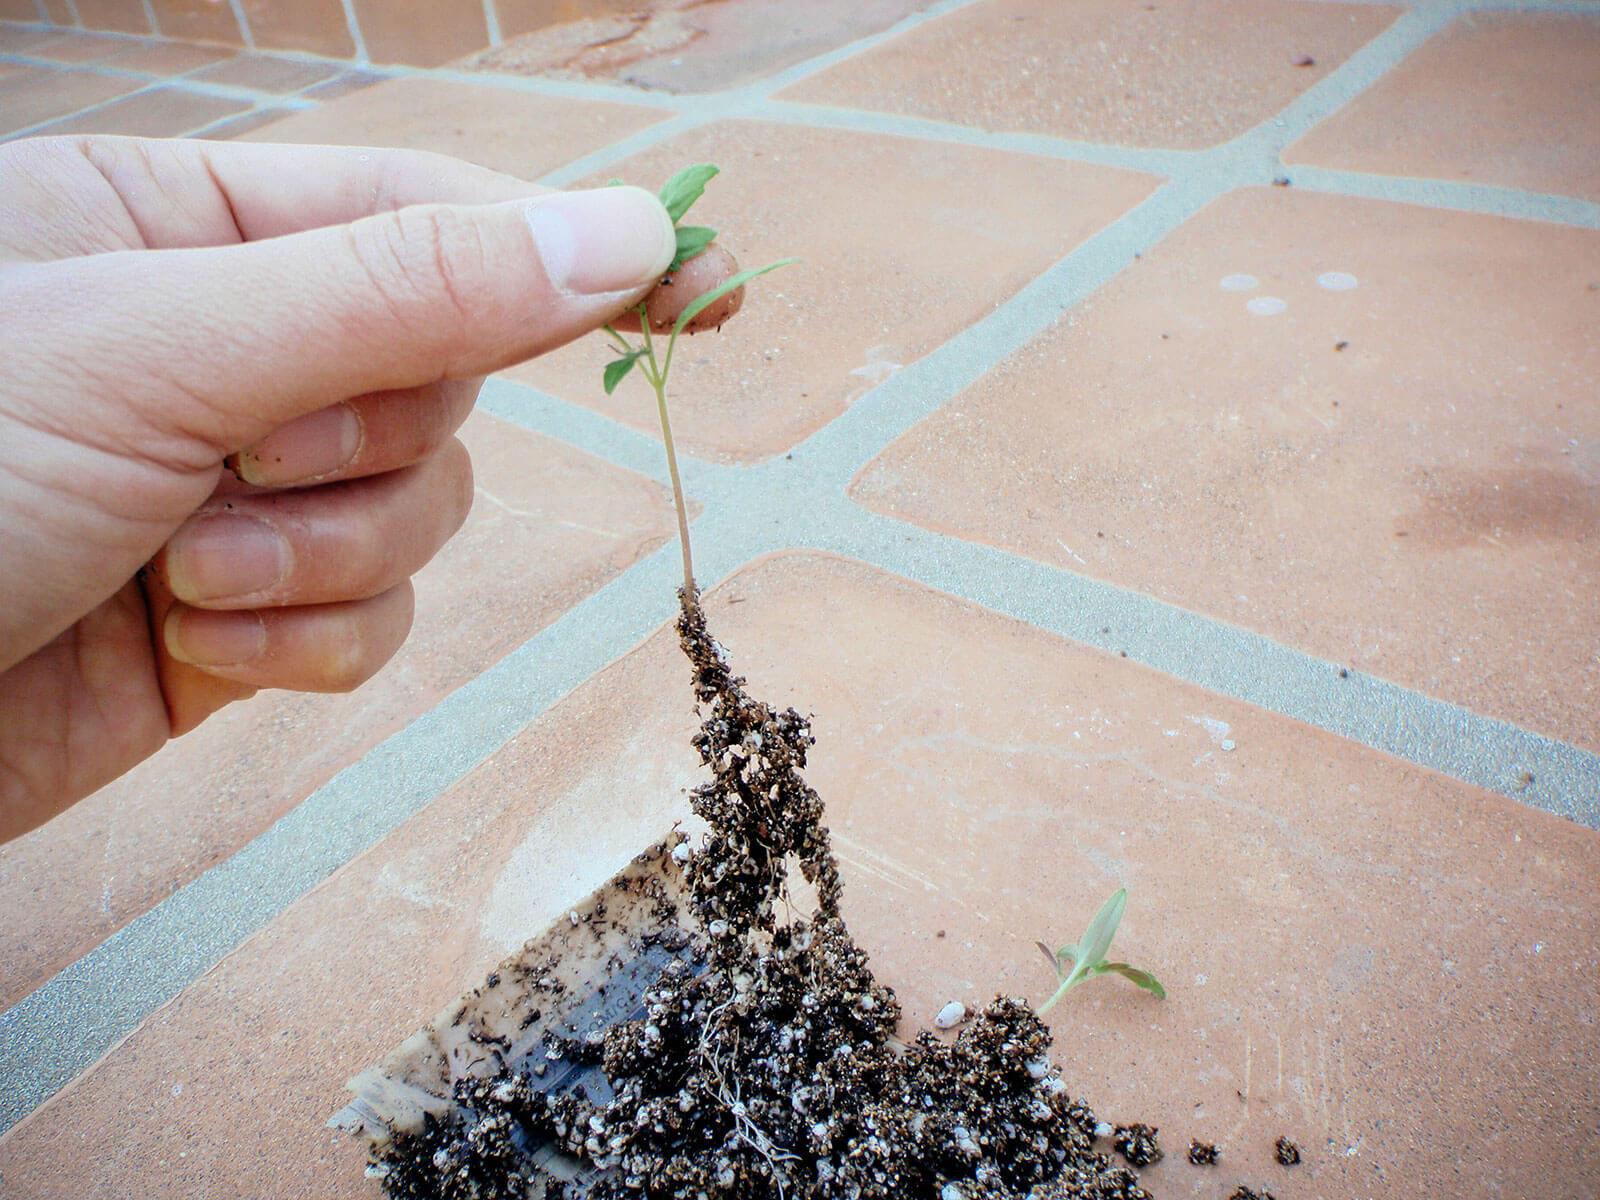
Step 4: Place a seedling in each pot and bury the stem up to its lowest set of leaves.
Position the tomato seedling in the center of the pot so that the lowest set of leaves is even with the rim of the pot.
Fill the pot with pre-moistened potting mix and gently pat it around the seedling to hold it in place. Tap the pot a few times on your work table to settle the potting mix, and add more as needed until the pot is filled to the top.
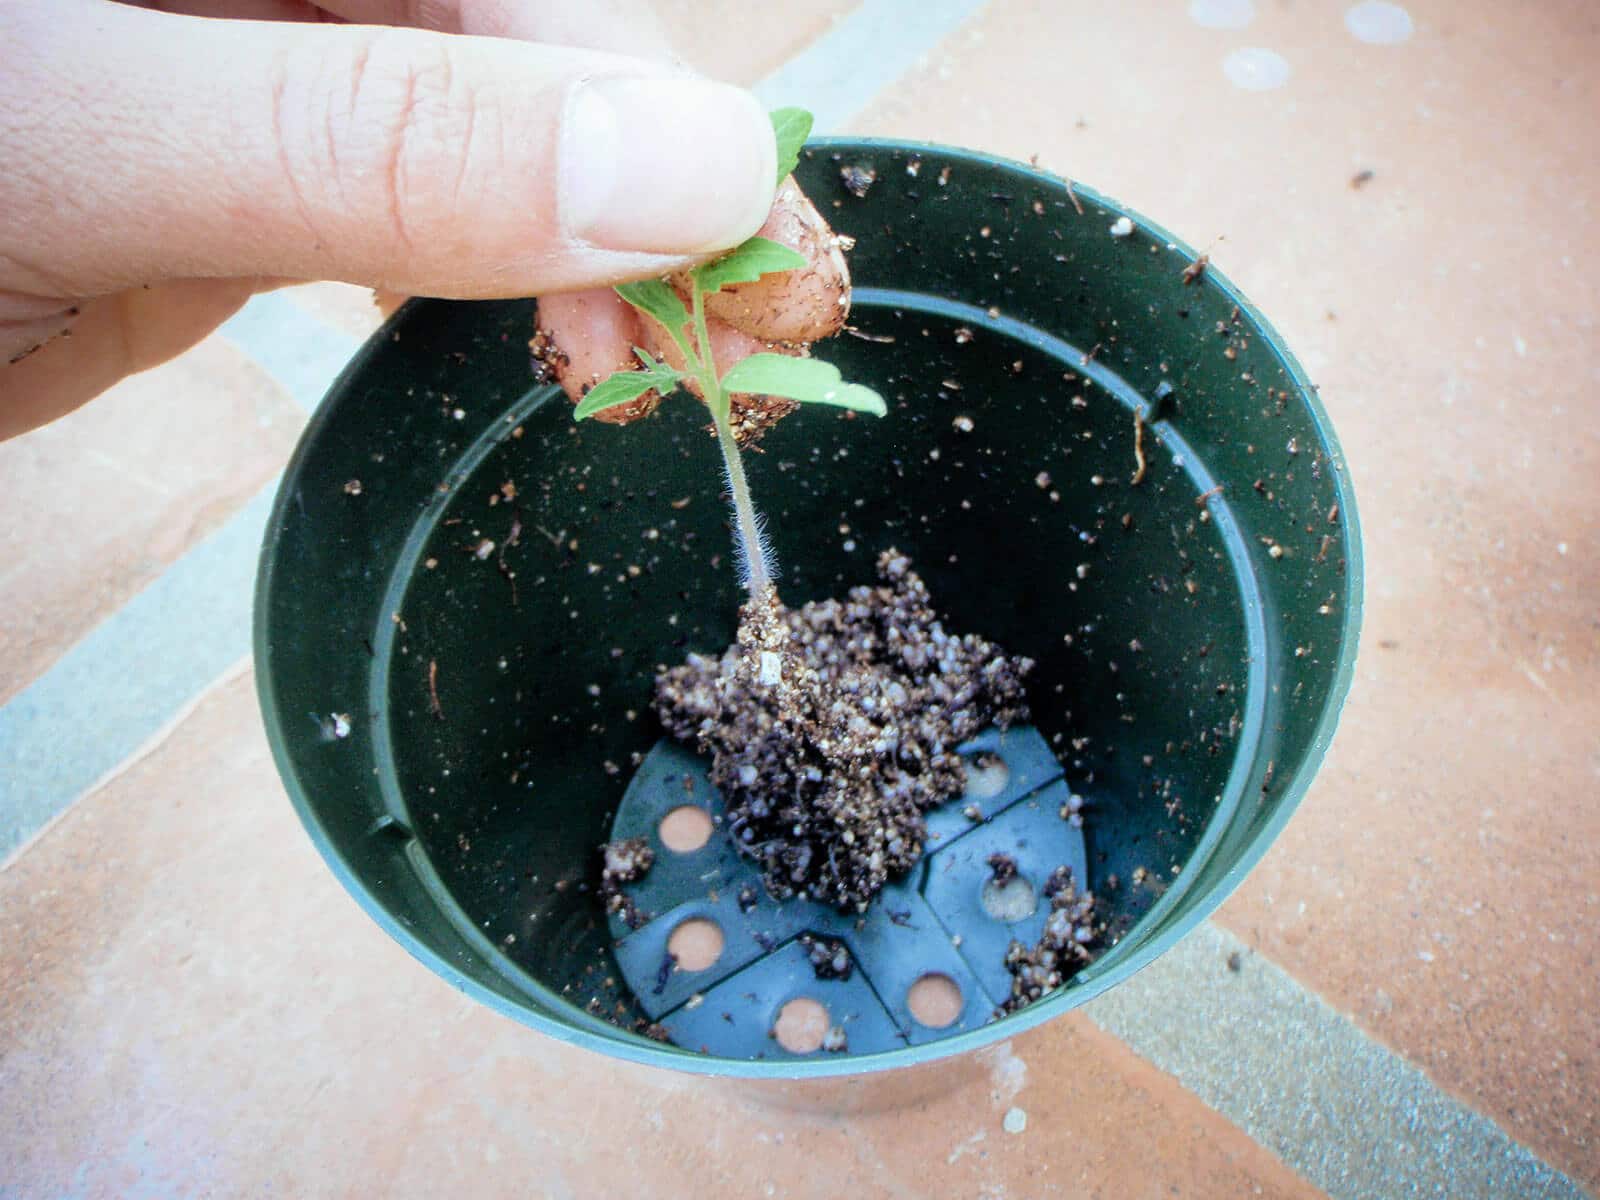
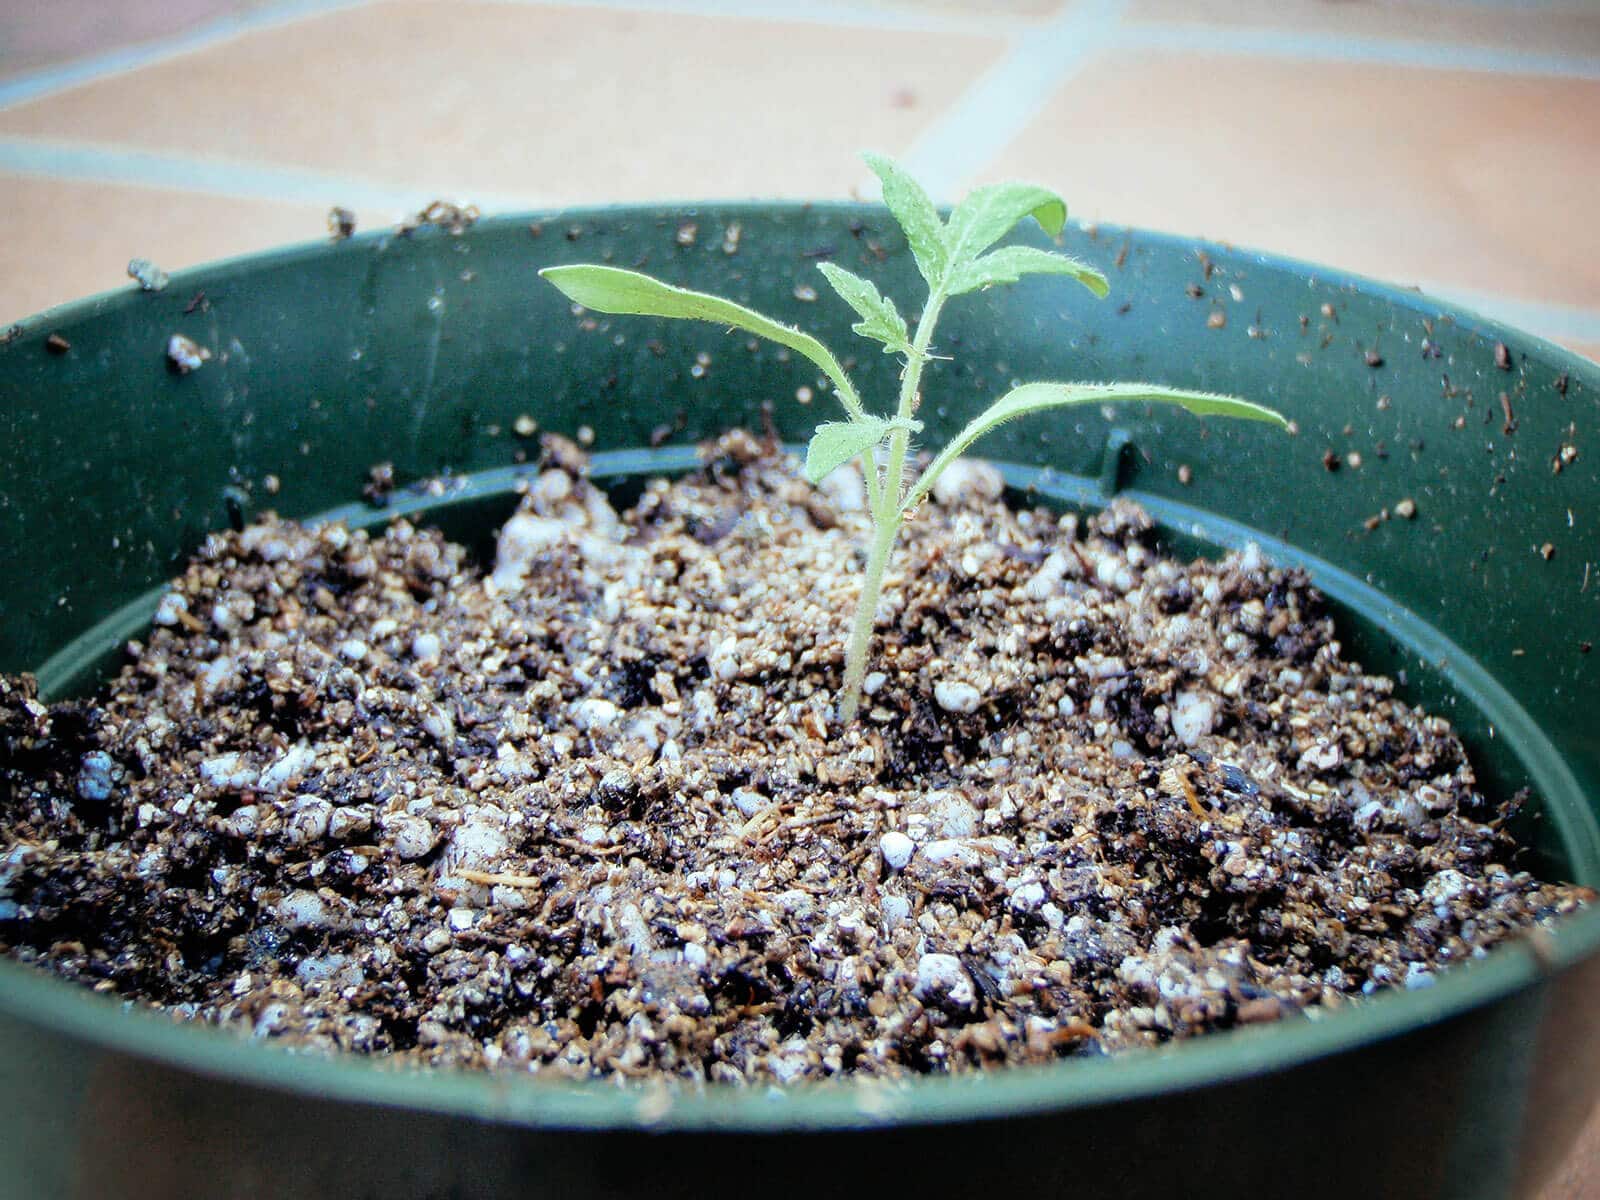
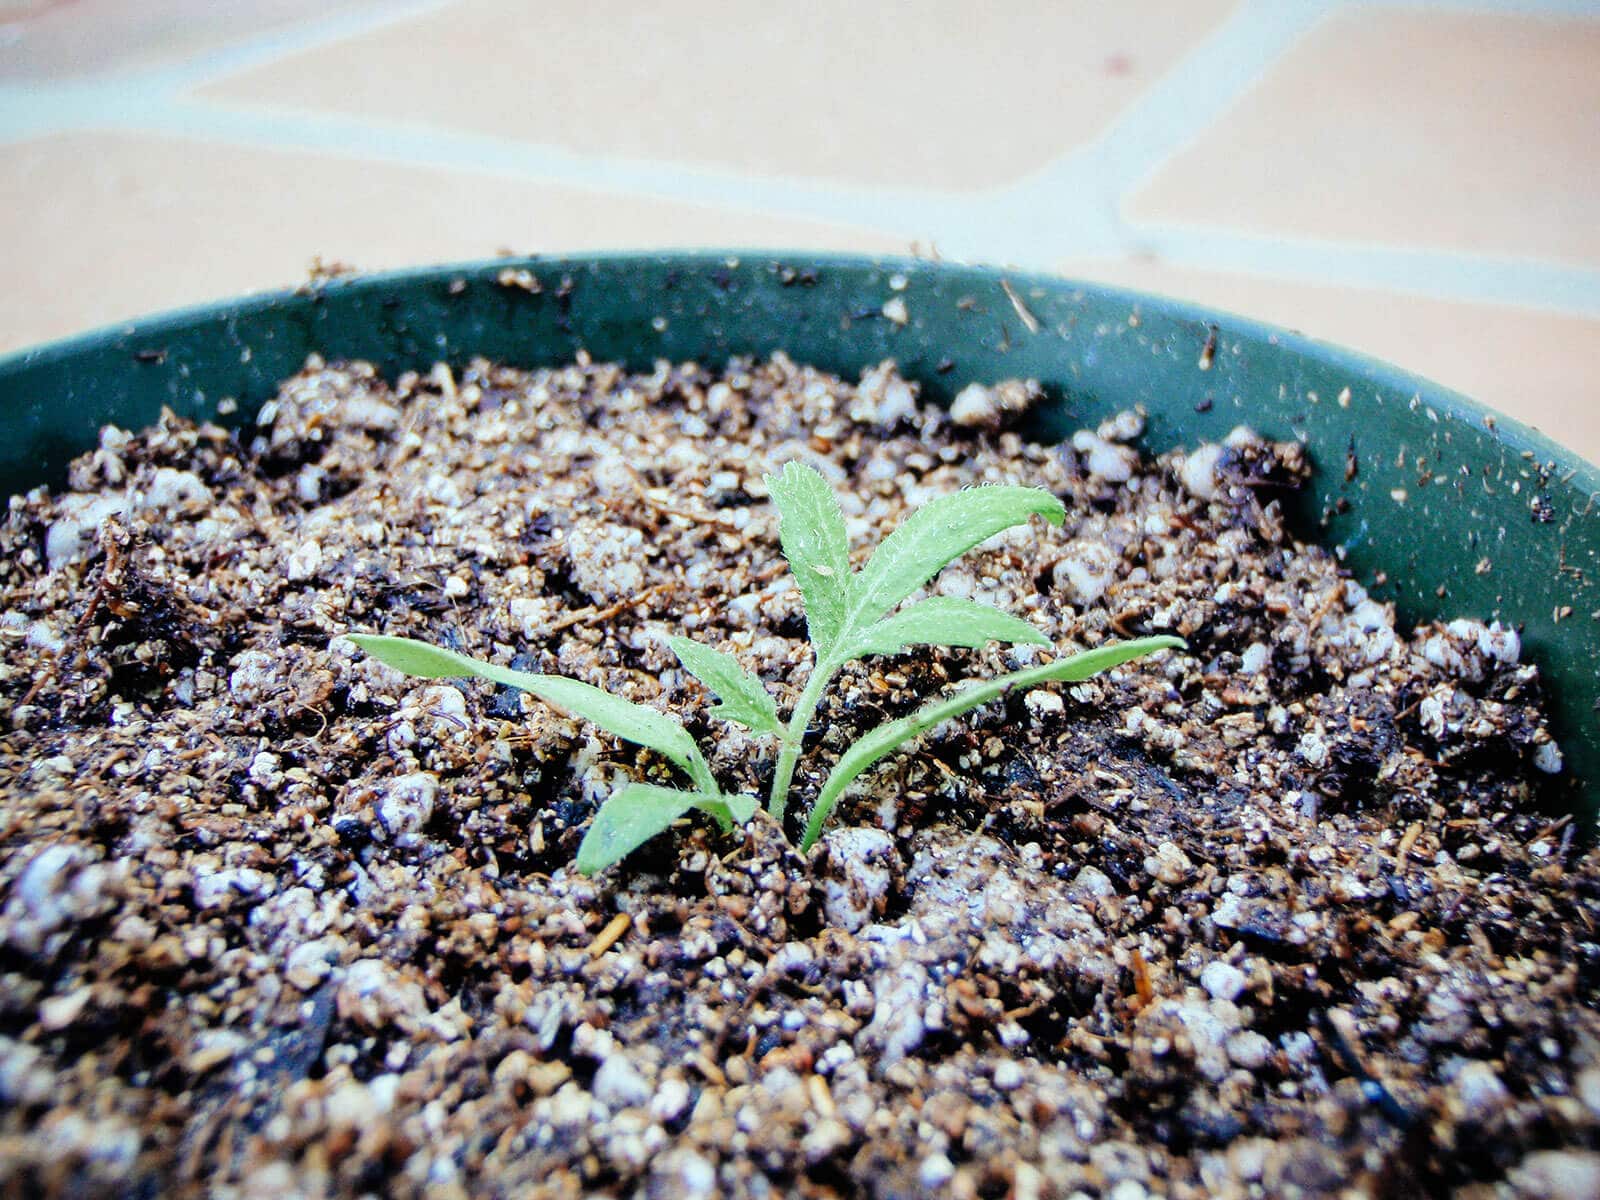
Water the seedling until it drains freely out the bottom.
Repeat Steps 1 through 4 for the remaining seedlings.
Disclosure: If you shop from my article or make a purchase through one of my links, I may receive commissions on some of the products I recommend.
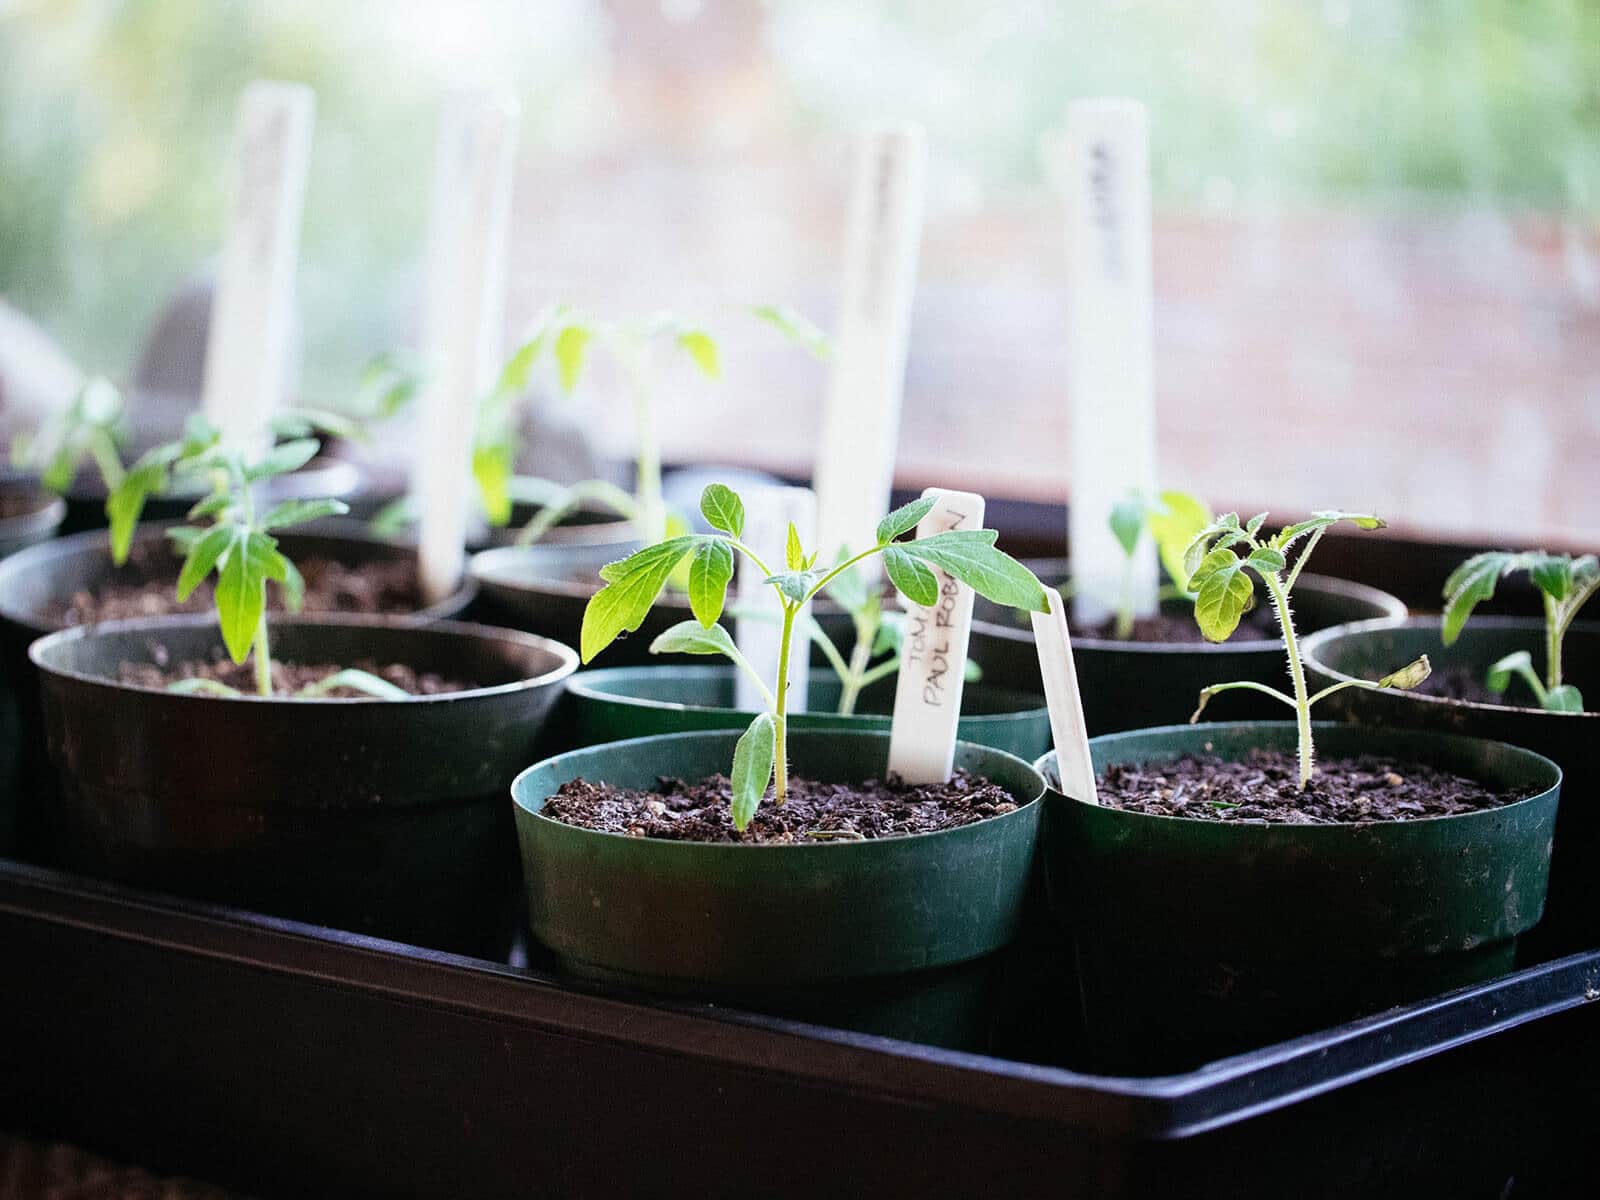
4 tips for taking care of your tomato transplants
1. Let your transplants acclimate under dappled light or party cloudy weather.
To minimize transplant shock, keep your tomato seedlings out of harsh direct sunlight for a day or two. Try to pick a period of calm weather so your transplants aren’t subjected to downpours or strong winds right away.
2. Don’t overwater your seedlings.
Tomato plants are susceptible to overwatering, so keep the potting soil barely moist at all times. Water deeply to reach the roots at the bottom (or soak pots from the bottom up), and only water again when the first inch of the soil feels dry to the touch.
3. Feed your tomato seedlings with an organic fertilizer.
Even when they’re this small, tomato plants are heavy feeders (plants that need a lot of nitrogen and other nutrients to thrive).
Start setting the stage for vigorous growth by fertilizing tomato seedlings with liquid fish and seaweed emulsion (which gives them an instant shot of nutrients) or top dressing them with a granular vegetable fertilizer (which releases nutrients slowly over several weeks).
4. Transplant your tomato a second time for better root growth.
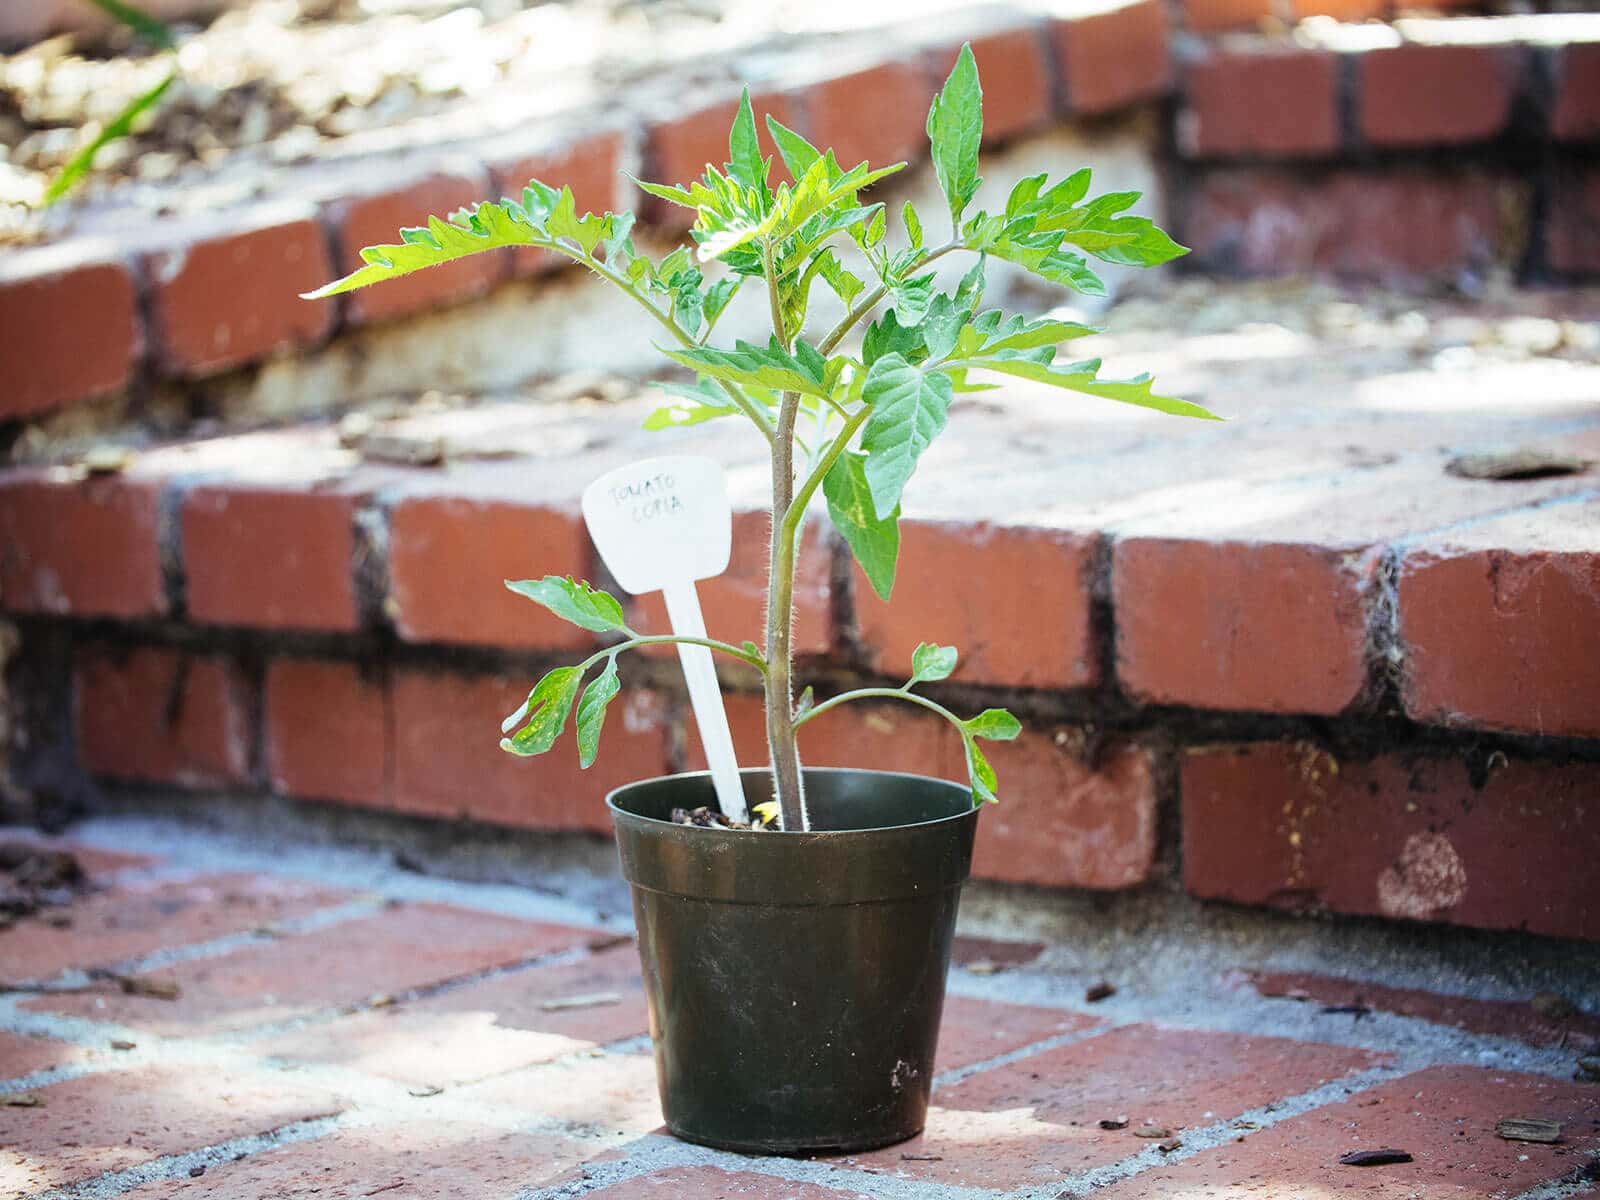
A tomato plant can be repotted two or three times before it’s transplanted in the garden, each time with more of its stem buried.
Moving the plant into a larger container at each transplant phase (for example, from a 4-inch pot to 1-gallon pot to 3-gallon pot) encourages the roots to keep branching out and form a robust, healthy mass.
Once your seedling grows up to three times the height of its pot, follow my guide on why and how to transplant your tomato plants a second time.
More tomato growing posts to explore:
- Grow Tomatoes Like a Boss With These 10 Easy Tips
- How to Grow Tomatoes in Pots—Even Without a Garden
- How to Best Fertilize Tomatoes for the Ultimate Bumper Crop
- How to Repot Tomato Seedlings for Bigger and Better Plants
- Why and How to Transplant Tomatoes (a Second Time)
- Planting Tomatoes Sideways: How Growing in a Trench Results In Bigger Healthier Plants
- Florida Weave: A Better Way to Trellis Tomatoes
- Conquer Blossom End Rot and Save the Harvest
- Can You Eat Tomato Leaves? The Answer Will Surprise You
- Why Tomato Leaves Have That Unique Smell
- The Power of Fermenting and Saving Tomato Seeds
- 4 Fastest Ways to Ripen Tomatoes in the Garden and Beat the First Frost
- The 30 Best Tasting Heirloom Tomato Varieties (By Color!)
- 83 Fast-Growing Short-Season Tomato Varieties for Cold Climates
- The Best Time to Pick Tomatoes for Peak Quality (It’s Not What You Think!)
This post updated from an article that originally appeared on April 7, 2011.
View the Web Story on how to repot tomato seedlings.







HELLO LINDA CAME ACROSS YOUR SITE AS WAS SEARCHING HOW TO TRANSPLANT MY SEEDLINGS TO BIGGER POT AND READ YOU POT IT TWICE. I AM NEW TO GARDENING I LIVE IN TORONTO CANADA IN A CONDO SO HAVE TO PLANT IN MY POTS. I WOULD LIKE YOUR HELP WITH WHAT SIZE OF POTS. I HAVE 5 GALLON POTS DO YOU THINK THAT’S GOOD ENOUGH FOR THE FINAL POTTING?
THANK YOU – I AM A GRANDMA
Hi. I have 3 tomato plants too close together in a pot. They are tall with reasonable strong stem but few flowers. Would it help to repot all 3!into a bigger pot without separating them or is it too late – they are about 2 foot tall
At this point, you risk killing all of the plants if you try to separate them. Personally, I’d keep the tallest/strongest/fullest plant and cut the other ones at soil level so there’s only one plant growing in the pot. However, you can take a small cutting of the other plants and put the stems in water. New roots will emerge and you can plant these cuttings in other pots.
Hi! Was wondering if I have to take the plant out of the newspaper or if I can take the bottom off and put the whole thing into a bigger pot, newspaper and all?
Yes, you can leave the newspaper if it’s not too thick and you only have one seedling to repot. I do recommend removing the bottom so the roots have room to spread.
is there a reason that you do not use the potting soil from the newspaper pot?
I usually differentiate between seed starting mix (what I fill the newspaper pots with) and potting mix (what I transplant the seedlings into). The latter is amended with compost (or a plant-specific fertilizer of your choice) to feed the seedlings. You can reuse the original mix but should add nutrients to it first.
…..so there I was minding my own business and about to fry a tomato when I suddenly realised (after slicing it) that it was full of little wriggly things!
Closer investigation revealed that the wriggly things were in fact sprouting seeds. The best I could manage at short notice was a bit of paper napkin and a very small plastic container so I moistened the paper and folded the seeds into it. And so, my fascination with tomato seedlings began.
Anyway, they’ve subsequently been transferred into little seedling trays, so far there must be close to 50 little plants 🙂 It is the highlight of my day to check their progress first thing in the morning and last thing at night.
Thanks so much for this interesting and informative site! I’ve learnt so much already.
I’m glad you have! Enjoy those seedlings, I often marvel at them as well when they’re growing. 🙂
so did you get tomatoes from the wriggly things?
Hmmm…it’s been a while, but yes, I think I did. Our climate is not really ideal for tomatoes. If you took away the roads and buildings you’d be be left with more or less just a stinking swamp. Ever experienced humidity of 96%? I did make an interesting discovery though. The flowers are extremely attractive to the African Carpenter bee. I’ve never seen so many of these gentle giants as when these plants flowered. And giant they are! I measured a dead one on a steel ruler. Covered the best part of 3cm!
Well that is fun. I would bet your heat and humidity is why the seeds started to germinate in the tomato. We rarely get humidity that high here in Wisconsin. Thanks for responding to my curiosity.
You’re welcome 🙂 Yep, we don’t really have seasons here. It’s pretty much always summer.
Can I ask where you live? We have all the seasons. We had snow today and 40 F.
Yes of course, I’m on the East Coast of South Africa, closest big city would be Durban. It’s 10am. Temperature 22.4 deg C, humidity 72%, which is quite pleasant for a change. Lately it’s been in the mid to high eighties 🙁 I truly envy you your snow. My mom is German and I had the pleasure of living there as a kid, on and off. Do you keep track of your humidity? What’s normal / average in Wisconsin?
Today I woke to 46 F and our humidity is 86, and it has been raining here for several days. April ,into May, showers are bringing us back green grass and early blooming flowers. I am waiting for the lilacs to bloom hoping to find some wild mushrooms to enjoy. Its been a relatively mild winter. Our relative humidity can range between 50 and high 80s depending on the season and time of day. I don’t normally track that, but I do notice when it gets high… which I would say is rare. I really notice when the humidity turns into snow and I have to shovel it off my driveway to get out to work in the morning. The blessing is that winter means that I MAY not have to shovel every week and I certainly do not have to mow every week. 🙂
Thanks for that, always assumed that the colder it got, the less humidity there would be. And I can honestly say I’ve never shoveled so much as one cubic inch of snow – in my life! Do you have a greenhouse or some sort of atrium? What got you interested in tomatoes? Have you had any success with them? Wish I could upload some photos. I have managed to get at least 3 varieties to produce edible fruit. That’s not to say I ate them though….we have monkeys too.
I shovel feet of snow most winters (a few inches to a foot or so at a time). It is good exercise. My first tomatoes were gifted plants from heirloom seeds grown by a neighbor. They were wonderful pure organic acidic marvels (varieties were red and yellow jelly beans and a Mortgage lifter) and I saved the seeds to try my hand at growing them again and have since started a little grow project each spring under some shop lights in the basement. It is a great break from the snow shoveling. I am trying a new variety this year. I start a couple dozen of each variety to make sure I have enough and then give away most of them to friends and family once I get them hardened off. I have to fence the garden to protect them from deer and chipmunks.. which I suspect is a lot easier than if I were trying to keep out monkeys.
As you may have deduced from my first post, I’m more of an ‘accidental’ gardener 🙂 I’ve never bought seeds of any kind although two of my tomato varieties were grown from seeds saved from fruit that was grown from packet seeds planted by a friend. They were both small round cherry varieties, the one being yellow, possibly a Pomodoro of sorts. These plants were attacked by a tunnel borer pest. In spite of the terrible damage inflicted by this pest the plants did bear fruit. I don’t remember if the monkeys were partial to the little fruits. They will steal the bigger tomatoes though, even when they are still green. I’m very fortunate in that I have quite a lot of space so it’s possible to grow hundreds of seedlings at a time. The main problem is the awful heat, it’s dangerous to go outside without a hat (think sunstroke & skin cancer) and the area is badly infested with mosquitoes almost all year long. If it weren’t for that I don’t think I’d ever go inside 🙂 The heat means you can’t afford to skip a watering session and with large quantities of seedlings it becomes impractical to water them individually. I’ve been using a fine spray from a hose pipe and this of course wets the leaves aggravating the susceptibility to mold. But then a couple of days of rain will do the same so it’s not really avoidable in the end.
It sounds like you have the perfect environment to grow herbs inside. Some are known to repel mosquitoes. I plant basil , lemon balm and catnip by my doors. I am not sure if it works but it makes for a short trip to get basil.
Part of my survival strategy (I don’t have air-conditioning) is to keep the doors and curtains closed during the day in a bid to keep the house cool. Then at night, open everything up to vent the house. I’ve researched this on the net and this does seem to be standard practice in other countries with similar climates. This results in low light levels though. Everything I’ve grown on window sills tends to become long and straggly, probably because the plants are searching for light. I’ve resigned myself to burning a liquid mosquito repellent 24/7 indoors. I work at home so it’s absolutely necessary unfortunately. Outside I had a lot of lemon grass at one time, which I believe is beneficial in repelling pests. I think you may be right about herbs in general though, growing well here. There is a particular herb (Rosemary) that’s gone completely wild, seeding itself everywhere.
My rosemary has done poorly here. Likely because it has to stay in a pot year round and come inside for the winter, which is dry and provides less light, even with grow lights. The furnace dries the air inside and we have to use a humidifier. I suspect that if you had a window sill between the shade and the window, that space would fry the plants. It’s too bad that you have that great climate and can’t enjoy it (says the person still recovering from winter).
I also don’t have air conditioning and draw my drapes during the day in the summer and it works well to keep my home comfortable. In the winter I open the drapes first thing in the morning to let the light in and then close them up at dusk to add an insulation barrier to the windows.
Interesting about your rosemary. My experience shows the plants to be virtually indestructible, I don’t even water mine. I’ll put one in a pot and see how it does. My very first rosemary plant, 4 years on, is (and has been for years) a very substantial bush and is extremely popular with the birds. Just brushing against the plant as you walk by releases the most wonderful smell. I can’t help smiling when I think about how nice the birds must smell after they’ve been in it. As a matter of interest, what do you consider a comfortable temperature? Where do you set the thermostat for your furnace? With regard to climate, there are parts of our province that are much nicer. The Natal Midlands for example. You can even experience all 4 seasons there. My own little ‘zone’ seems to unfortunately have a particularly (the word sadistic comes to mind) nasty mico-climate. One can definitely have ‘too much’ of a good thing. Edit: After posting, I remembered that my second largest rosemary bush seeded itself in an old automobile tyre. The tyres were put down by me on a concrete slab for the purposes of growing seedlings. This means that whatever is growing in them has to make do with the volume of soil the tyre can hold. The plant roots can’t penetrate the concrete so there is no additional source of moisture or nutrition. They are, to all intents and purposes, potted. And this bush is doing just as well as the one in the garden!
I understand that I should put my rosemary on a water/rock tray to give it the humidity that it needs to survive the winter inside….I took one downstairs and put it under the light hoping it will survive until I can let it go outside. They really do better here in the summer. It is getting them through the winter here that is the problem. We really only get about 8 hours of light in the midwinter mixed with the dry air, they get pretty homesick, lol. I would venture a guess that your rosemary is living off your humidity (and airborne dust/ nutrients).
I am in zone 3/4 so we have a limited (by many standards) of plants that make it through the winter freeze here. Many of the plants that thrive in southern climates, we grow as annuals.
I set my thermostat at 70F. I like 70s to 80sF and don’t mind higher. We rarely get such high humidity that our heat is “terrible” yet I am one of a few here without air conditioning. I’m just too frugal for the 2 days each summer I wish I had it. Comfortable is relative. You will see WIsconsinites bundle up in the fall when the temps drop into the 50s but when the winter is winding down and we get those first few days of sunshine and 40’s the shorts and short sleeves come out.
Gotta go to work…later?
I find your posts very interesting, lots of general lifestyle info to be gleaned there. I have pen pals all over the world but none in the US, unless Brazil counts? Those temps are interesting. Your 70 is about as much as I can comfortably bear here. There definitely seems to be a difference generating heat from cold as opposed to cold from heat. The former seems to result in ‘cosy’ whereas the later is uncomfortable. Also, in your case, if it gets too hot, you can always go outside 🙂 Your rosemary continues to baffle me. Example: Annual plant dies, rosemary seeds itself in pot. I don’t notice it, it gets no water and dies, I need pot, throw ‘dead’ rosemary into empty trough, dead rosemary lies there in full sun, for days, roots exposed, then springs back to life! Maybe you’re just being too nice to your plants? When I Googled Wisconsin, I was surprised to see how far north it was. Almost on the same line of latitude as Germany. Looks like a truly beautiful part of the world. The cities have lovely names, Madison for example…. Edit, just to keep things educational, 23.3C with 70% humidity today, 11am. We had light rain last night.
I too really enjoy learning from you. I would take our conversation to email if you wish. I woke to 32F with 93% humidity but as the sun burns bright today (and it will be a beautiful sunny day here today) we are predicted to get to 74 F (22 C) and the humidity will be down below 40%. It got nice enough yesterday that I was able to open my windows and get some fresh air into my house- Wooo hooo. Tonight they are warning that some of the tender (not native to this climate) plants that came up with the warm days, may suffer frost damage as the temps go back down near freezing again…then we will be back up to 60F by the afternoon. That is pretty typical spring here as our sun angle changes.
I have heard that we are too nice to rosemary, as far a winter watering, yet it needs that high humidity and I just can’t take my house above 55% or so humidity in the winter without harming my house. The condensation on the windows (from the temperature difference between the inside/70 and outside/often below 0 F) would cause mold to grow in the window sills and that will start all kinds of trouble. We humidify homes in the winter to about 55% ..a fine line between saving our skin and wood furniture, etc. from “too dry” and having moisture problems start in the home.
Rosemary takes up to 3 weeks to germinate, and the one time I tried it, I used a heat mat under the seeds, then bright light and moisture/ humidity.. and it only lived to about 2″ tall before I just couldn’t provide the conditions to sustain it. I decided that was a waste of a month of my life and I would just buy established plants and try to keep them alive all year. I have one that is doing well (grow lights in the basement) and one that was in my south facing window that was dying so is now also under the grow lights. I hope they both make it the last 4 weeks of “winter” here… Our last usual day of frost risk is the end of May, so that is when we plan prep our gardens and plant seeds or transplant our seedlings outside. Some plants have to wait until the soil warms into the 50s F, which can take another couple weeks.
I will be off line until Sunday, because I will be visiting / helping my elderly mother. Have a great weekend and if you wish, give me your email address and we can leave this poor site some relief from us.
Thanks, yes we can certainly email direct, that way we can also share photos. I’ve kinda been expecting Linda to pull the plug on our little tête-à-tête – we have wandered rather far off topic. Nevertheless, I get the feeling our Garden Betty is a very savvy lady, and like the good gardener she is, would probably transplant us to a more appropriate spot:). Maybe this site could use a ‘What did you do in your garden today?’ section / thread. No doubt it will help stimulate interesting discussions beneficial to both Linda and the public. Linda, what do you say? Can we ramble on right here? My name is Chris and I can be emailed direct on chrisdc_pandora@hotmail.com
I never did finish my rosemary story :). So the plant sprang back into life, probably just to make me feel bad for evicting it from it’s pot! And I did feel bad. When I saw it sending out new shoots, I watered it immediately thinking I’d plant it elsewhere in the garden. And you know what? The damn thing died! Permanently this time.
Okay..I sent you an email.
I think it’s awesome you two resurrected an old comment thread and have been chatting it up these past couple of weeks! The community of people here is what makes the blog so fun and rewarding for me. And I especially love the fact that one person in Wisconsin can connect with another all the way in South Africa — two different cultures and climate zones, bonding over a shared interest!
Thank you for being so gracious and tolerant of my curiosity. I love it too. Thanks.
Here is a small comment about humidity and temperature to @CHRISSC and @JUSTSAYING, since you were discussing it
Relative high temperature climates can hold more moisture then cold. So 90% humidity feels different for warm vs cold climates.
When the weather is warmer the air can hold more moisture before it condensate to rain, so you will feel temperature more intense since high moisture levels transfers heat more then low moisture and it becomes harder for the body to cool down by sweating.
So air from a warmer environment that cools down will condensate to rain because the air can’t hold the water. In my country, Norway, this result to the west coast having a lot of days of rain.
But high moisture is still felt in cold environments. If you, for example, are on the mainland and bike past a river you can feel suddenly super cold. So this got to be the high moisture transferring heat away from you body more then what you felt earlier. Therefore -5 by the coast feels different then -5 far inland.
Hi, I need to transplant my tomato seedlings into bigger pots because right now I have multiple growing in very little pots. For me space is an issue because I’m growing everything in containers on my back porch (no ground garden unfortunately). Can I transplant multiple seedlings into a bigger pot and then transplant them again to each have their own container once they’re big enough? If so, how far apart should I plant them in one container? A few inches?
Thanks for the help!
No, each tomato seedling needs its own pot to do its best. You can reuse other containers you have around the house if you don’t have enough “real” pots: http://gardenbetty.com/2014/02/seed-starting-containers-you-already-have-around-the-house/
Ian- It only sounds “fiddly” if you’ve never raised and planted tomatoes before… it’s simply how it’s done. If you skipped transplanting them, you’d have weak, worthless plants on your hands. If ever you buy tomato seedlings from a garden center, you want short and stalky plants… never tall and spindly. The shorter ones are healthier and have the strong root systems you want, which occurs when you transplant your seedlings in the manner described. You also want to plant them to within an inch of their lowest leaves when you put them in their permanent homes in the ground or in large containers outside, too–they will continue growing stronger and stronger roots if planted that way. (FYI- my tomatoes were the healthiest ever last year… no black-winged aphids at all, and all I did differently was interplant basil with them and use old coffee grounds as a fertilizer.)
Cheers, and happy gardening!
Companion planting is clever stuff isn’t it? This is the stuff that our grandfathers took for granted. Seems like the old ways are still the best when it comes to gardening. Nothing like the pressure of actually going hungry to motivate you to get it right eh?
Re the toms, yes I see that now, now I know why I felt like I ran out of time with my first toms last year. Weak roots that took way too long to get established.
You’ve saved the day here 🙂
Thanks!
Julia, if you’re still out there… Your reference to old coffee grounds interests me greatly. I generate about 1 liter by volume of grounds every week. After a friend told me it’s not a good idea to pour them down the drain (goes to septic tank) I started pouring them out into the garden – always the same place because I burn twigs and small branches on that spot. I noticed the grass seems to grow particularly well in this area. Could you elaborate on how much you use and how often?
Hi Betty,
I’m curious though. What would happen if you simply planted the seeds in the end pots (biggest) to start with? Or is it the repeated deepening when repotting that boosts the root system?
I might try a comparison next year! I guess I just find it a bit fiddly re-potting all the time. Big fingers and small seedlings huh!
Thanks for the info about planting deep, didn’t know that!
Stay well
The reason for re-potting is to keep burying the stems deeper each time, and thereby encouraging more roots to develop along the part of the stem that’s underground. Planting your tomatoes in a gallon pot initially would make no difference than if you were to plant them in a smaller pot, other than giving you more time to plant them outside before they get rootbound.
I have to tomato seedlings in one pot. I’m planning to remove the smaller one to the other pot so they can both survive. What is the best way to separate them from one another? My friend told me to take the soil ball and irrigate it until the soil disappear. Then untangle them gently. I’m planning to do it on my tomatoes but can I also use that procedure to my new Marigolds? Thanks!
I just gently pull the roots apart with my hands; never had a problem with any of my seedlings this way.
I found that I would put off the transplanting too long if I put them in new pots. so now I start my tomatoes in cups or 4″ pots with just a couple of inches of soil. Then as they get larger I start adding soil to progressively cover the stem. This works well for me.
Clever! I use that method for growing leeks, too.
I started some of my tomatoes in eggshells- can I just bury the shell in the potting soil or should I try to get the plant out?
Just crack the eggshell slightly to allow the roots room to move around, and plant in the ground as-is. Tomatoes love the added calcium from eggshells.
Very interesting viewpoint. I have always waited until the true leaves appeared before transplanting. This way the seedlings can draw more energy from a larger source than the cotyledons, thus increasing their chances of survival. All my plants have done well this way. But I agree that the sooner and smaller the plant, the better.
I’d recommend transplanting them at an earlier stage. About a week or 10 days before the ones shown. An earlier stage reduces transplant shock which slows growth and could effect primordial floral development.
The earlier stage will look like the seedling “A” in this picture:
http://kdcomm.net/~tomato/graphics/seedling.jpg
Love the post. For seed germination, we use the cores to toilet paper rolls and cut them in half and get two from each core. Works great and, as you point out, excellent for compost once plants are transplanted.
Thank you so much for all of this great information! This is my first time growing from seeds, and I’m loving all of your posts. 🙂
The joy for me is just in seeing those little seeds sprout! Have fun this season!
Thanks for sharing the knowledge about repot of tomato seeding. This knowledge helps me so much in future.
I am here for first time and likes the blog entries in this blog.I will glad to follow this blog in future
With regards
Shaun…….