Here in Los Angeles, nasturtiums are wildly weedy, growing all over hillsides and gardens and reseeding with wanton abandon. This weediness makes them very underappreciated as a bona fide vegetable, and even more so as a pickled delicacy.

While much of the country doesn’t see the seed pods until late summer (when intense heat causes nasturtiums to wither away), we Angelenos see a succession of flowering nasturtiums year-round, giving us seed pods even in winter.

Those delicate green pods emerge after the blossoms have faded, appearing in clusters of three on the stems. Before you yank your plants out, hunt for those little pods to get one last use out of your nasturtium crop! You don’t need more than a handful to turn them into tasty “capers,” and though they’re sometimes called poor man’s capers, they have a distinct, mustardy flavor all their own.
This recipe makes a half-pint at a time. If you were lucky enough to harvest more than a handful, simply double, triple or quadruple the following measurements as needed.
Pickled Nasturtium Pods
Makes 1/2 pint
Ingredients
2/3 cup nasturtium seed pods
1/4 cup salt
2 cups water
2/3 cup distilled white vinegar (5% acidity)
1 teaspoon sugar
1 bay leaf
Making Your Pickled Nasturtium Pods
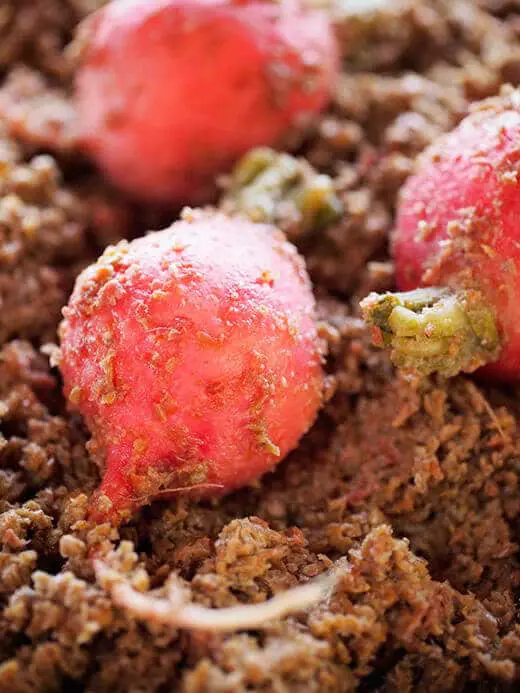
Harvest young, light green, half-ripened seed pods while they’re still on the vines. Young pods are crisp and juicy, but tend to lose their zip and flavor as they mature (eventually, they dry out into wrinkled brown seeds and drop to the ground).

Separate the pods into individual seeds, and give them a quick rinse to remove any dirt.


The raw seeds are full of potent mustard oils that make them bitterly strong in flavor; a little too strong for my liking, so I start by mellowing them out in a simple salty brine.
In a quart jar, dissolve the salt in water.


Add the nasturtium seeds, then place a zip-top bag over the rim and down into the jar to keep the seeds submerged. Let the brine sit for a couple of days at room temperature. The seeds will turn a dull green during this stage.

Strain the seeds and rinse again to remove excess salt.

In a small saucepan over medium-high heat, bring the vinegar and sugar to a low boil for 1 minute and stir to dissolve.
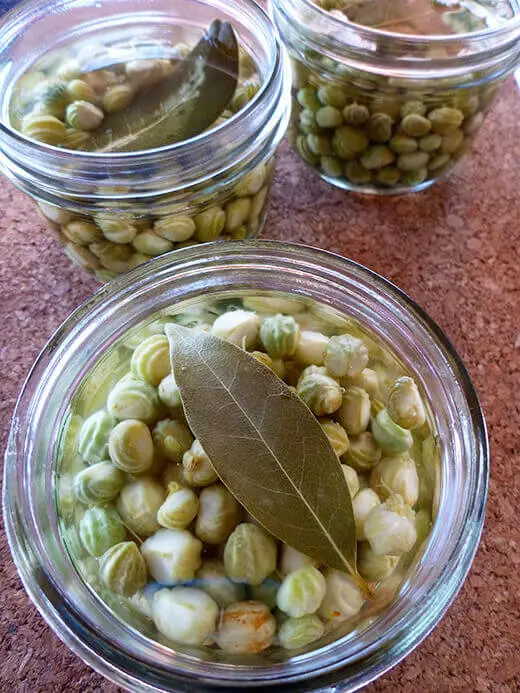
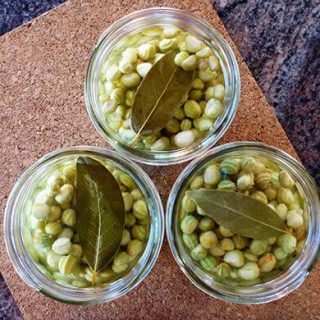
Divide your seeds into half-pint jars, then pour the hot vinegar over the seeds, covering them completely.

Add a bay leaf to each jar.

Let the jars cool to room temperature before sealing with lids. At this point, you can either keep the jars at room temp (no need to fire up the boiling water bath), or store them in the fridge.
The pickled pods will keep indefinitely in the vinegar; I still have a jar left from a big batch I made almost two years ago, sitting in my pantry unspoiled. (Just make sure you use a clean utensil each time you scoop out seeds!)

Nasturtium capers have a nose-tingling bite that pairs well with spicy dishes, such as Asian stir-fries or sushi rolls. To use them, spoon out a few seeds and chop them up finely. You can add them to any dish where you’d typically use traditional capers — pastas, sauces, salads, dressings. A little goes a long way!
Pickled Nasturtium Pods
Before you yank your plants out, hunt for those little pods to get one last use out of your nasturtium crop! You don’t need more than a handful to turn them into tasty “capers,” and though they’re sometimes called poor man’s capers, they have a distinct, mustardy flavor all their own.
Ingredients
- 2/3 cup nasturtium seed pods
- 1/4 cup salt
- 2 cups water
- 2/3 cup distilled white vinegar (5% acidity)
- 1 teaspoon sugar
- 1 bay leaf
Instructions
Harvest young, light green, half-ripened seed pods while they’re still on the vines.
Separate the pods into individual seeds, and give them a quick rinse to remove any dirt.
The raw seeds are full of potent mustard oils that make them bitterly strong in flavor; a little too strong for my liking, so I start by mellowing them out in a simple salty brine.
In a quart jar, dissolve the salt in water.
Add the nasturtium seeds, then place a zip-top bag over the rim and down into the jar to keep the seeds submerged.
Let the brine sit for a couple of days at room temperature. The seeds will turn a dull green during this stage.
Strain the seeds and rinse again to remove excess salt.
In a small saucepan over medium-high heat, bring the vinegar and sugar to a low boil for 1 minute and stir to dissolve.
Divide your seeds into half-pint jars, then pour the hot vinegar over the seeds, covering them completely.
Add a bay leaf to each jar.
Let the jars cool to room temperature before sealing with lids. At this point, you can either keep the jars at room temp (no need to fire up the boiling water bath), or store them in the fridge.
Notes
The pickled pods will keep indefinitely in the vinegar; I still have a jar left from a big batch I made almost two years ago, sitting in my pantry unspoiled. (Just make sure you use a clean utensil each time you scoop out seeds!)
Nasturtium capers have a nose-tingling bite that pairs well with spicy dishes, such as Asian stir-fries or sushi rolls. To use them, spoon out a few seeds and chop them up finely. You can add them to any dish where you’d typically use traditional capers — plates of pasta, sauces, salads, and dressings. A little goes a long way!
Recommended Products
As an Amazon Associate and member of other affiliate programs, I earn from qualifying purchases.


Would apple cider vinegar be a good replacement for distilled vinegar?
I’m so excited to try your recipe! I live in New Zealand where we only get nasturtiums in spring/summer. Managed to get nearly 3 cups of pods from my garden this afternoon and they’re now soaking in brine. Will look forward to trying them … thanks for your informative blog!
do you have a printable version?
Love this! I found this while looking for nasturtium pesto (found your recipe there too!). I love using nasturtiums in my garden and plant them throughout my planters. So happy to have found another use other than as garden greens! Thanks for sharing!
Too cool. Found fava bean plant tips and nasturtium seed capers! Plant people are the best.
I definitely want to try making these, and wanted to know if there’s a particular reason why you would not seal the jars while they’re hot, right after the brine goes in? jars seal best when the contents are boiling hot when they’re closed, and that helps ensure everything inside remains edible. thanks!
Perhaps seal is not the right word to use. You just need to cover the jars with a lid to keep the contents from spilling. The vinegar is enough to preserve them without an airtight seal (like what you’d get from a boiling water bath).
thank you so much! that makes sense, and your recipe looks delicious.
hey Linda, I’m trying this recipe. i have left the seeds in brine for 3 days. it didn’t change the color. some of them have sunken to the bottom from some reason. you didn’t write when can you eat the pickled seeds. when are they ready? what is minimum time before opening the jar?
Thanks for catching that, I’ll have to update the recipe with that info! I’d leave it to pickle for at least 3 days before eating.
Delicia!!!
I just wanna report that I made these about a year ago. Initially, the nasturtium pepper flavor was a bit strong. We tried them again a year later and they are even more yummy! We used them in a pico de gallo kind of thing for our fish tacos!
The “capers” definitely mellow out more over time, and we still have some from a jar we packed a couple years ago that are wonderful!
I’ve often wondered about pickling the seeds of nasturtiums, as the flowers and leaves are lovely in salads. Thanks for a very informative, step-by-step description regarding how to pickle the seeds!
Nice instructions, thank you. When you say “sealing with lids,” may I assume you just mean screwing regular lids on?
Yes, just screwing the lids on. They don’t have to be airtight.
I prefer them to real capers….. much more flavour.
Hi Linda the recipy sounds good I want to try it can you tell me the ratio of water and salt in the brine for mellowing the pods for 3 to 4 days.
Hi, the ratio is listed in the ingredients of the recipe. 1/4 cup salt to 2 cups water.
😉 That’s not strictly a ratio … it would be helpful if you good give a ‘salt brine’ percentage, e.g. 2%, 5%, 10% (10% is what I think you’ve done in this recipe). There is a wide variety of salt types available and, for example, a 1/4 C of maldon flaked salt will yield a wildly different brine than 1/4 C of basic table salt. Indeed, providing dry good measurements in grams/dry ounces is vastly more helpful than Cups etc. Many of your readers may indeed be based overseas and this helps with the recipe.
wow this is so great! I just ordered Nasturtium seeds. Cannot wait to get them in the ground.
They will grow EVERYWHERE if you let them reseed! I love it!
Amazing! I love capers and would love to try this as an alternative! It’s great to find a recipe for something that won’t have lower food miles!
These make a wonderful caper alternative! And a small jar lasts forever too.
I adore this dirty girl and her recipes! I’ve tried nastie capers in the past, but they were way too strong! The brining is brilliant! Mellows the flavor quite a bit. In some ways, they are better than capers–super crisp and crunchy! Can’t wait to use them in my marinated feta for Chrissie pressies! (Cubed feta, whatever herbs you like, slices of garlic, sliced hot pepper, pink, white, black peppercorns, mustard seed–however you feel like flavoring it! Cover w/EVOO and seal. Turn jars to make sure all ingredients are covered. Refrigerate indefinitely! La Yum!) Hmmmm… may even start some early and add actual nastie flowers!
Thank you for the nice comment! And nastie flowers marinating with feta sounds delicious… not to mention beautiful.
I’ve tried this and it’s such a great idea! Thanks for sharing! I will share this on my food swap blog if that’s ok.
Absolutely! I’m glad you enjoyed!
awesome! I think we are going to do this today. When we went to put our garden to bed for the winter yesterday, we had so many nasturtium seed pods and I am very excited to try this!
My nasturtiums are just starting to grow again, so pickled pods won’t happen for me for another few months… but they’re worth the wait!
Thanks for the info. Broccoli leaves and nasturtium capers, you’ve helped out my culinary summer.
It’s all part of being a garden foodie. 🙂 Enjoy!
These are great. They’re very nice with cheese.
My favorite way to eat them! (Along with salami and crackers.)
Trying these now! Very excited to find your great blog, it’s so inspiring! Thanks for sharing. We just planted a whole heap of amaranth in the garden, looking forward to checking out your amaranth ideas! 🙂
I was trying to figure out what to do with all these seeds, and came across your blog – fantastic idea!! Just getting ready to put my first batch in brine 🙂 How long after pickling them do you start eating them?
I usually wait 3-4 days (at room temperature) for a good pickle. Try them after that and see how you like it!
Thanks! Can´t wait 🙂
Great idea! I have made tempura-fried nasturtiums before but never thought to prepare the seeds like this. Will have to try it this year!
Tempura nasturtiums sound delicious! (And very similar to the tempura squash blossoms that I’ll be making very soon!)
I love nasturtiums in salads. The leaves are peppery. I never tried the seed pods before. Nice idea. I love pickled daylily pods, though. Very tasty. So I think I may give this a try.
Have you tried using a lower salt brine and just letting them pickle? I use 1-2-3-4 with kosher dill pickles: 1 tablespoon kosher salt, 2 tablespoons white vinegar, 3 c. water, put over cukes with garlic, dill, chilis whatever, and wait 4 days. It is so good and easy and you can do it with okras and onions, so maybe nasturtium buds?? You do get a little white sediment though, and by late winter cukes get soft.But it is totally lactic fermentation so good for your body. Wonderin.
This isn’t a lacto-fermentation recipe, but rather a vinegar-pickling recipe. The nasturtium pods are brined to pull out some of their bitterness. Then they are rinsed and pickled in 100% vinegar (with a little sugar for flavor). The vinegar gives them indefinite shelf stability without refrigeration.
I’m sure you can lacto-ferment nasturtium pods, but I would use a different ratio to ensure proper fermentation. My rule of thumb is 1/4 cup pickling salt to 1 quart water, with no vinegar. (Vinegar inhibits all the good bacteria in fermentation.) Also, keep in mind that your pods will continue to ferment even when refrigerated. Since you use so little at a time, the pods could become too sour by the time you use up your jar.
They’re beautiful!
By the way, nasturtiums come as both compact plants and climbing plants, depending on what you want in your garden. 🙂
This is novel. After seeing a recipe for grapefruit marmalade on Small Measure I had a new vision. The boxes of juicy, delicious, just harvested fruit from my dwarf grapefruit tree are soon to be part of a cooking lesson this coming Sunday. A friend who loves to cook is coming to my house to teach me and another friend how to make marmalade and can! I see a new vision after your nasturtium capers post. Making pickled foods!!! Thank you for the inspiration. And by the way, I like your writing style.
Thanks Georgette!
I have a few other grapefruit recipes on my blog if you search for them – grapefruit-rosemary bread, grapefruit jelly, and an orange-grapefruit-ginger marmalade!
Amy Goo liked this on Facebook.
This is so cool. I’m officially in awe. 🙂 And, I will be including nasturtium seeds in my garden this year.
Nice! I particularly like the variegated leaf variety. I think that’s the Alaska mix.
I ended up ordering these (black velvet nasturtium)[http://www.seedsavers.org/onlinestore/Flower-Seeds/Flower-Black-Velvet-Nasturtium.html], their color made me happy. 😉
Jenny Heflin liked this on Facebook.
great post I will have to try this… I love Capers, but live in zone 6 ..they don’t grow here…
You can sow seeds in early spring once the ground has warmed up. If you sow a batch every couple of weeks, you’ll have nasturtiums blooming for several months!
I live in zone 6a and Ive had nasturtiums since July and it’s now November here in New England and I still have beautiful flowers outside on my 2nasturium plants. Huge leaves this year for salads All my neighbors wondered what they were -so I gave them all a taste of the crisp peppery leaves, the flowers The whole plant edible. And I’m on a Main St in a city it’s great! Try planting this in pots that’s what I do. Great Article/recipe @gardenbetty
Jun Iguchi liked this on Facebook.
Josh Lee liked this on Facebook.
Interesting idea, though I don’t know if I will ever have enough to do something like that with, but something worth keeping in mind I suppose. I will try yesterday’s recipe though, that sounds delicious!
Nasturtiums put out a surprising amount of seeds with very few plants. Once that initial crop reseeds, they multiply like crazy if you let them.