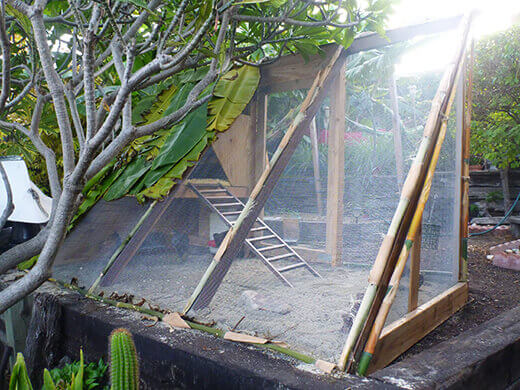
I never thought I’d ever say this… but I now have a chicken coop in my backyard! And not just any chicken coop. A tiki coop!
My guy and I have been working on it off and on for the last five weeks… putting in a few hours here, a few hours there, taking a week off… and we finally finished it last Monday. Just in time for our new chickens to move in on Tuesday!
We built the tiki coop and run with plenty of room for our three girls to stretch their wings out, as we’re not always home to let them free-range during the day.
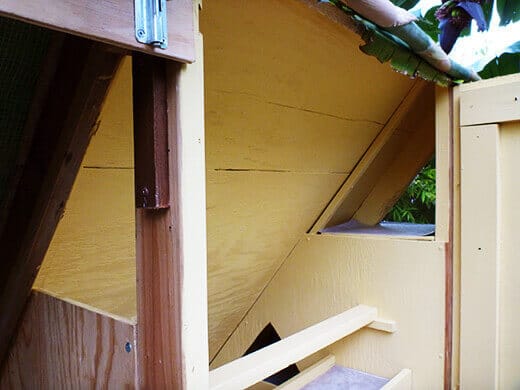
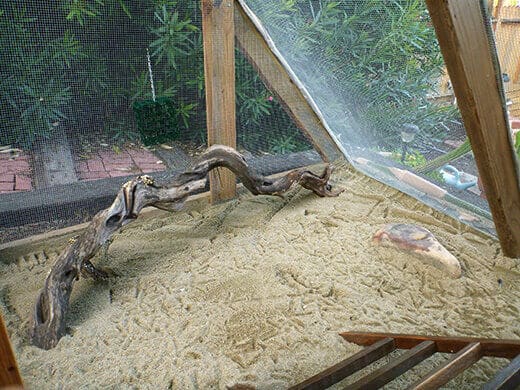
The coop itself sits inside an enclosed run, with a ladder leading up to the pop door, and a sheltered area underneath for food and water.
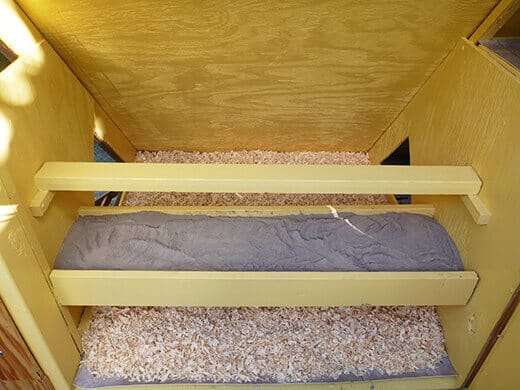
Inside the coop, the walls are painted a semi-gloss yellow and the floors are lined with linoleum for easy clean-up. A roost hangs above a poop tray, which is also lined with linoleum. All the linoleum sheets slide right out for a good wipe-down.
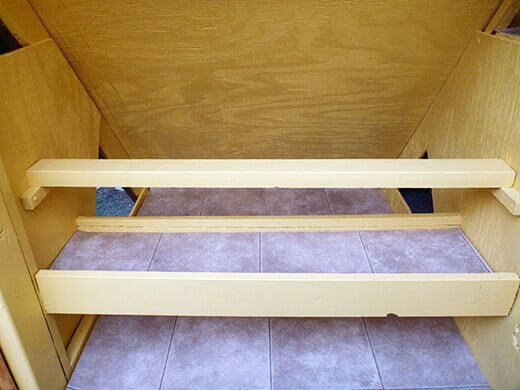
We put kiln-dried, medium-coarse pine shavings on the main floor of the coop, and diatomaceous earth in the poop tray. The diatomaceous earth is super absorbent and keeps odors down. Every other day I sift poop out of the tray with a small litter scoop.
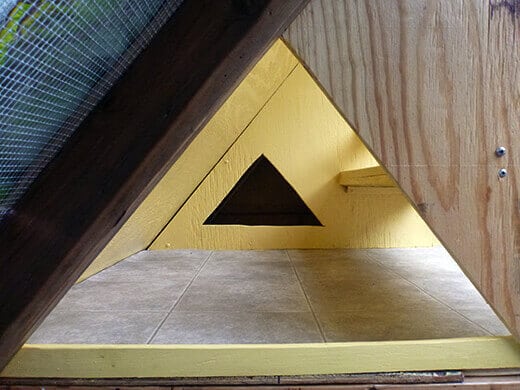
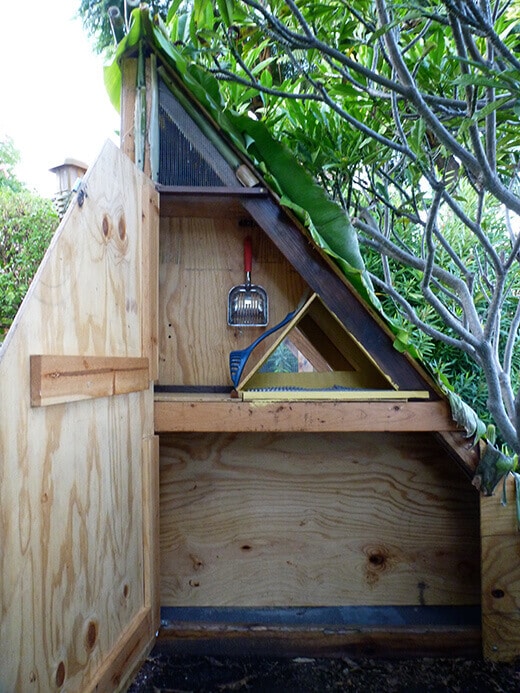
A triangular cutout serves as an open pop door, giving the hens free access in and out of the coop. They wake up with the sun and tuck themselves in at night. Since they’re locked into the run, a closing door on the coop was not necessary.
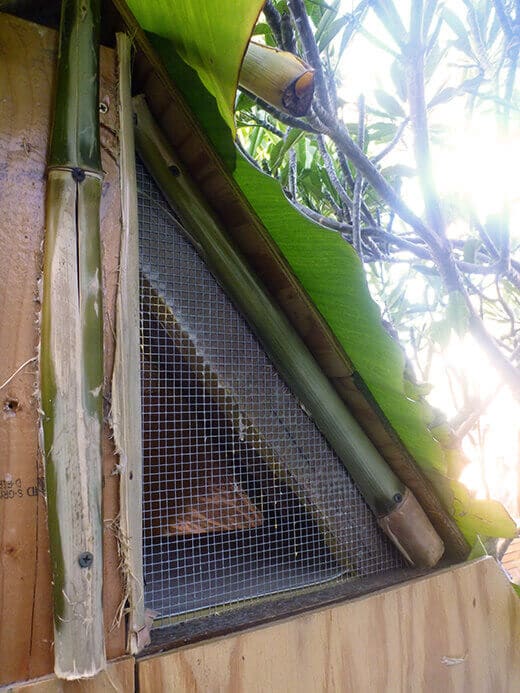
Another triangular cutout leads to the egg cubby, which I’ve lined with plastic nest pads.
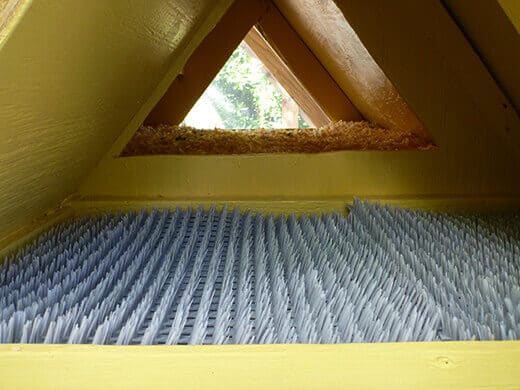
I know — they look barbaric, but I’ve read that chickens like to rest their tushies on these things. The plastic keeps mites and lice at bay, and the “drainage” holes allow droppings to fall through (to a linoleum-lined floor). When the girls are ready to lay, cleaning the nest will only involve a quick spray of water from the hose.

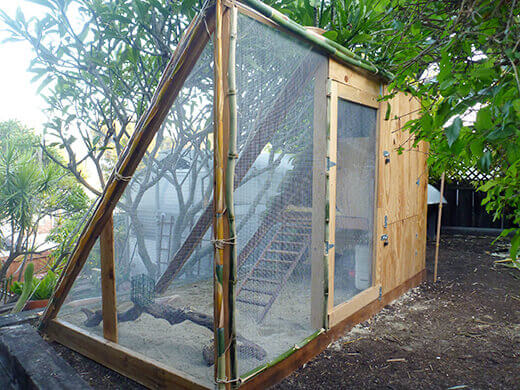
Two windows give cross-ventilation inside the coop. We even built in an “attic,” which we’ve discovered the hens love to sit in and look out the window.
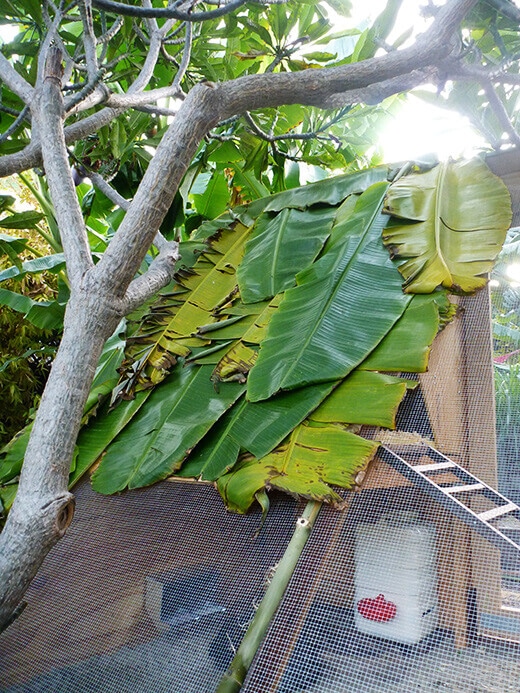
In keeping with the tiki theme, the roof of the coop is covered with banana fronds from our trees (and vinyl pond liner underneath to prevent leaks). As the fronds age we may have to replace them, but luckily we have a neverending supply in our garden!
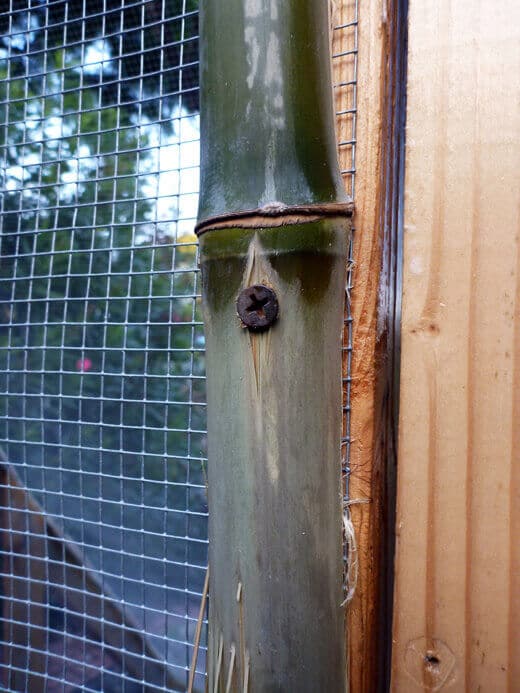
The bamboo from our garden was used as lath to trim the edges of the coop and add an extra layer of security over the hardware cloth. We also tied long stalks together with jute twine just for looks.
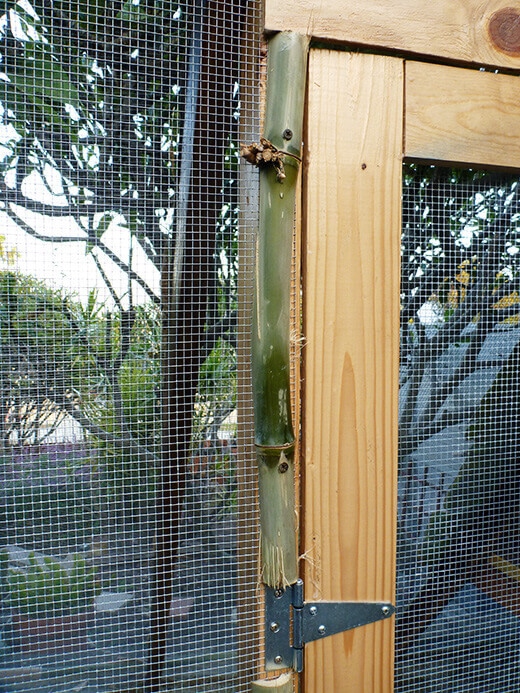
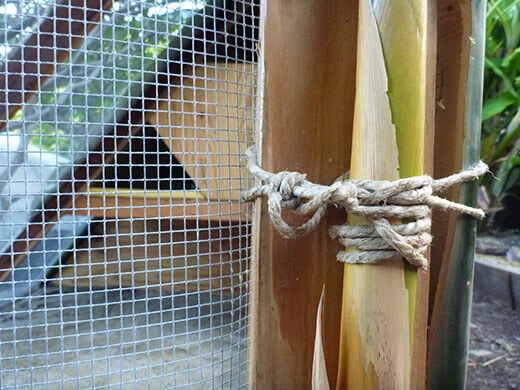
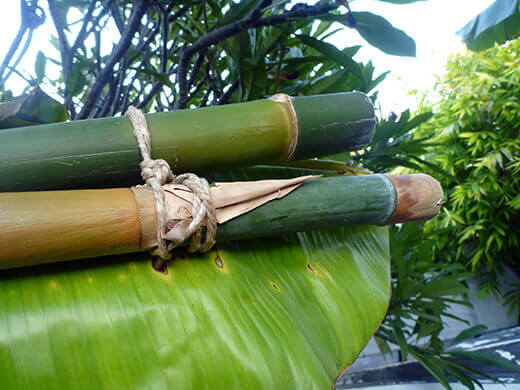
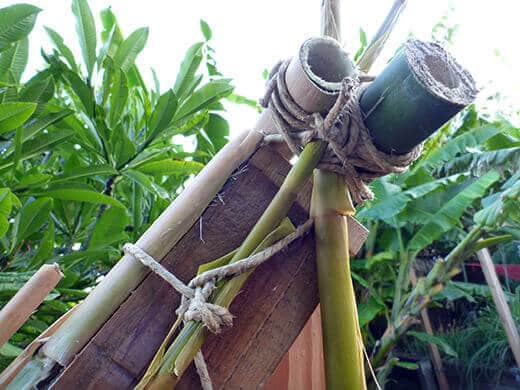
I love the way the bamboo is already starting to change color and look more weathered.
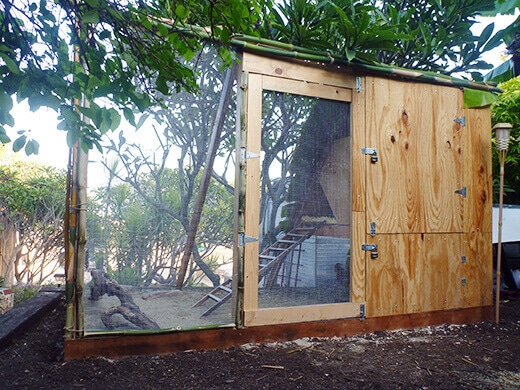
On the side of the coop, a large door swings open for access to the egg box and a storage area to hold tools, food and treats, and other supplies.
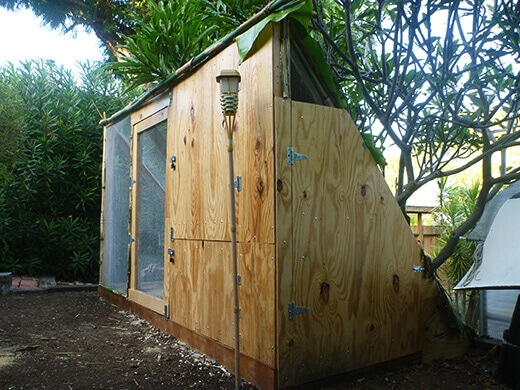
In front, a tall door leads to the run, and beside it are an access door to the coop and a door to the feeders.

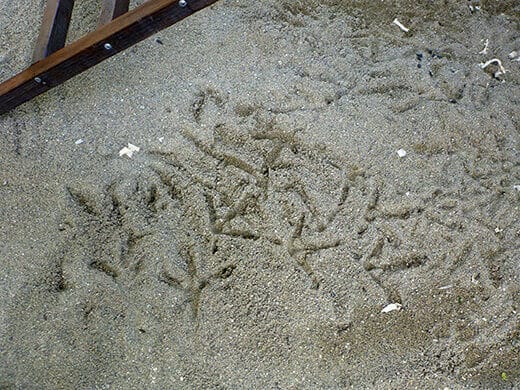
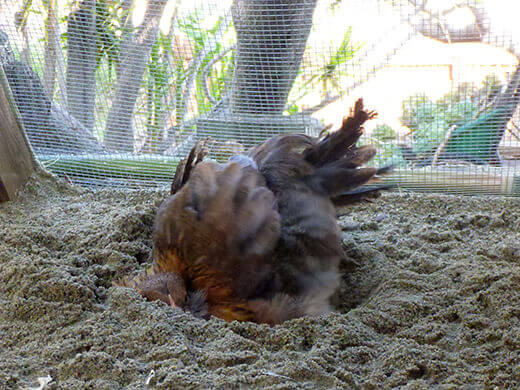
The run is covered in fine grained, washed plaster sand. Combined with a little diatomaceous earth raked into the surface, it’s one of the tidiest options I’ve found for a run that sits on dirt. We had a big rainstorm the day after we loaded in the sand, and it dried out quickly. It doesn’t get muddy or dusty. And speaking of, the chickens love to luxuriate in a dust bath!
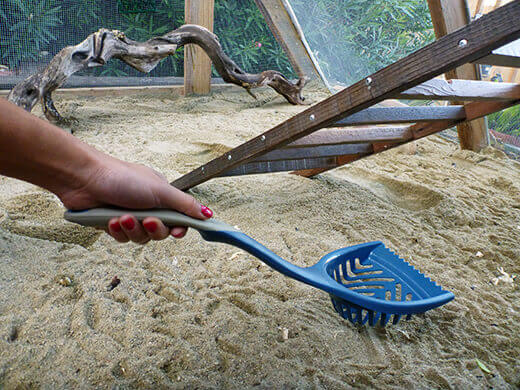
We treat the run as one big litter box, which makes poop patrol pretty easy. Twice a week I go in with a kitty litter scoop and scoop out all the droppings. I use a long-handled scoop with a very wide mouth (almost 6 inches across). Since I’ve never had cats, I didn’t even know they made scoops this large — you could pick up Godzilla’s poop with this thing!
The hens love to perch on the twisted manzanita branch we brought back from my mother-in-law’s backyard forest in Mill Valley. A double suet cage hangs above the branch, which we fill with fresh fruits and veggies from our garden for the hens to peck at all day. We also put in a couple of San Miguel River stones, which we scavenged from our Southern Colorado road trip.
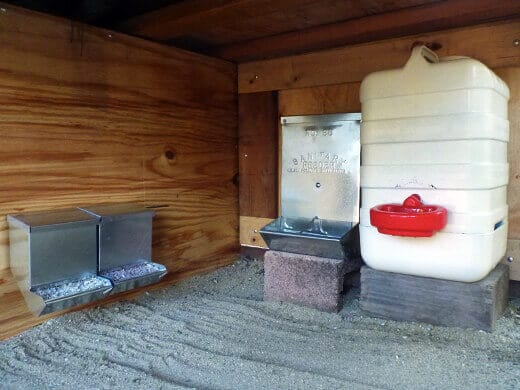
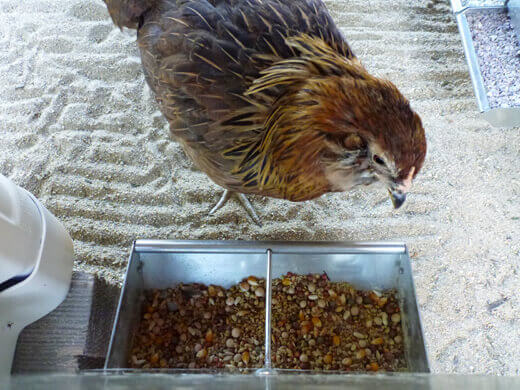
Underneath the coop are the waterer and feeders. The waterer was made from a recycled blue water jug that we painted over, leaving a window so we could check the water level easily. We screwed in an automatic drinking cup, which refills itself from the jug as the hens drink.
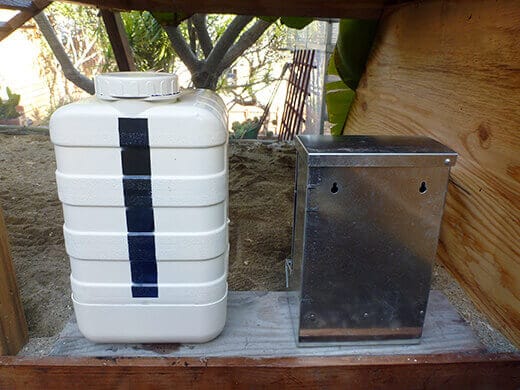
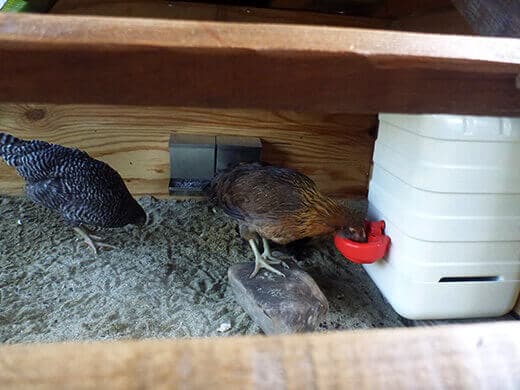
The main feeder is a baby pig creep feeder that allows simple adjustment of the feed flow. I keep the flow at a low level, which minimizes waste. Two smaller feeders hold grit and oyster shell, all served free-choice.
The girls seem pretty happy in their new home. Now I just need to start collecting some kitschy tiki decor to complete the look!
So there you have it — the Garden Betty tiki coop! If you want to know the nuts and bolts of how we actually built it, stay tuned for my next post…


Nice looking! Respectful tip from a carpenter: unless it NEVER rains where you live, the sheetrock screws will rust out in a year or two. Use coated screws that are labelled exterior grade.
Sadly, it rarely rains in Los Angeles. But thank you, that’s a great tip!
Wow really cool and well thought out setup, would you do anything different? I am in Wisconsin, so no bananas here, lol. used to grow them when I was in Hawaii, along with papaya, bittermelon, herbs (don’t get any ideas lol)
After four years, we still haven’t changed a thing structurally! The coop and run are so easy to clean, and we top off the sand in the run once a year. The pine shavings in the coop are composted and refreshed every 2-3 months. The only minor thing we did do was add caulking along the wood seams in the storage area to keep mice out of the coop.
Are mice entirely unsuccessful getting to the feed in that ‘off ground’ position?
I responded to your “Guest” comment below, but to elaborate, we don’t get mice in the run because of the hardware cloth-lined floor. We also inspect the coop once a year and seal off any gaps in the wood.
You don’t seem to be worried to expect any predators digging underneath. Are there none of those in your area? No foxes, racoons etc. Was anything between sand & ground?
The floor (underneath the sand) is lined with 1/2-inch hardware cloth that’s stapled to the walls, so critters can’t dig under the coop. You can see it here: http://gardenbetty.com/2011/11/the-nuts-and-bolts-of-the-tiki-coop/
Have you come up with anything new for the waterer? I was wanting to try your version in the post until I read about the issues you had.
For a while I was just using a standard water fountain (and it works reliably, but does get dirty easily), though right now I’m in the middle of testing a new nipple-based system. I can’t recommend it just yet, but I’ll post an update if it ends up working well!
This is one that was recommended to me.
http://www.cornerstone-farm.com/equipment/300-poultry-cup-drinker/
I am going to look into it more. I read good reviews on it so far.
people should live this well
I am looking all over the internet for the double and single baby creep feeders and I can’t find anything like them! Especially with covered tops, for added protection of the food. I really love your set up and how it can separate the grit, shells and feed as well as give a little more space in my small coop. Can you you help me find out where I can get some of my own?
Thanks for the incredible amounts of inspiration!
🙂 Meredith
San Luis Obispo, CA
I bought my feeders online from Stromberg’s Chickens.
Did you purchase the plans for your coop? Where can I find them? I like this set up.
Do you have any issues with mice/rats and snakes getting inside the area?
There were no plans for this coop, since we designed and built it as we went along. You can see our process here: http://gardenbetty.com/2011/11/the-nuts-and-bolts-of-the-tiki-coop/
We don’t have a problem with mice getting inside the run as we enclosed the bottom with hardware cloth. But, we did have an issue this winter with mice getting into an open bag of scratch in our coop storage area. That was our fault though; we should’ve moved the scratch into an airtight container sooner.
Have you tried alternatives to the drinking cup yet? I’m looking for a new system but can’t seem to find one. What don’t you like about the cup system, if you don’t mind me asking? Thanks,Sally
With the cup, sediment collects inside and clogs the holes and float valve. Every few weeks I have to take apart the cup, wash it out, and screw it back together. I actually had to request a replacement cup from the vendor because the first one failed completely after a couple months (the float valve stopped working). Turns out, the second cup failed as well after a few months of use, so now I’m using a standard drinking fountain while I research other products.
I’m currently looking into a nipple-based drinking system, as I’ve noticed my chickens like to peck at water dripping off stairs and such. I’ll post an update with whichever new system I end up going with!
Hi Linda, we have tried the nipple based system with little luck. No matter how we mount them they drip constantly, either from the nipple itself or from the base of the nipple. Would be interested to hear if you have found something better. We have 3 laying hens and another 2 teenagers that will get added to the flock soon. Twice a day cleaning 2 waterers is a hassle, but of course done out of love. 🙂
These days I just use a standard fountain that I clean/refill twice a week. It really only gets dirty if the hens are cooped up inside all weekend when I’m out of town… otherwise the fountain stays relatively clean when they get to forage outside.
Debbie
Just found your site and really enjoying reading about the chickens. I love the Tiki Coop. Been looking for some new plans and I think this is it. Thanks for all the info.
Have fun building your new coop! 🙂
Hi I love your coop, you have a lot of great ideas. Can you tell me where you bought the automatic drinking cup and the plastic nesting pads? I’m getting my first backyard coop ready and would love to incorporate these items. Thanks!
Most of my coop accessories were purchased online from Fleming Outdoors or Stromberg’s Chickens. I’m hesitant to recommend the drinking cup though; have had mixed experiences with that. But the plastic nest pads are great!
I love you coop!!! What a great idea. What are you feeding them? Also I was wondering if you could grow cucumbers or something that vines on the sloping side for shade.
Thanks Bev! Right now I’m transitioning the chickens over to whole grains and seeds (from their starter crumbles). Every day they also get a salad from my garden, and I let them free range in the yard for a couple hours.
You could definitely grow climbing vines on the side for shade, as well as sunflowers. (Bonus with sunflowers is you can toss the whole seed head into the run when the flower’s spent.)
Nice digs for the girls! Look forward to reading more about your chickens and their new home.
Thanks Robin! Hopefully I can post more pictures of the girls too… if only they’ll hold still…
What a humble little home… and the bed of nails is a sweet lil perk!
The ladies like a lil pain… 😉
P.S. that automatic waterer is really cool! I might have to make one for my girls.
Is that poop tray under the perch wide enough? I’m just wondering because my chickens tend to projectile crap all over the place while on the perch (i.e. their poop doesn’t tend to fall straight down into a nice straight line).
So far it’s wide enough… as they grow, we might expand it if they keep missing the tray. But I’m finding their poop shoots straight down. Maybe they just have good aim. 😉