
Tomato planting is something I look forward to every spring. I start counting the days from the time I start my first seed indoors to when I might have that first vine-ripened tomato in my hand, juices dripping down as I take a bite of the sweet, succulent flesh before it even makes it back to the kitchen.
But if I want to maximize tomato production and reap the benefits of a bumper crop, I need a good—no, great—tomato fertilizer to feed the soil and boost plant growth all season long.
Disclosure: If you shop from my article or make a purchase through one of my links, I may receive commissions on some of the products I recommend.
While it’s most convenient to go with an off-the-shelf tomato fertilizer (like this organic option from Espoma or this one from Dr. Earth, both of which I’ve used for a long time with good results), it’s worth putting in a little extra effort to make sure your tomato plants truly reach their fullest potential each season.
This in-depth guide will take you through the complete process of preparing the soil before planting and using my “secret ingredient” when it comes to tomato fertilizers: fish heads!
Yep, raw fish heads.
This unlikely and incredible soil amendment works wonders for other heavy-feeding, nitrogen-loving plants too, and I’ll show you exactly how to use fish heads as an organic source of fertilizer in your vegetable garden.
Which tomato varieties benefit from fish head fertilizer?
Let me start off by saying that no matter how many fish heads you throw at them, your tomato plants won’t thrive if they aren’t the right varieties for your climate.
To optimize growth in your garden, make sure you choose a tomato variety that matures well within your expected frost-free window. (You can find your first and last frost dates using my customizable planting calendar.)
If you have a short growing season, smaller tomatoes (or determinate tomatoes) do better than large, indeterminate beefsteak types that need three full months to ripen.
Related: Tomatoes still green? Here are four easy ways to ripen them on the vine
If you have specific environmental conditions that make growing challenging (for example, hot humid weather or previous infections in the garden), then a hybrid tomato variety that’s been bred for disease resistance will usually be a better choice over an heirloom seed variety.
Read more: These are the best-tasting heirloom tomato varieties—do you agree?
Favorite tomato varieties
Other than that, it doesn’t really matter what type of tomato you grow, as all tomatoes benefit from fish heads as fertilizer. So you can experiment with determinate or indeterminate, red or striped, slicing or cherry types, and they will all work.
The 2 things your tomatoes need for optimum growth
Tomatoes are fairly fuss-free. They don’t require any special conditions to sprout and they grow relatively quickly. Tomatoes do just as well in the ground as they do in growing in containers, and there are even tomato varieties that grow in shade.
But once they start producing more foliage, they need a lot of love to perform their best—their best meaning lots of flowers and lots of fruit.
In gardening parlance, tomatoes are called heavy feeders; that is, they require a lot of nutrients to flourish. They’re wild about fertilizer and before you even think about growing tomatoes, you should think about “growing” your soil first. Tomatoes like rich, amended soil teeming with worms and microbes.
Two key nutrients must be present for tomatoes to thrive:
- Phosphorus, which promotes the growth of flowers and fruit
- Calcium, which prevents blossom end rot (that dreaded black sunken hole on the flower end of your calcium-deficient tomatoes)
Providing these nutrients right from the start ensures you’ll grow tall, beautiful, healthy plants laden with juicy tomatoes that are sure to be the envy of all your neighbors.
To a lesser extent, tomato plants also need nitrogen, but too much nitrogen could result in a big, bushy, and green tomato plant with no flowers. With my soil prep method, however, you’ll be adding just the right amount of nitrogen to encourage healthy growth, while providing the phosphorus and calcium your plants need to produce loads of flowers (and ultimately, fruits).
First, prepare the garden bed
I start my tomato planting by preparing the bed at least a day or two before I transplant.
First, compost: Over an established but empty bed, I spread a 2- to 3-inch layer of well-aged compost; this can be compost made from kitchen scraps, leaf mold, bulk compost, or bagged compost.
(If you don’t have access to a good, organic, and aged compost locally, I recommend this one by Dr. Earth for a high-quality amendment you can buy online. It’s also available at some independent garden centers.)
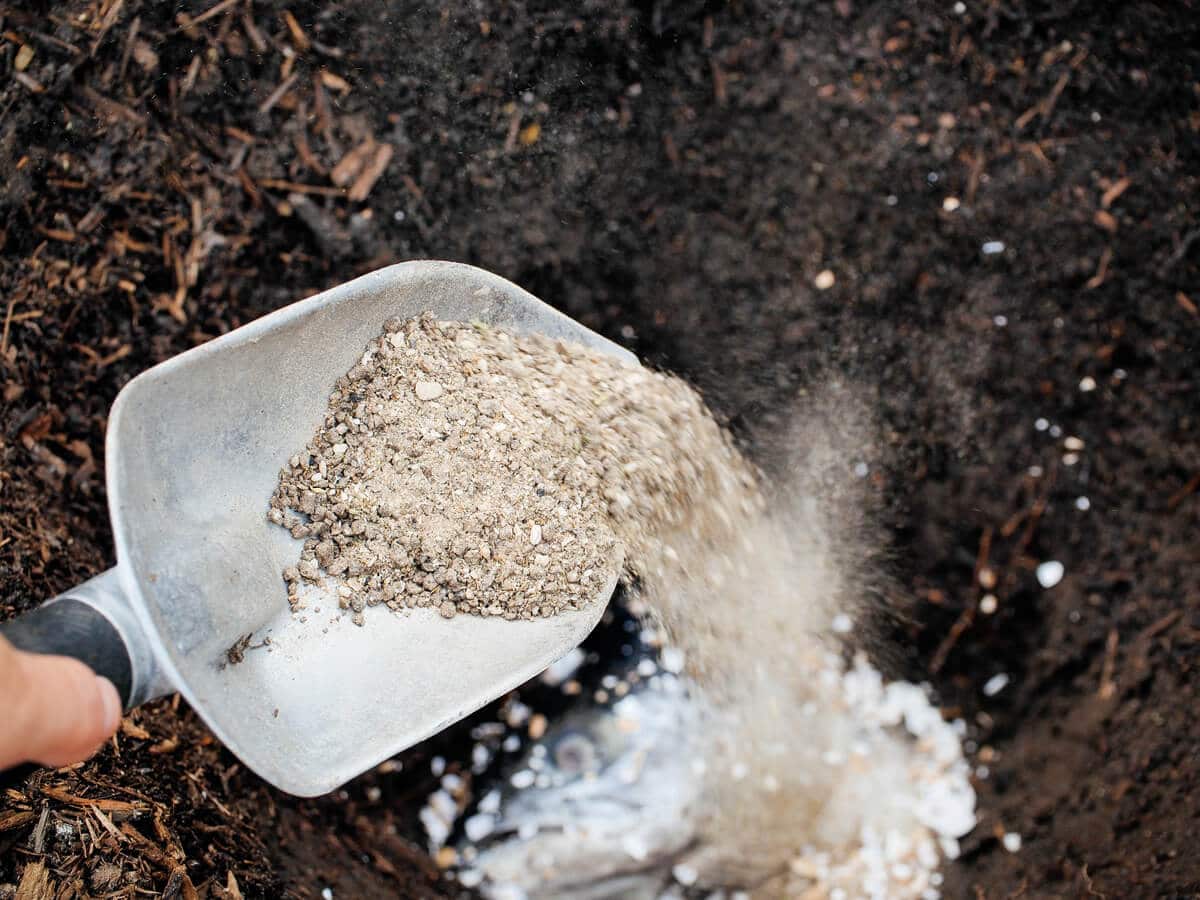
Next, fertilizer: On top of the compost, I apply a granular, organic, all-purpose fertilizer (the one I like is a 4-4-4 blend). Those three numbers indicate the nutritional makeup of the fertilizer, also known as N-P-K, or nitrogen, phosphorus, and potassium.
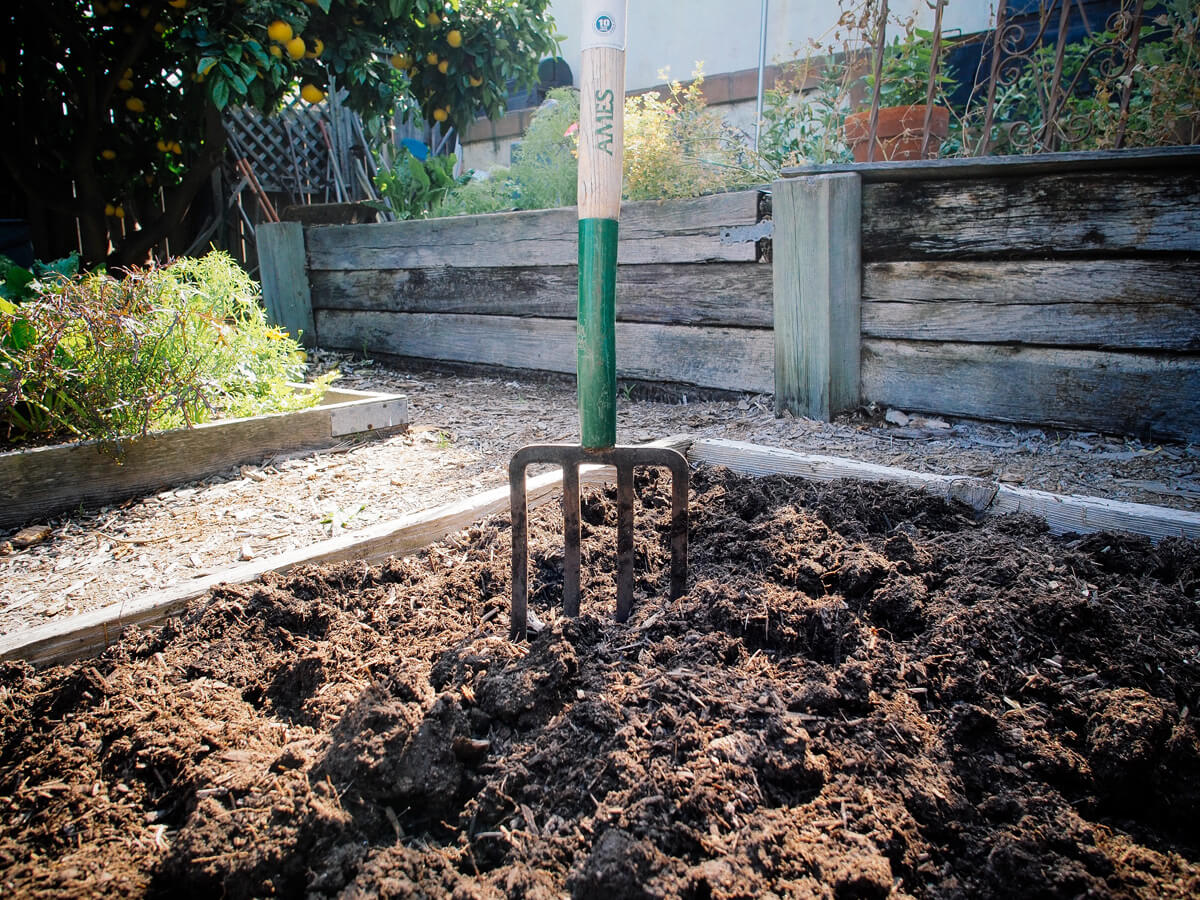
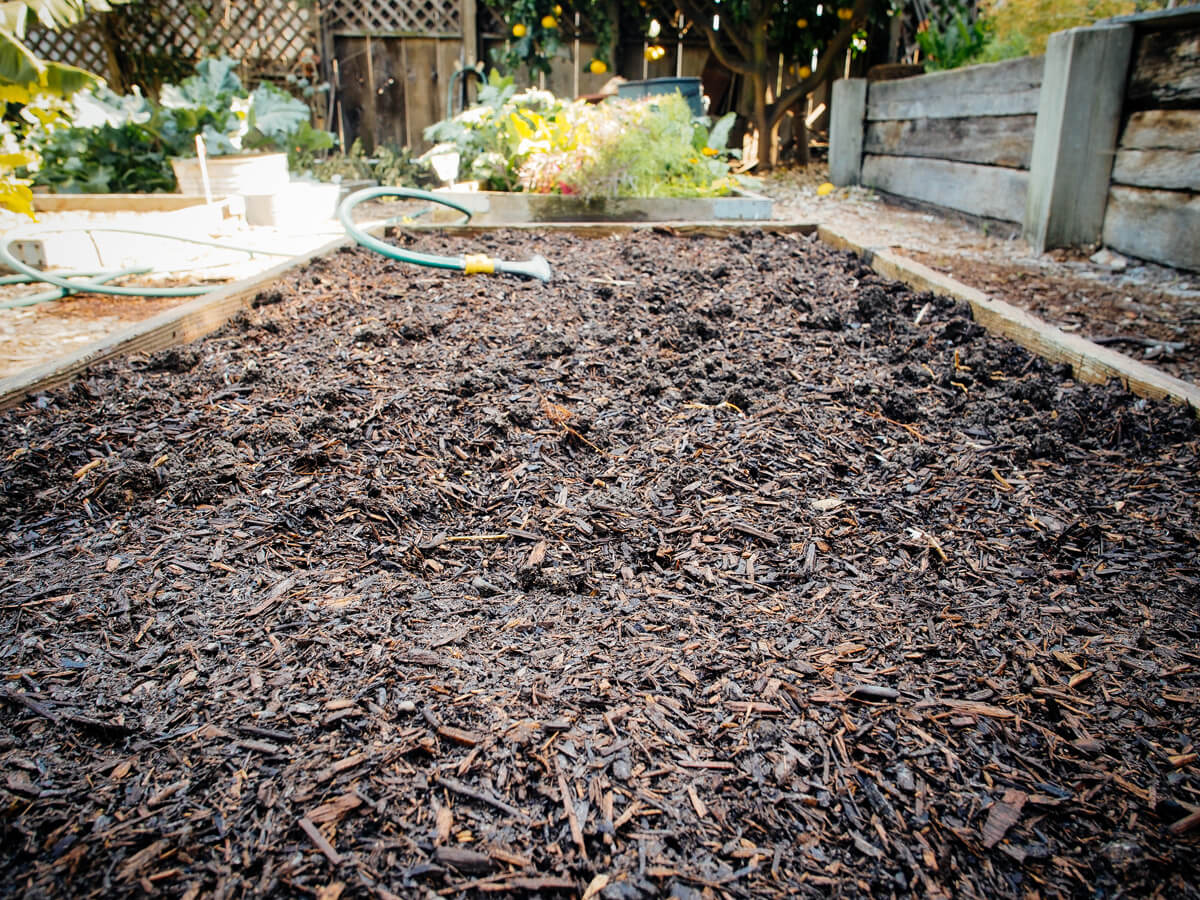
Once the compost and fertilizer are spread across the bed, I rake or dig them in lightly to make sure the fertilizer is evenly incorporated, smooth out the soil, and water well.
There’s no need to dig the compost and fertilizer deep down into the soil—you can leave them right on the surface as a top dressing. Over time, they will work their way down to improve soil tilth and fertility.
After fully saturating the soil, I let the bed sit for a day or two for the soil to settle back in before I plant.
So, tomatoes. Let’s get them in!
Prepare your tomatoes for transplant (and give them a boost with the aspirin trick)
Generally, I start my seeds in late winter, repot the seedlings into 4-inch pots in early spring, and depending on how things are going in the garden, transplant the tomatoes (again) into 1-gallon pots or put them straight in the ground.
(Your sowing and transplanting timeline may vary with your particular climate, microclimate, and expected frost dates.)
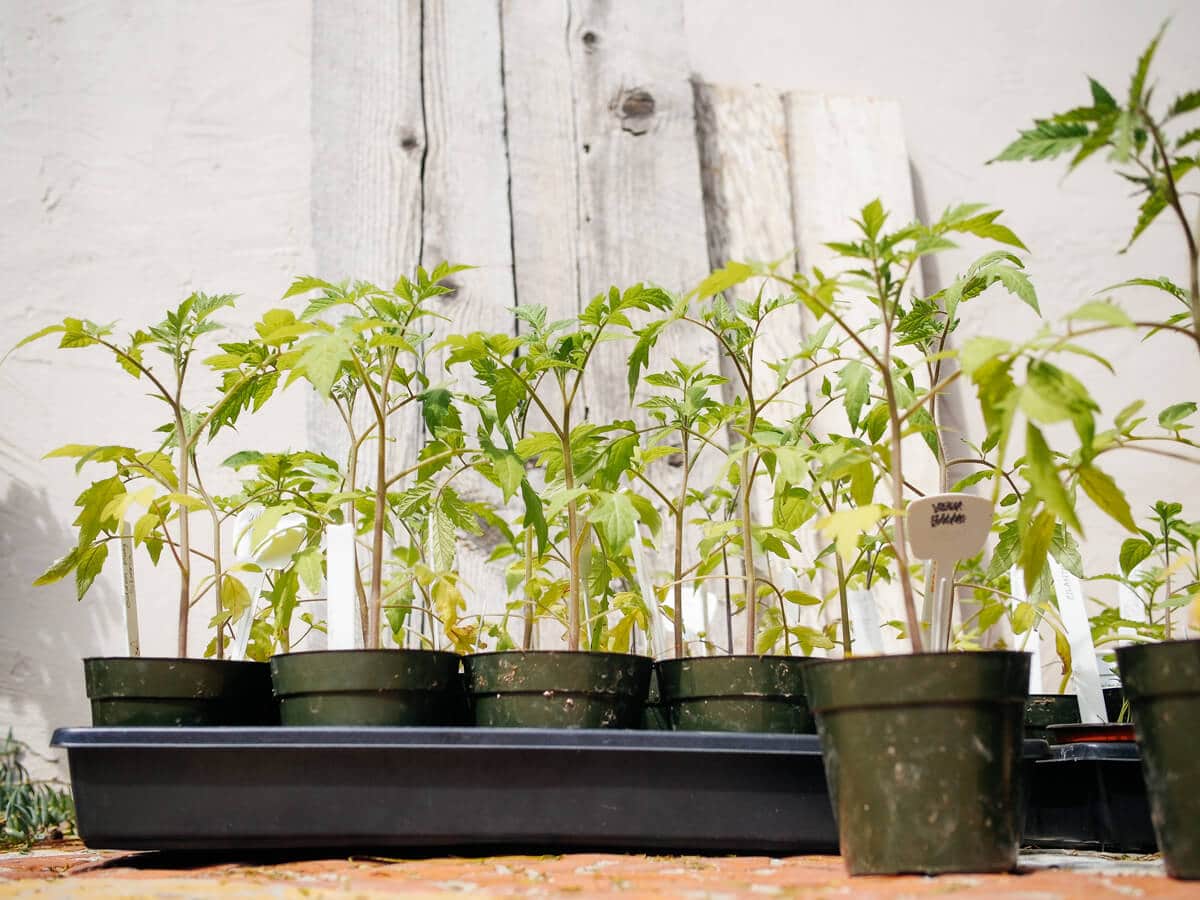
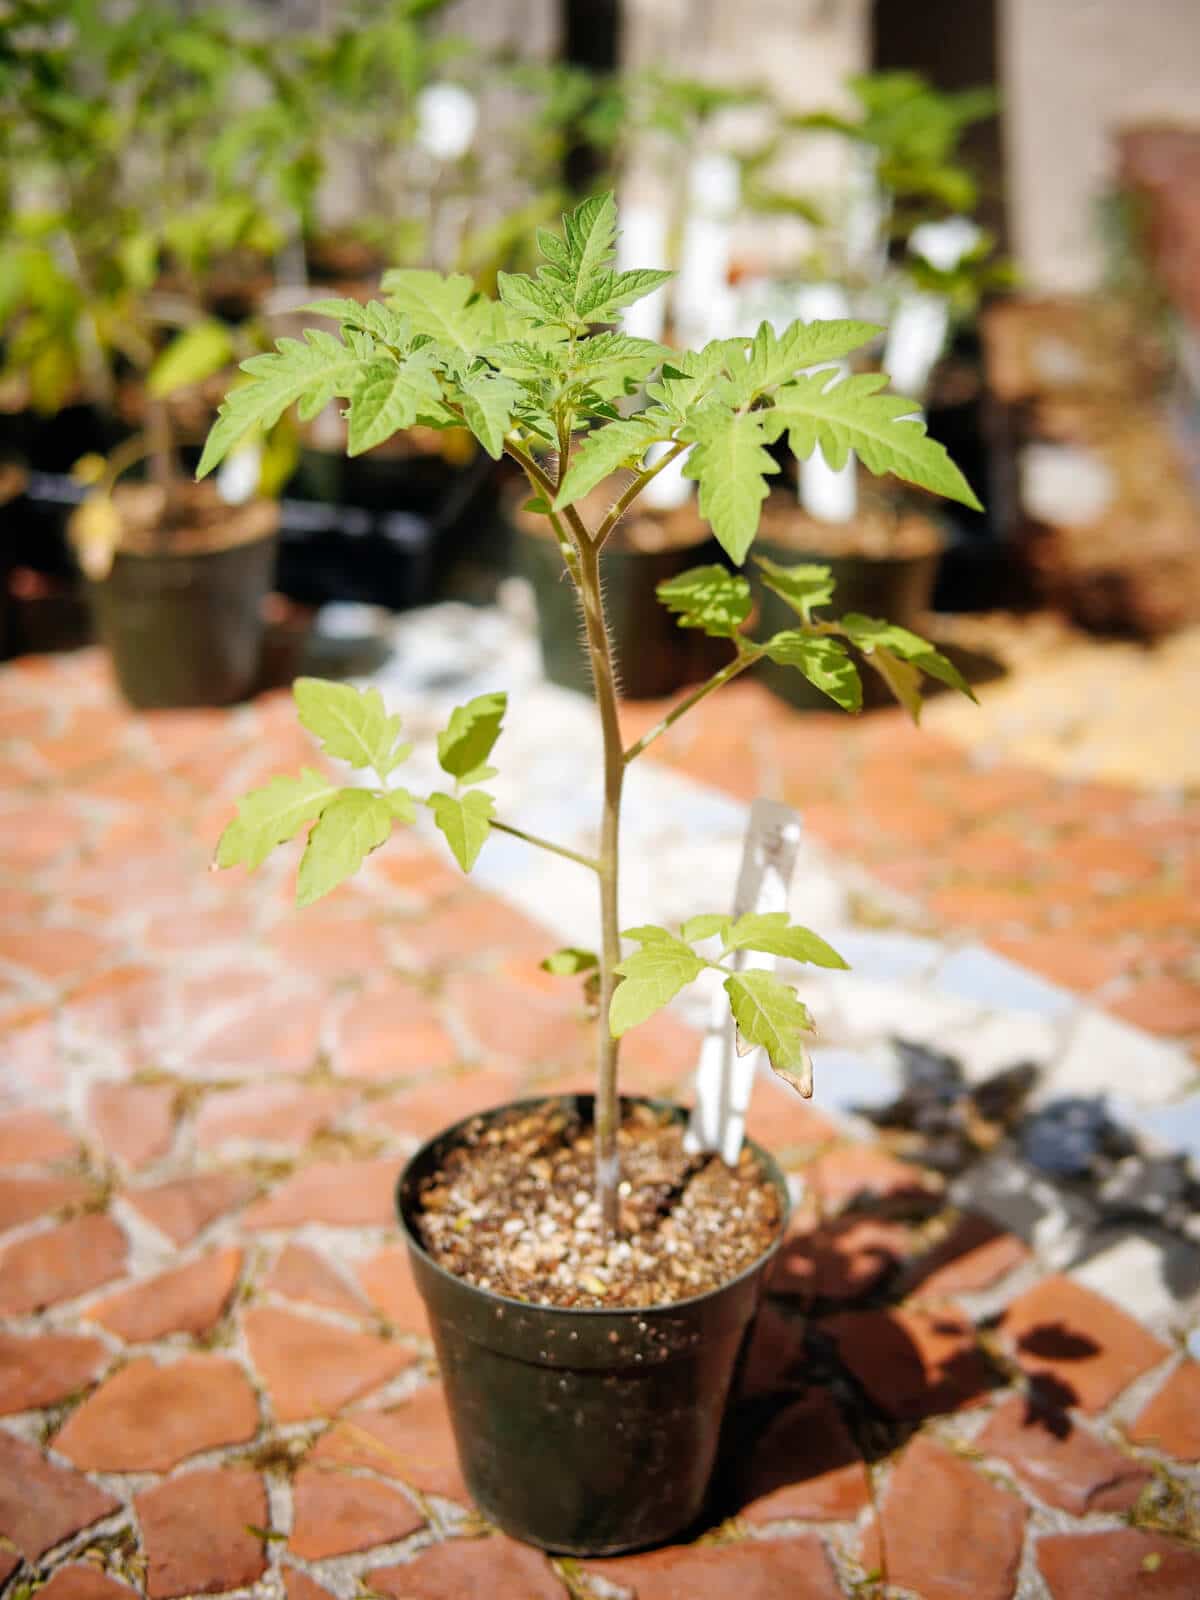
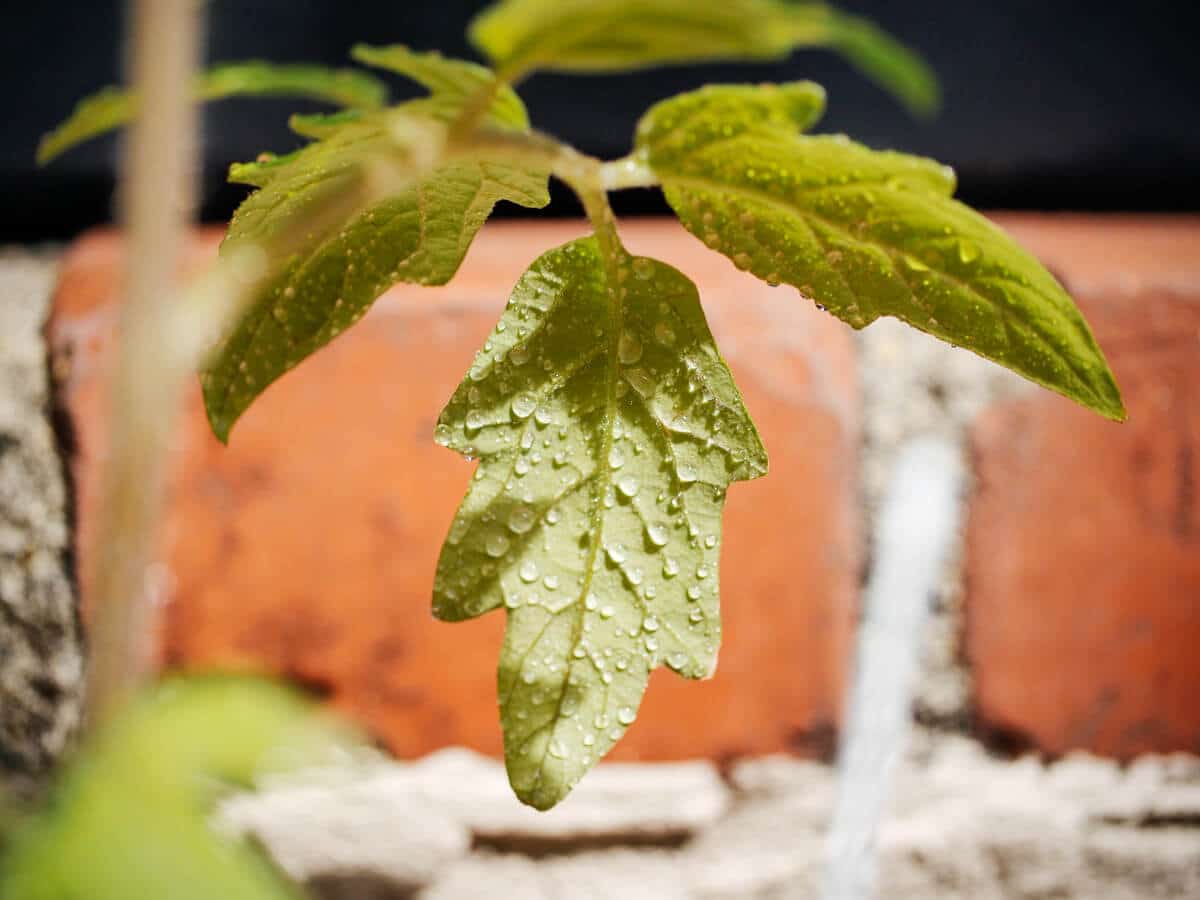
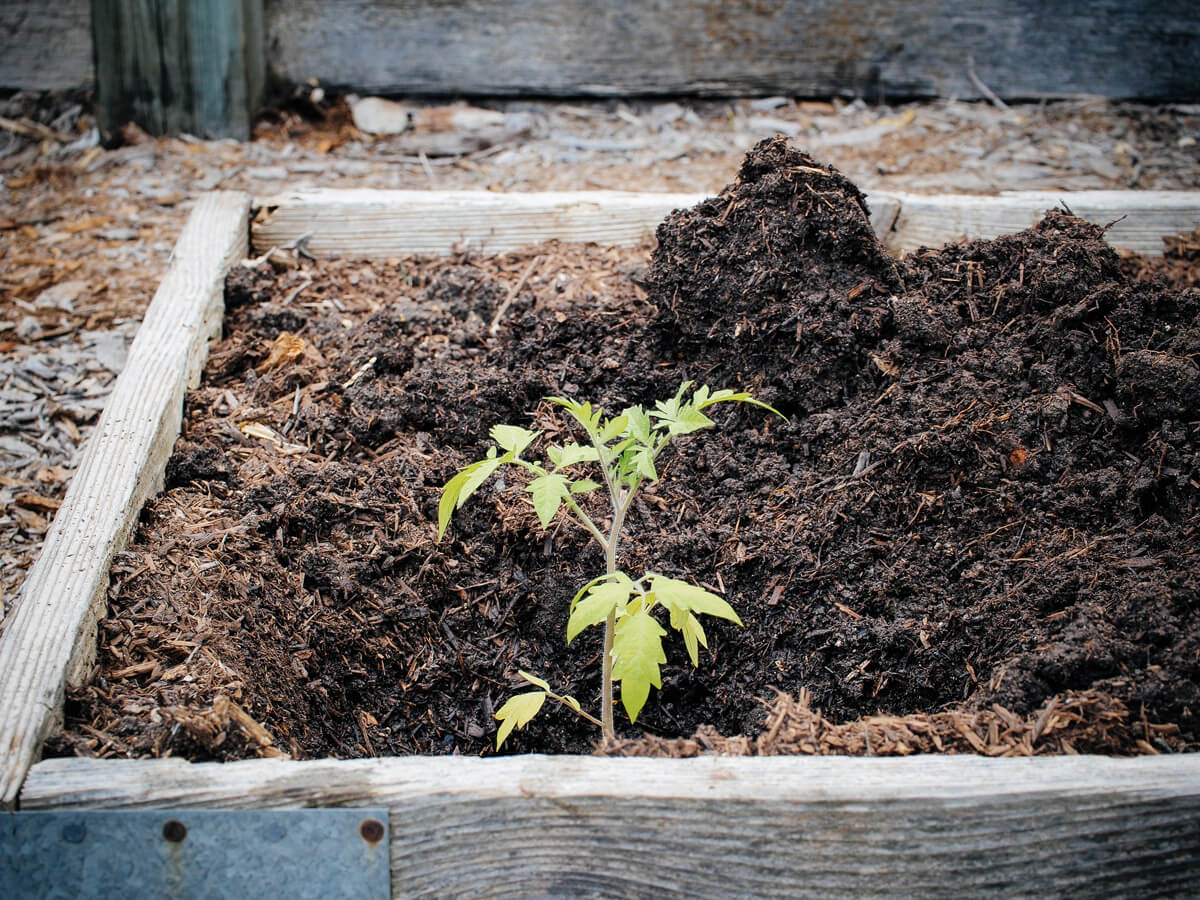
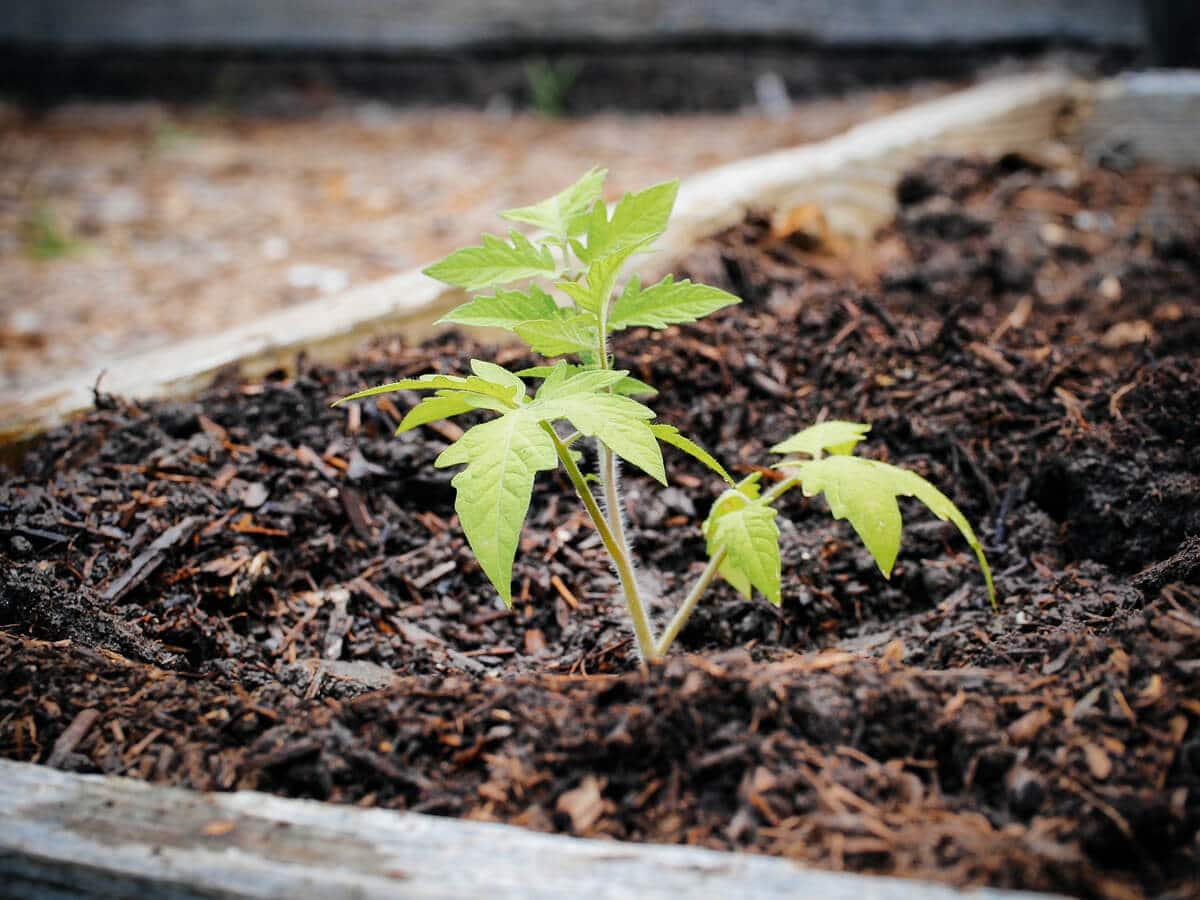
I always start with healthy plants about a foot tall, whether it’s a foot tall in a 4-inch pot or a foot tall in a 1-gallon pot.
This tomato seedling spent a week outside getting hardened off, and looks primed for the garden.
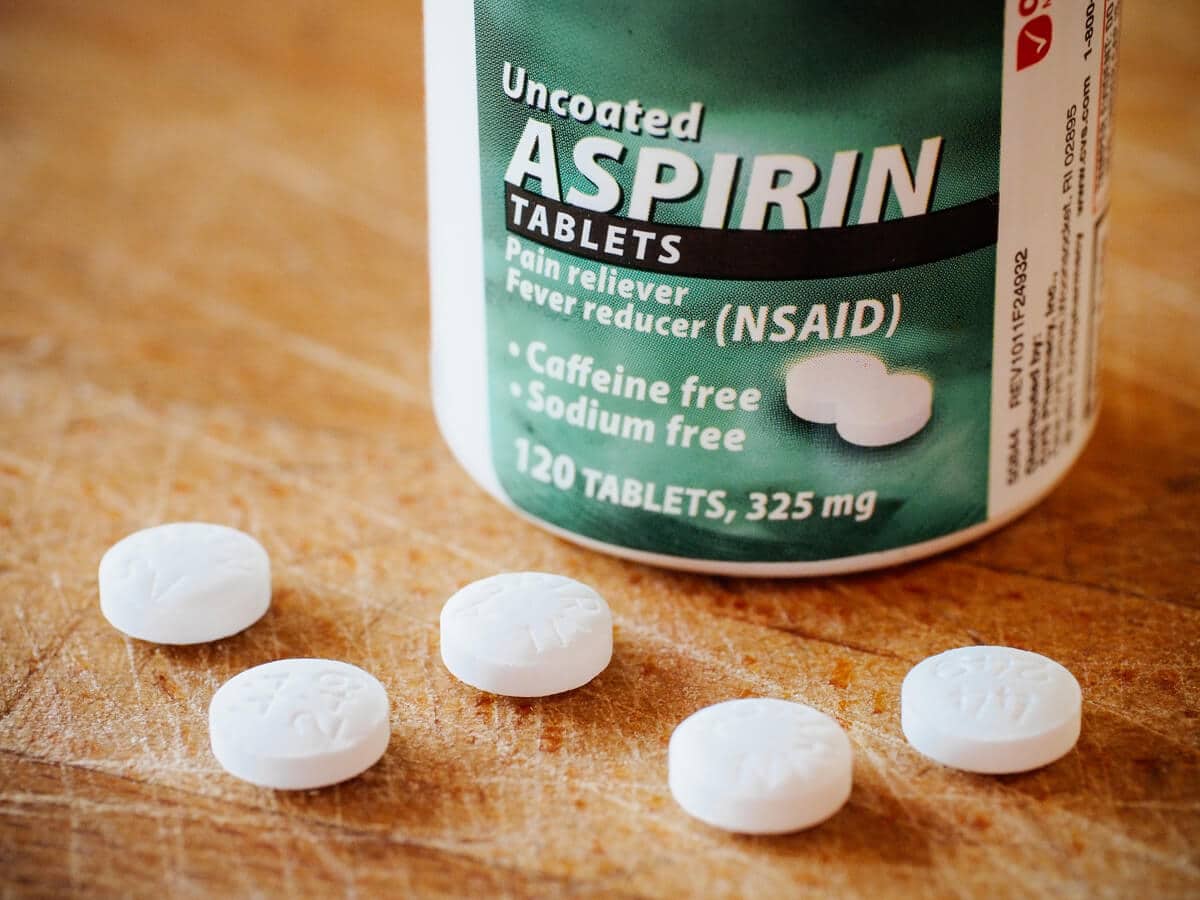
A couple of days before I transplant, I shower my tomato plants with aspirin spray to prepare them for the move.
Aspirin (the same stuff you can find at the pharmacy) contains salicylic acid, a chemical compound that’s naturally present in most plants.
Studies have found that in a tomato plant, salicylic acid (a plant hormone) is produced at high levels in response to a microbial attack on the plant.
Oftentimes, this response happens too late in the natural cycle. But since we know salicylic acid triggers the plant’s defense system, we can give our tomato seedlings a little immunity boost before they go in the garden and have to face all kinds of microbes, good and bad.
To make a foliar spray, dissolve a regular-strength aspirin tablet (325 mg) in a gallon-size sprayer or watering can.
Try to find uncoated aspirin as it dissolves easier; no need for brand names, I looked for the cheapest aspirin at my local drugstore and found a generic version on sale.
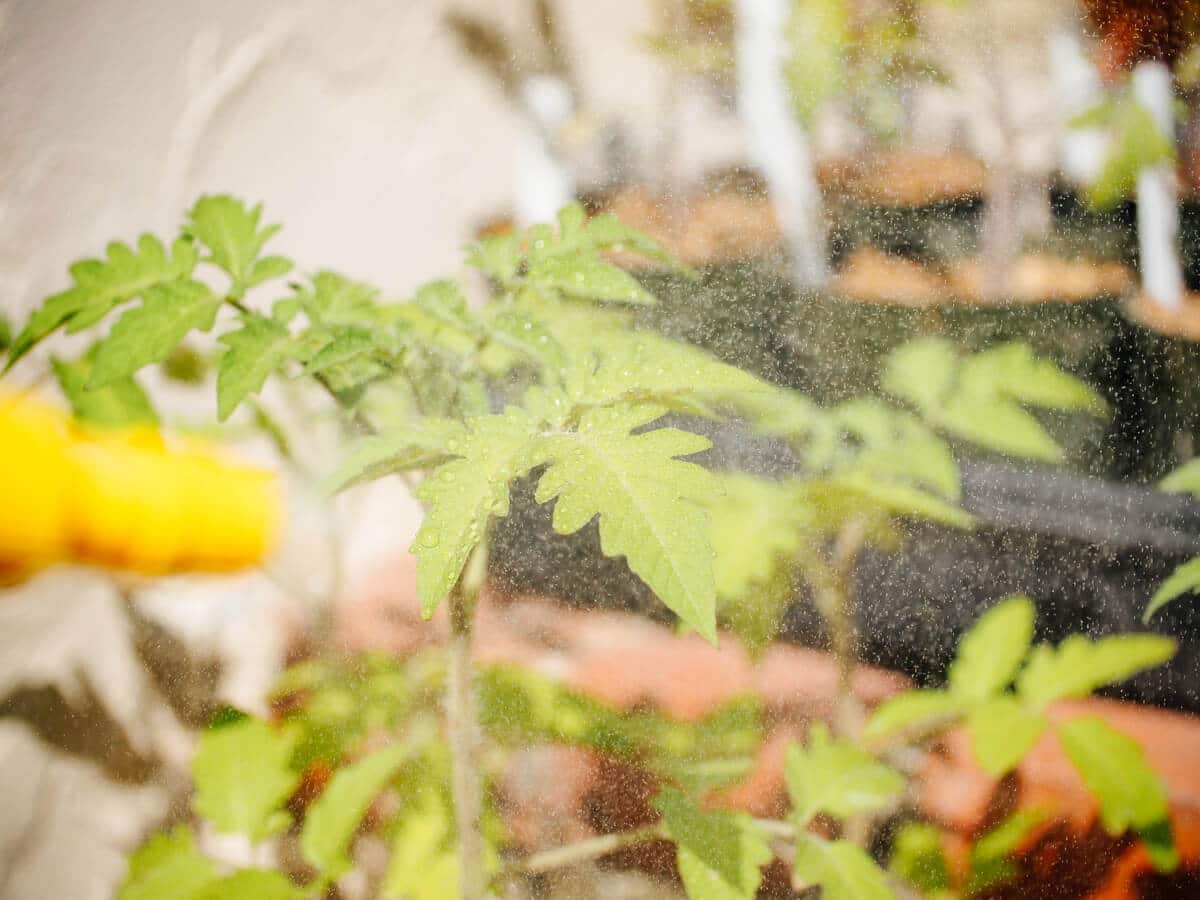
Thoroughly spray all the leaves, making sure to get the undersides.
Prepare the hole for planting
A couple days after their aspirin shower, your tomatoes are ready to go in the ground.
You want to avoid transplanting in the middle of a glaringly sunny day or a ferociously windy day, which could add undue stress to the plant.
Wait for a bit of cloud cover, or transplant in late afternoon when the sun is lower and your tomatoes have a chance to recover from transplant shock.
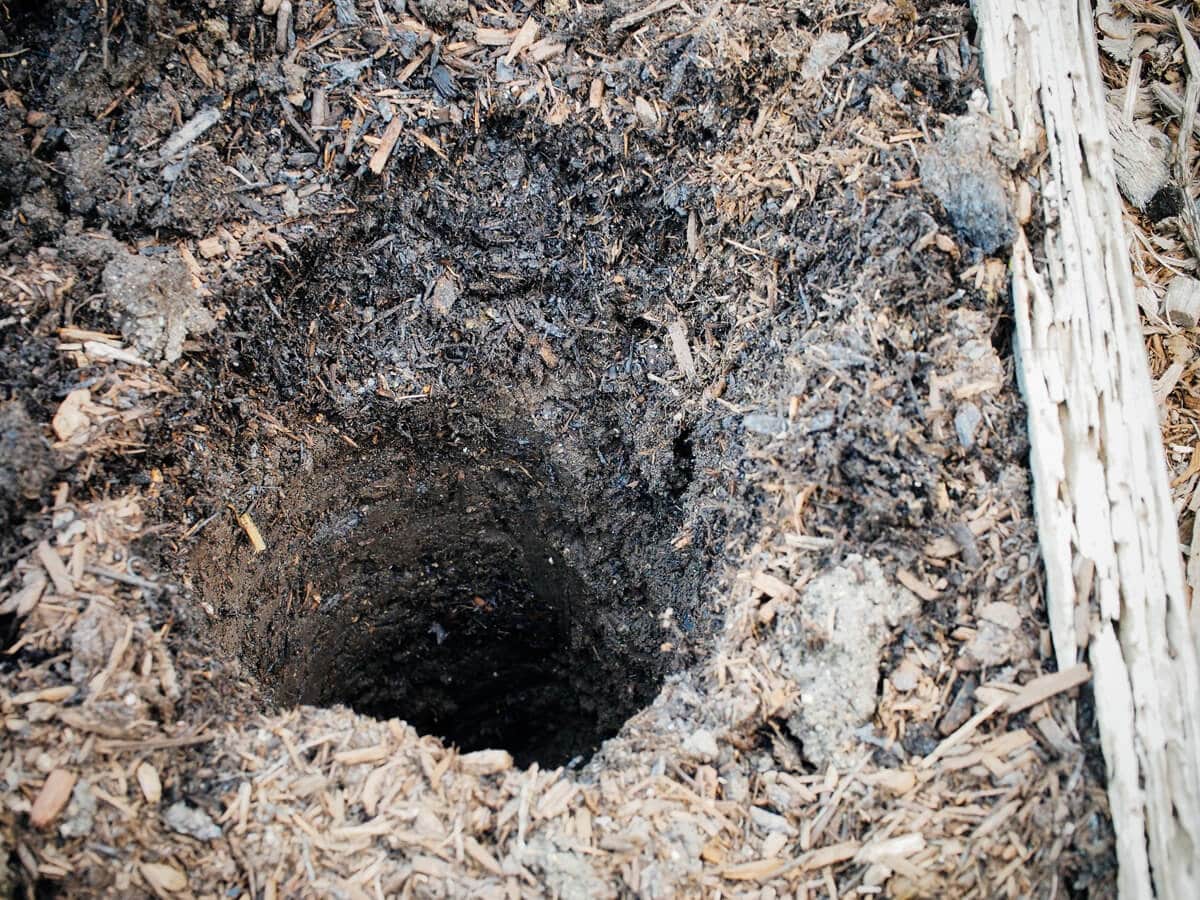
Step 1: Dig the hole.
In your freshly prepared bed, dig a 1-foot-deep hole. You want enough room to throw a bunch of soil amendments down the tomato planting hole, as well as bury the stem up to its lowest set of leaves.
If you’re transplanting a larger plant from a gallon-size container, there’s no need to dig a 2-foot-deep hole. Simply dig a 1-foot-deep trough and plant your tomato sideways in this trench.

Oh, and if you have a post hole digger, now is a good time to break it out as it makes the deep-hole-digging much easier… or at least, my husband made it look easy, after I’d painstakingly dug the first five holes with a shovel.
But his post hole digger holes? Perfect, every time.

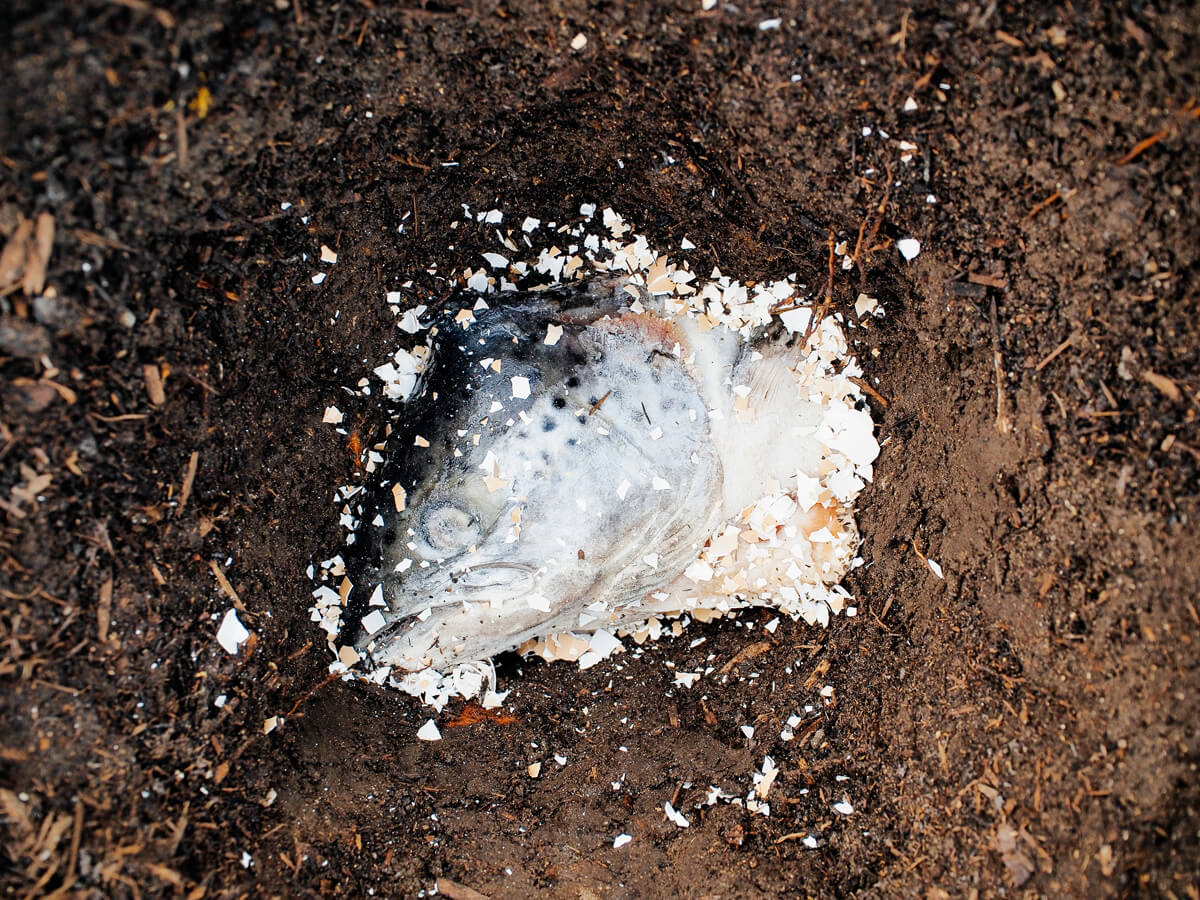
Step 2: Add your fish head.
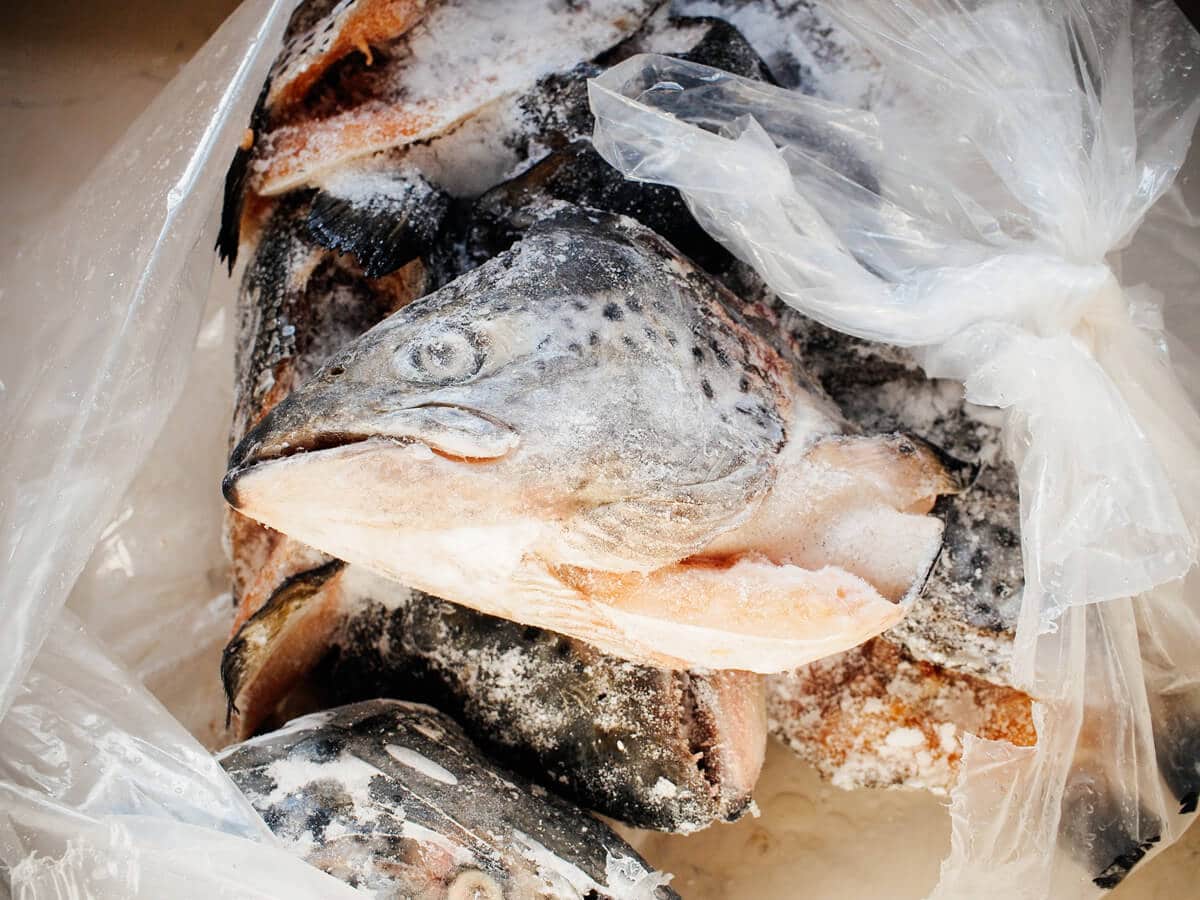
First down the hole, and our secret ingredient when planting tomatoes, is a fish head.
Yes, a raw fish head! (Fresh or frozen works equally well.)
I used to get mine from the local fish market for 90 cents a pound, but now I try to save and freeze the heads whenever I procure whole fish.
If you’re resourceful, you might even find them for free. Call around to restaurants and supermarkets, or make friends with fishermen. I use pretty hefty heads that weigh about a pound each.
So why would I throw a fish head down the hole?
Growing up in a seafood-loving household, I remember watching my parents bury all kinds of seafood (fish heads included) in the garden, and growing some pretty remarkable things for living in the arid landscape of Southern Nevada.
And maybe you’ve heard tales of people burying fish heads under their rosebushes or between rows of crops to fertilize their soil.
Fish heads are not merely folklore in the garden. They’ve been used as natural fertilizer for centuries all over the world, and in fact, the American Indian Squanto taught the Pilgrims how to sow seeds with a small fish.
Raw fish decays quickly in the ground, releasing nitrogen, phosphorus, calcium, and trace minerals to roots. And as we know, tomatoes especially love phosphorus and calcium!
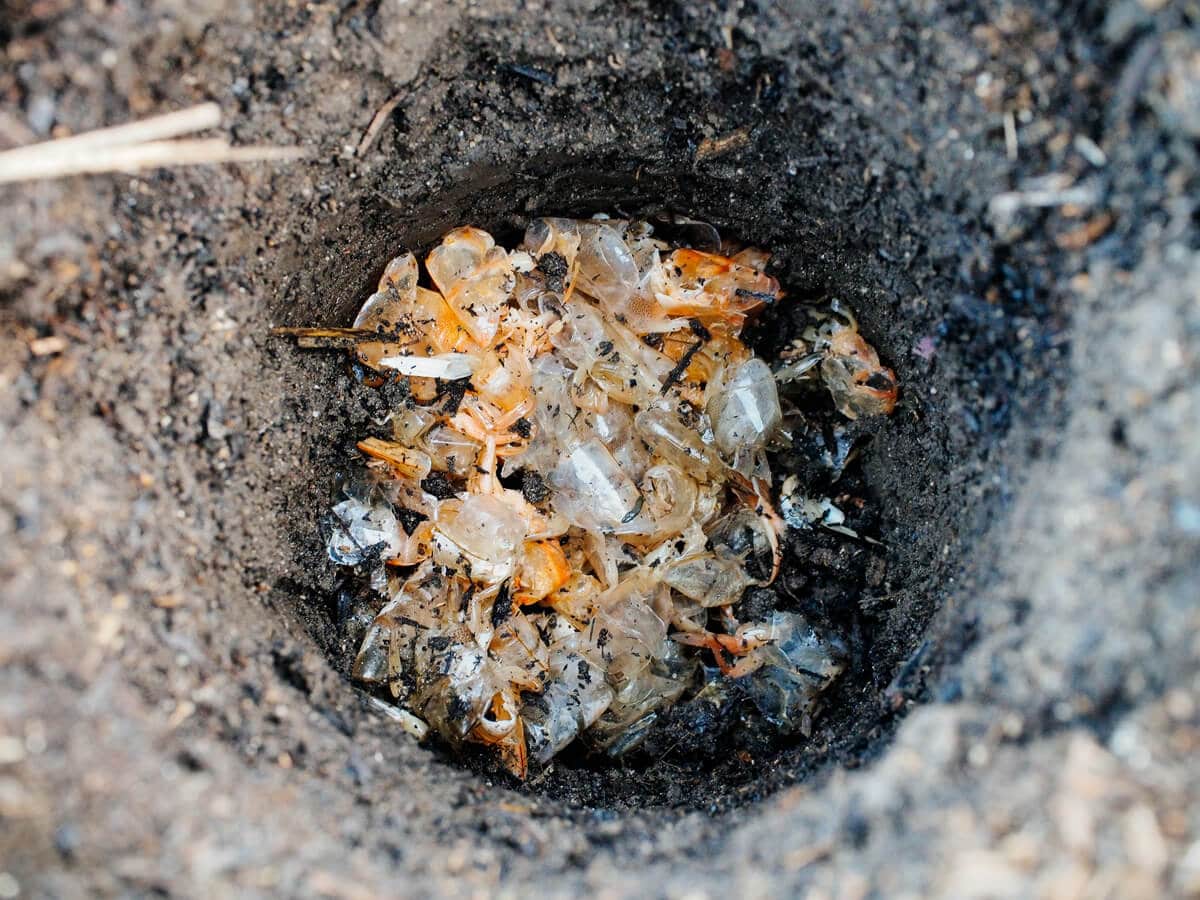
But you don’t have to limit yourself solely to fish heads. Fish guts, fish bones, and shrimp shells all work well as fertilizer, as do whole carcasses from large salmon (eat the fillets but leave the heads and excess meat that you can’t scrape off).
If, heaven forbid, you find your pet fish floating belly up in your aquarium one day, don’t flush it down the toilet. Bury the dead fish in your garden to fertilize your tomatoes and other plants!
Use whatever is cheap or free, I say.
Buried a foot deep, fish are not likely to be dug up by critters—and I have entire families of raccoons patrolling my property every night. (Personally, I think it’s too much work for them when they have a veritable buffet of trash cans lined up on the street.)
Step 3: Continue adding amendments to the planting hole.
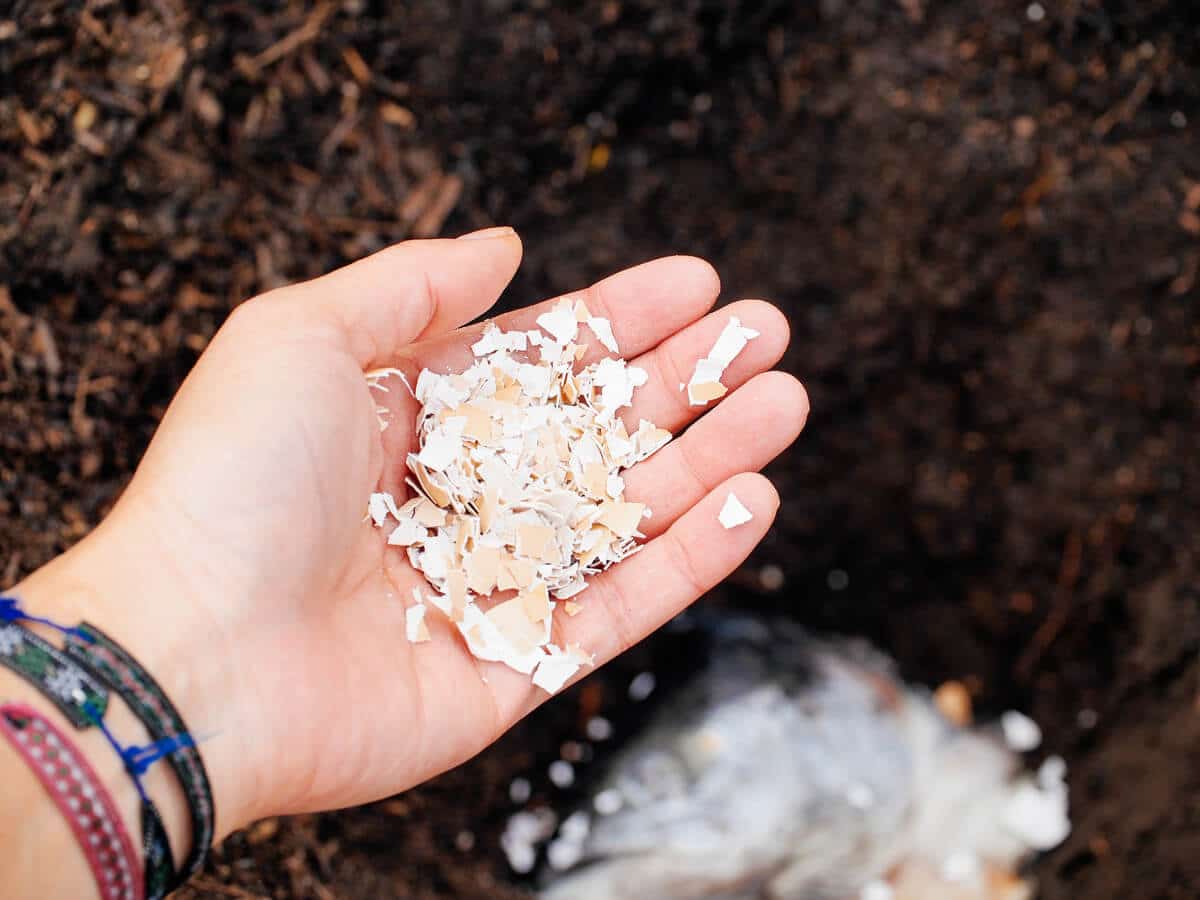
Next to go down the hole are two aspirin tabs (for a shot of immunity) and a handful of crushed eggshells (for a calcium boost).
It should be noted that the eggshells won’t benefit your plants this season, as they take a while to break down into usable calcium—but they will benefit your plants when your crops rotate back to the same bed in a couple years (assuming you use a regular crop rotation schedule, which every gardener should as a best practice).
So why add eggshells now? Honestly, I just make it a habit to add a (free) calcium source when I’m already amending the soil in spring (as tomatoes are always the first major summer crop to be transplanted).
Then, I add about a half-cup of fertilizer specially formulated for tomatoes or vegetables (like this one) and about a quarter-cup of bone meal, which is a good organic source of phosphorus and calcium.
No measuring cups necessary, I just eyeball everything in my trowel.
I cover these amendments with a couple inches of soil, then water them in.
Step 4: Bury the tomato plant.
Before your tomato plant goes in, pinch off the lowest two or three sets of leaves on the stem.
Gently loosen the root ball with your hands and lower the plant down the hole. The soil line should be right at the last set of leaves; the rest of the stem gets buried, as new roots will grow from any part of the stem below ground. (I talked more about adventitious roots in my original post on repotting tomatoes.)
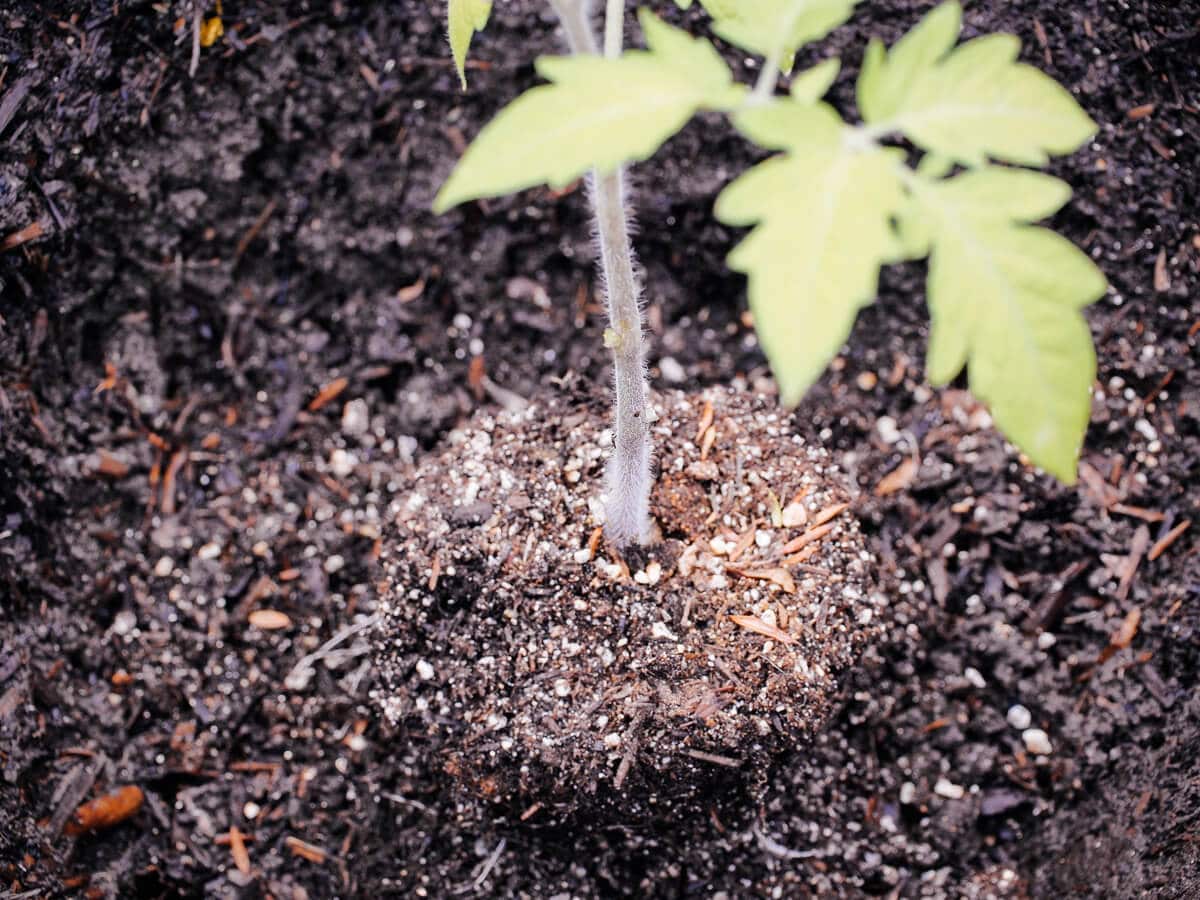
Backfill the hole with soil (avoid tamping it down vigorously with your hands or trowel, as it will settle naturally) and create a small well around the plant.
Water your plant deeply (don’t be stingy!)
Finally, water your tomato plant deeply and thoroughly.
You want the water to reach the very bottom of the roots, which are now 8 inches below the surface. I use upwards of a gallon of water per plant, letting the water fully drain into the soil between each soak.
After that initial watering, your plants will only need a deep watering once or twice a week, depending on your climate. A moisture meter like this one is a good, cheap investment to make sure you aren’t underwatering or overwatering.
I generally water tomatoes when the first 3 to 4 inches of soil feels dry to the touch; remember, their roots are waaaay down there, especially as the season goes on.
Mulch, stake, and fertilize your plants as they grow
If you’re transplanting more than one tomato plant, space them at least 2 feet apart so they have plenty of air flow between the foliage.
Good to know: You can maximize your garden harvests with this biointensive planting method (chart included)
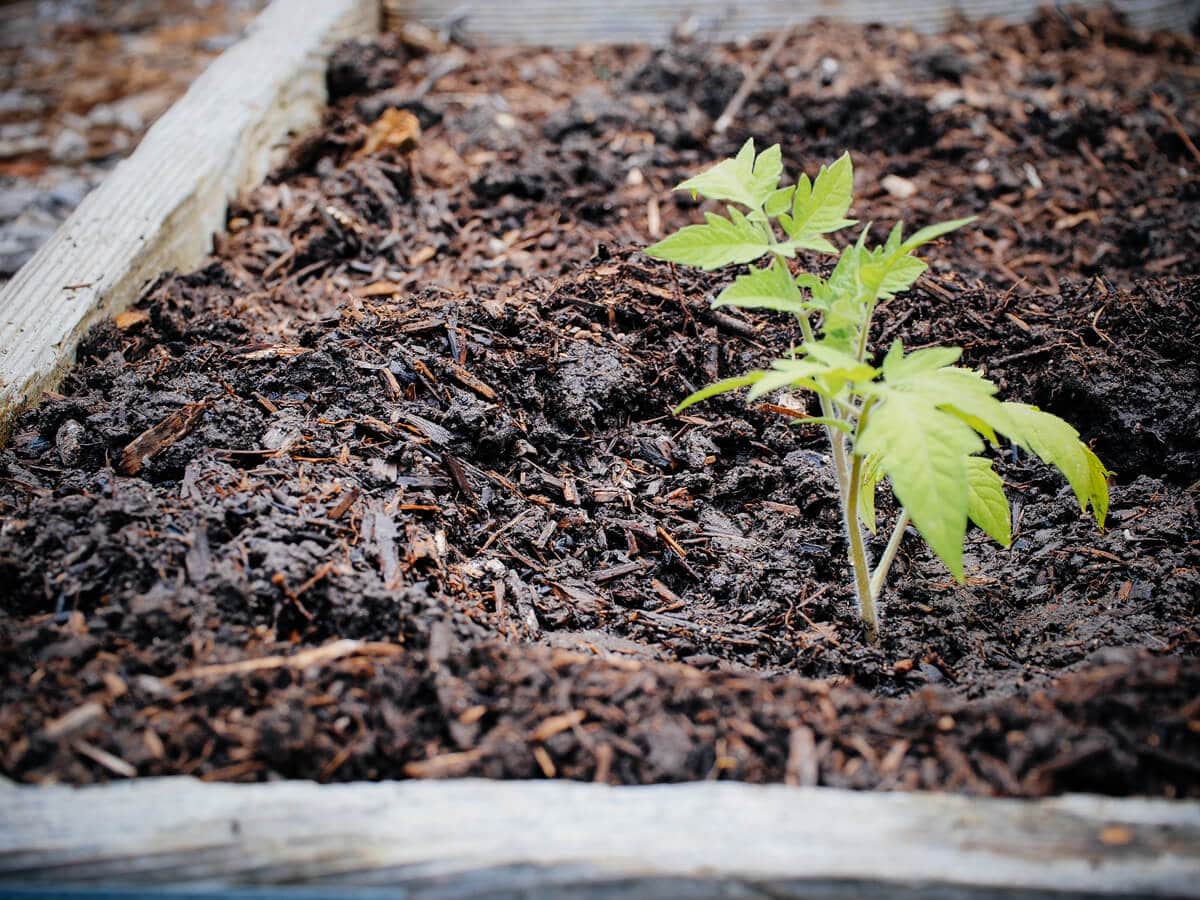
I usually wait until my plants are at least a foot tall (and the leaves are further from the soil) before I mulch the bed with straw, pine straw, shredded leaves, or sheep wool. (Any of these organic mulches are great options to use in a vegetable garden.) Mulch holds in moisture, and any dampness on or near the leaves can lead to disease, especially on a susceptible young plant.
For staking options, I personally like the Florida weave method if I’m growing rows of tomato plants, but plenty of caging options exist.
If you plan to grow tomatoes year after year, consider investing in sturdy square cages, and not the cheap, flimsy metal ones that look like upside-down cones.
You should stake your plants sooner than later, before the roots have a chance to sprawl and you risk damaging and disturbing them.
Feed your plants throughout the season with your preferred fertilizer. I alternate between tomato fertilizer and fish fertilizer, and always see accelerated growth with loads of blossoms.
Come summer, those once-little seedlings will turn into thick, verdant vines laden with luscious tomatoes!
Turn them into easy homemade tomato sauce (with the skins on!) or make oven-dried tomatoes with your harvest. At the end of the season, any immature fruits left on the vines can go into a batch of pickled green tomatoes or green tomato salsa verde.
What can I use if I don’t have a fish head?
I get it, not everyone has access to (or wants to deal with) fish heads. You definitely have an alternative here: fish meal. The nutrient-rich powdered fertilizer is made from dried ground fish and fish waste, and is a great way to get all the benefits of fish heads without actually handling the flesh (especially if you’re growing in containers).
You can see fish meal in action in my detailed guide to growing tomatoes in pots.
Where to buy
Tools and supplies from this article
This post updated from an article that originally appeared on March 31, 2014.
More tomato growing posts to explore:
- Grow Tomatoes Like a Boss With These 10 Easy Tips
- How to Grow Tomatoes in Pots—Even Without a Garden
- How to Best Fertilize Tomatoes for the Ultimate Bumper Crop
- How to Repot Tomato Seedlings for Bigger and Better Plants
- Why and How to Transplant Tomatoes (a Second Time)
- Planting Tomatoes Sideways: How Growing in a Trench Results In Bigger Healthier Plants
- Florida Weave: A Better Way to Trellis Tomatoes
- Conquer Blossom End Rot and Save the Harvest
- Can You Eat Tomato Leaves? The Answer Will Surprise You
- Why Tomato Leaves Have That Unique Smell
- The Power of Fermenting and Saving Tomato Seeds
- 4 Fastest Ways to Ripen Tomatoes in the Garden and Beat the First Frost
- The 30 Best Tasting Heirloom Tomato Varieties (By Color!)
- 83 Fast-Growing Short-Season Tomato Varieties for Cold Climates
- The Best Time to Pick Tomatoes for Peak Quality (It’s Not What You Think!)


thank you for your expertise in tomatoe care and planting.
Nihai Dönemin En Fazla Gözde Bahis Platformu: Casibom
Casino oyunlarını sevenlerin artık duymuş olduğu Casibom, son dönemde adından çoğunlukla söz ettiren bir bahis ve kumarhane platformu haline geldi. Ülkemizdeki en başarılı kumarhane web sitelerinden biri olarak tanınan Casibom’un haftalık olarak değişen açılış adresi, alanında oldukça yenilikçi olmasına rağmen güvenilir ve kar getiren bir platform olarak öne çıkıyor.
Casibom, rakiplerini geride kalarak eski kumarhane sitelerinin önüne geçmeyi başarılı oluyor. Bu sektörde uzun soluklu olmak önemli olsa da, oyuncularla iletişimde bulunmak ve onlara temasa geçmek da aynı kadar önemlidir. Bu noktada, Casibom’un her saat yardım veren gerçek zamanlı destek ekibi ile rahatlıkla iletişime ulaşılabilir olması önemli bir fayda sağlıyor.
Süratle genişleyen oyuncu kitlesi ile dikkat çekici Casibom’un gerisindeki başarılı faktörleri arasında, sadece casino ve canlı olarak casino oyunlarına sınırlı kısıtlı olmayan geniş bir hizmetler yelpazesi bulunuyor. Spor bahislerinde sunduğu geniş seçenekler ve yüksek oranlar, oyuncuları çekmeyi başarılı oluyor.
Ayrıca, hem spor bahisleri hem de casino oyunlar oyuncularına yönlendirilen sunulan yüksek yüzdeli avantajlı promosyonlar da dikkat çekiyor. Bu nedenle, Casibom hızla alanında iyi bir reklam başarısı elde ediyor ve önemli bir oyuncu kitlesi kazanıyor.
Casibom’un kazandıran bonusları ve popülerliği ile birlikte, platforma abonelik nasıl sağlanır sorusuna da atıfta bulunmak elzemdir. Casibom’a mobil cihazlarınızdan, PC’lerinizden veya tabletlerinizden tarayıcı üzerinden rahatça erişilebilir. Ayrıca, platformun mobil uyumlu olması da büyük bir artı sağlıyor, çünkü artık hemen hemen herkesin bir akıllı telefonu var ve bu telefonlar üzerinden hızlıca ulaşım sağlanabiliyor.
Hareketli cep telefonlarınızla bile yolda gerçek zamanlı tahminler alabilir ve maçları canlı olarak izleyebilirsiniz. Ayrıca, Casibom’un mobil uyumlu olması, ülkemizde kumarhane ve oyun gibi yerlerin kanuni olarak kapatılmasıyla birlikte bu tür platformlara girişin önemli bir yolunu oluşturuyor.
Casibom’un itimat edilir bir kumarhane platformu olması da önemlidir bir artı sunuyor. Belgeli bir platform olan Casibom, duraksız bir şekilde eğlence ve kar elde etme imkanı getirir.
Casibom’a üye olmak da son derece basittir. Herhangi bir belge gereksinimi olmadan ve bedel ödemeden web sitesine kolaylıkla üye olabilirsiniz. Ayrıca, web sitesi üzerinde para yatırma ve çekme işlemleri için de çok sayıda farklı yöntem mevcuttur ve herhangi bir kesim ücreti isteseniz de alınmaz.
Ancak, Casibom’un güncel giriş adresini takip etmek de önemlidir. Çünkü gerçek zamanlı iddia ve oyun web siteleri popüler olduğu için yalancı platformlar ve dolandırıcılar da görünmektedir. Bu nedenle, Casibom’un sosyal medya hesaplarını ve güncel giriş adresini düzenli aralıklarla kontrol etmek gereklidir.
Sonuç olarak, Casibom hem emin hem de kazandıran bir casino web sitesi olarak dikkat çekiyor. Yüksek bonusları, geniş oyun seçenekleri ve kullanıcı dostu mobil uygulaması ile Casibom, kumarhane sevenler için ideal bir platform sağlar.
Portal Judi: Portal Togel Daring Terluas dan Terpercaya
Portal Judi telah menjadi salah satu platform judi daring terluas dan terpercaya di Indonesia. Dengan beragam pasaran yang disediakan dari Semar Group, Portal Judi menawarkan pengalaman main togel yang tak tertandingi kepada para penggemar judi daring.
Pasaran Terbaik dan Terlengkap
Dengan total 56 market, Situs Judi menampilkan berbagai opsi terbaik dari market togel di seluruh dunia. Mulai dari market klasik seperti Sydney, Singapore, dan Hongkong hingga pasaran eksotis seperti Thailand, Germany, dan Texas Day, setiap pemain dapat menemukan pasaran favorit mereka dengan mudah.
Cara Main yang Mudah
Situs Judi menyediakan panduan cara bermain yang sederhana dipahami bagi para pemula maupun penggemar togel berpengalaman. Dari langkah-langkah pendaftaran hingga penarikan kemenangan, semua informasi tersedia dengan jelas di situs Portal Judi.
Ringkasan Terkini dan Info Terkini
Pemain dapat mengakses hasil terakhir dari setiap pasaran secara real-time di Situs Judi. Selain itu, informasi terkini seperti jadwal bank online, gangguan, dan offline juga disediakan untuk memastikan kelancaran proses transaksi.
Bermacam-macam Jenis Game
Selain togel, Situs Judi juga menawarkan bervariasi jenis permainan kasino dan judi lainnya. Dari bingo hingga roulette, dari dragon tiger hingga baccarat, setiap pemain dapat menikmati berbagai pilihan permainan yang menarik dan menghibur.
Security dan Kepuasan Klien Dijamin
Situs Judi mengutamakan keamanan dan kepuasan pelanggan. Dengan sistem keamanan terbaru dan layanan pelanggan yang responsif, setiap pemain dapat bermain dengan nyaman dan tenang di platform ini.
Promosi-Promosi dan Hadiah Istimewa
Situs Judi juga menawarkan bervariasi promosi dan bonus menarik bagi para pemain setia maupun yang baru bergabung. Dari bonus deposit hingga hadiah referral, setiap pemain memiliki kesempatan untuk meningkatkan kemenangan mereka dengan bonus yang ditawarkan.
Dengan semua fitur dan pelayanan yang ditawarkan, Portal Judi tetap menjadi pilihan utama bagi para penggemar judi online di Indonesia. Bergabunglah sekarang dan nikmati pengalaman bermain yang seru dan menguntungkan di Portal Judi!
Sounds like this might work for summer squash/zucchini as well. Would you recommend that?
Can I use cooked fish skin instead of raw heads?
can i use any type of fish fresh water catfish is what i have easy access to
How about an article on straw bale gardening?
Hello Linda,
I’ve heard it’s good to defoliate the tomato plants after they begin to develop fruit so one is not growing leaves, just fruit. Do you practise this method?
Thank you kindly.
Are you defoliating the ENTIRE plant? Or do you mean just removing the suckers? Leaves are necessary for growth so no, I don’t defoliate my plants during fruiting. (I typically don’t pinch the suckers either, though that’s a personal preference and also depends on your own garden conditions—sometimes it can help with airflow.)
Hi Linda,
Thank you for a very educational article!
Let me guess. Is the tomato in the first picture a Black Krim by any chance?
Kimberly
You’re welcome! And that’s a great guess – I don’t actually remember which one that was, as I tend to gravitate toward black/purple tomatoes and Black Krim is one of my favorites that I’ve grown. 🙂
Never heard of the fish heads!! Crazy. Gonna try
I used the fish this year and I’m having problems with the plants not growing and they have terrible leaf curl, did I do something wrong?
It’s hard to say because leaf curl can occur from any number of things: hot dry weather and uneven watering, rainy weather and cool temperatures, overpruning of the plant, or tomato yellow leaf curl virus. The first three should be easy to rule out or remedy, and as the season progresses the plants shouldn’t be affected too much as long as you take steps to correct the issues.
Will the aspirin spray work on other plants?
Yes!
Hi Linda, i made self irrigating containers from 55 gallon drums and was wondering if i could still add the fish below the plant? I have about 2 feet of soil in the container. Thanks for a great post!
Yes, just place the fish in the bottom of the container.
Im excited to try your way to prep my soil for Tomatoes, I read an article suggesting spraying ASA water on plants 2-3 times per month during the growing season. If I place 2 ASA in bottom of my hole, do I also need to spray with ASA water ?
I don’t think it would hurt, but I also don’t know if it would help any more. Personally, I’d just stick to putting the tabs in the hole and following up with a regular fertilizing schedule.
how to grow large tomatoes
hi LINDA i live in north las vegas and every year my tomato plants grow well to about july then they all die so i get very few tomatoes what can i do to get them through the heat of summer
I suggest giving your tomatoes afternoon shade or growing them in an east-facing bed. If you typically grow them in the ground, you can also try putting them in large pots or half-barrel planters on wheels, so you can move them throughout the day to avoid the blazing sun.
My tomato’s are turning red while they are still small. About the size of a Roma Tomato, but these are early girl. I have picked them and they were ready. I would prefer good sized tomatoes. Been growing these for years and I have never seen anything like it. Any ideas?
It’s hard for me to guess as I don’t know your growing conditions. Factors that can affect tomato size include the size of container, amount/type/quality of soil used, type of fertilizer added throughout the season, amount and frequency of water or sunlight, and quality of seeds.
Hi Linda! I live in MD and each year we start our tomato plants from seeds we save- ( all heirloom). Do you rotate your tomatoes every year since you start your own?
Yes, I usually do a 2-year rotation schedule for all my plants, unless they had disease, in which I case I use a 3-year rotation.