Here we are, a whole season after the first onion seeds were sown, and those tiny black specks have slowly grown into a bed of bulging brown (or red, or white) globes pushing their way out of the soil.
While onions can be harvested and eaten at any stage, the most satisfying part of growing onions (in particular, storage onions) is being able to pick a fresh onion from the pantry months after you’ve picked it from the ground.
Curing makes that possible.
The key to longer storage
Curing is a month-long process of drying down your onions to prep them for storage. Once properly cured, onions store for a very long time—through the fall and winter, and sometimes even spring under the right conditions.
But not all onions are created equally.
As a general rule of thumb, long-day varieties store longer than short-day varieties (the “long” in long day refers to the onion needing 14 to 16 hours of sun to develop properly), and pungent onions store longer than mild onions.
Mild onions are generally large and juicy with thick rings and papery skins that peel easily. They’re sweet enough to eat raw but they really shine as onion rings and deep-fried “bloomin’ onions.”
Unfortunately, most mild onions don’t last more than two to three months, even when cured and stored under optimal conditions. If your crop includes mild onions, you’ll want to eat those first.
Pungent onions, on the other hand, can keep as long as six months or even up to a year. They’re usually smaller in size with thinner rings and tighter skins, and are best known for making you cry when you cut them.
The sulfurous compounds that sting your eyes are the same ones that inhibit rot, so the more pungent the onion is, the longer it will store.
Onion varieties with the longest shelf life
When it comes to onions, we just have to accept that long-storing onions cannot be grown in the south.
Northern climates, however, have their pick of long-day storage onions that are bred for winter storage. They include white, yellow, and red globe onions with mild to moderate pungency.
Short-day and intermediate types are mostly sweet onions that store for one to three months on average.
The exceptions are Red Creole, a short-day red globe that keeps exceptionally well, and Texas Legend, a short-day yellow globe that can sometimes last up to four months.
In fact, Red Creole was my favorite onion to grow when I lived in Southern California because I could count on it to last through Christmas!
| Cultivar | Shelf Life in Storage |
|---|---|
| Red Wethersfield | 12+ months |
| Copra | 10 to 12 months |
| Stuttgarter | 10 to 12 months |
| Redwing | 8 to 10 months |
| Red Zeppelin | 6 to 8 months |
| Red Creole (short day) | 6 to 7 months |
| Sterling | 6 months |
| Blush | 5 to 6 months |
| Highlander | 4 to 5 months |
| Ringmaster | 4 months |
| Yellow Spanish | 4 months |
| Red River | 3 to 5 months |
| Texas Legend (short day) | 3 to 4 months |
How long do onions take to grow?
In general, onions are ready for harvest in 100 to 150 days from seed. (This timing is indicated on your particular seed packet’s “days to maturity” label.) If you planted onion sets, expect to harvest in 60 to 80 days.
(Onion sets are tiny onions that can be transplanted—generally these are a better choice for people with short growing seasons, and they have a higher success rate in spring as they can withstand light freezes.)
For longer storage, it starts with a proper harvest
1. Wait for at least half the plants to fall over.
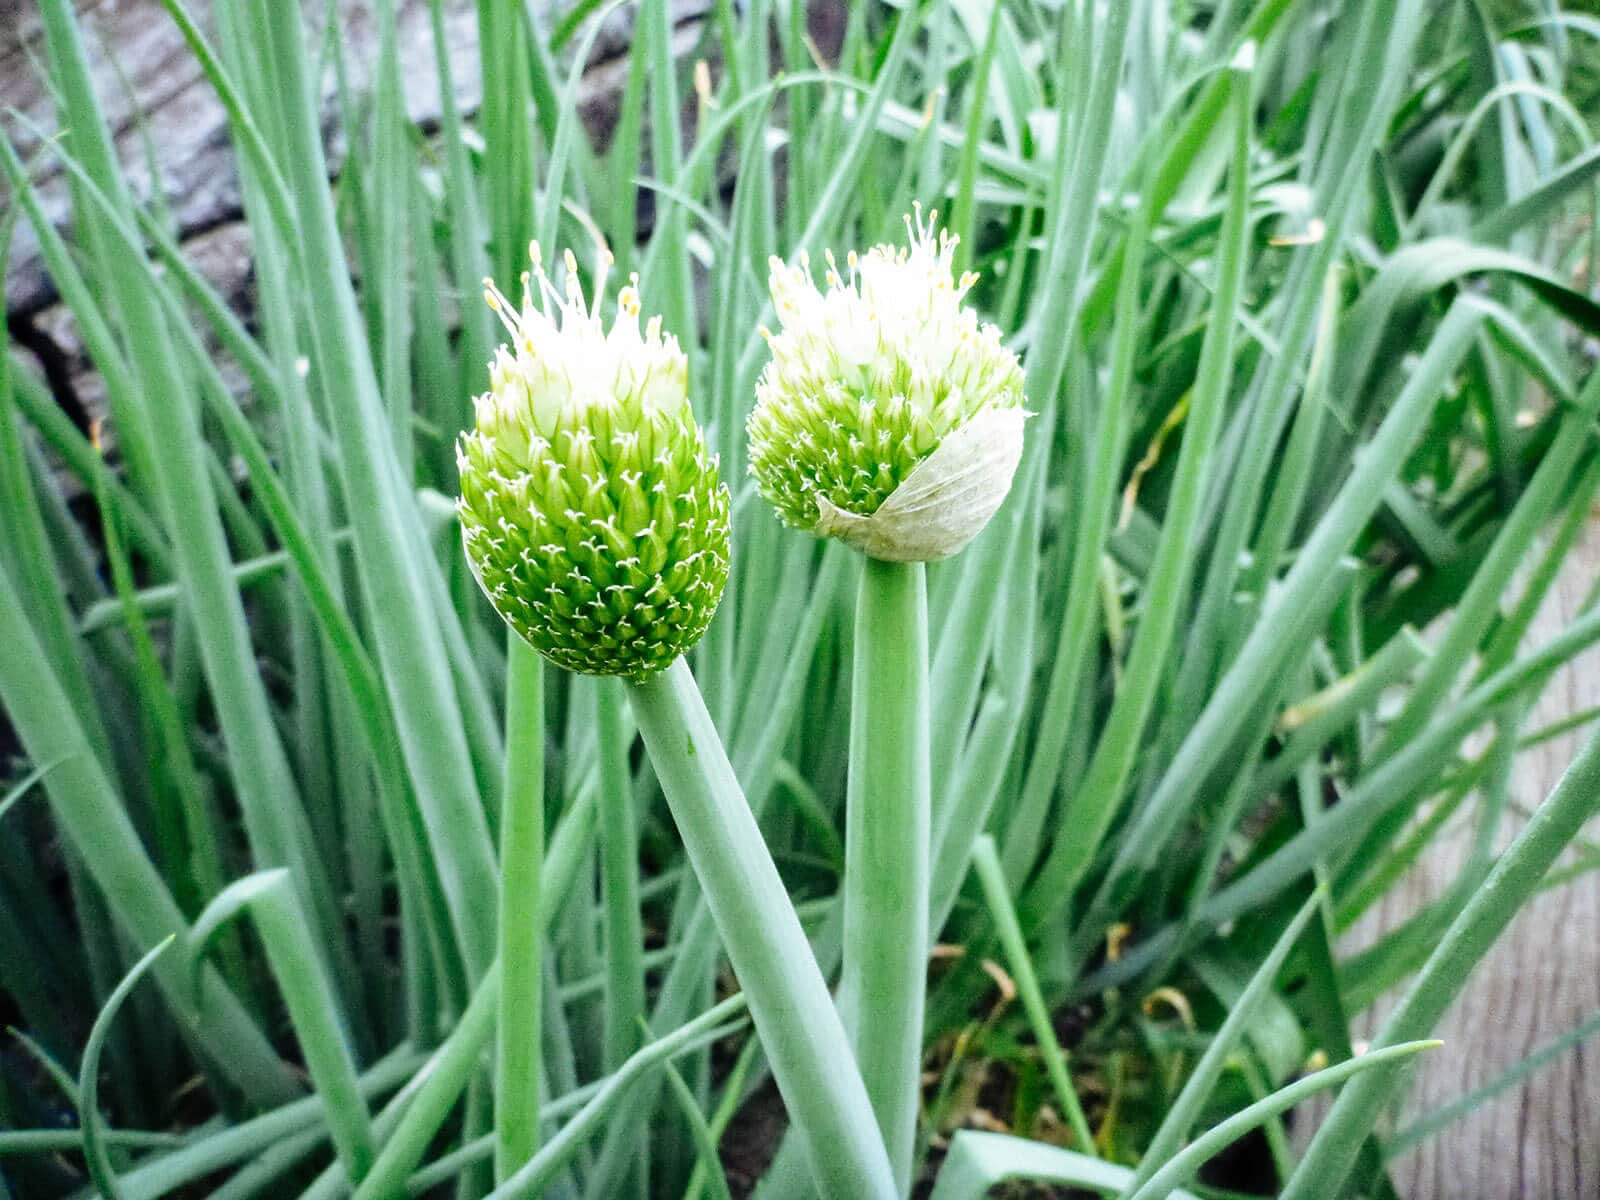
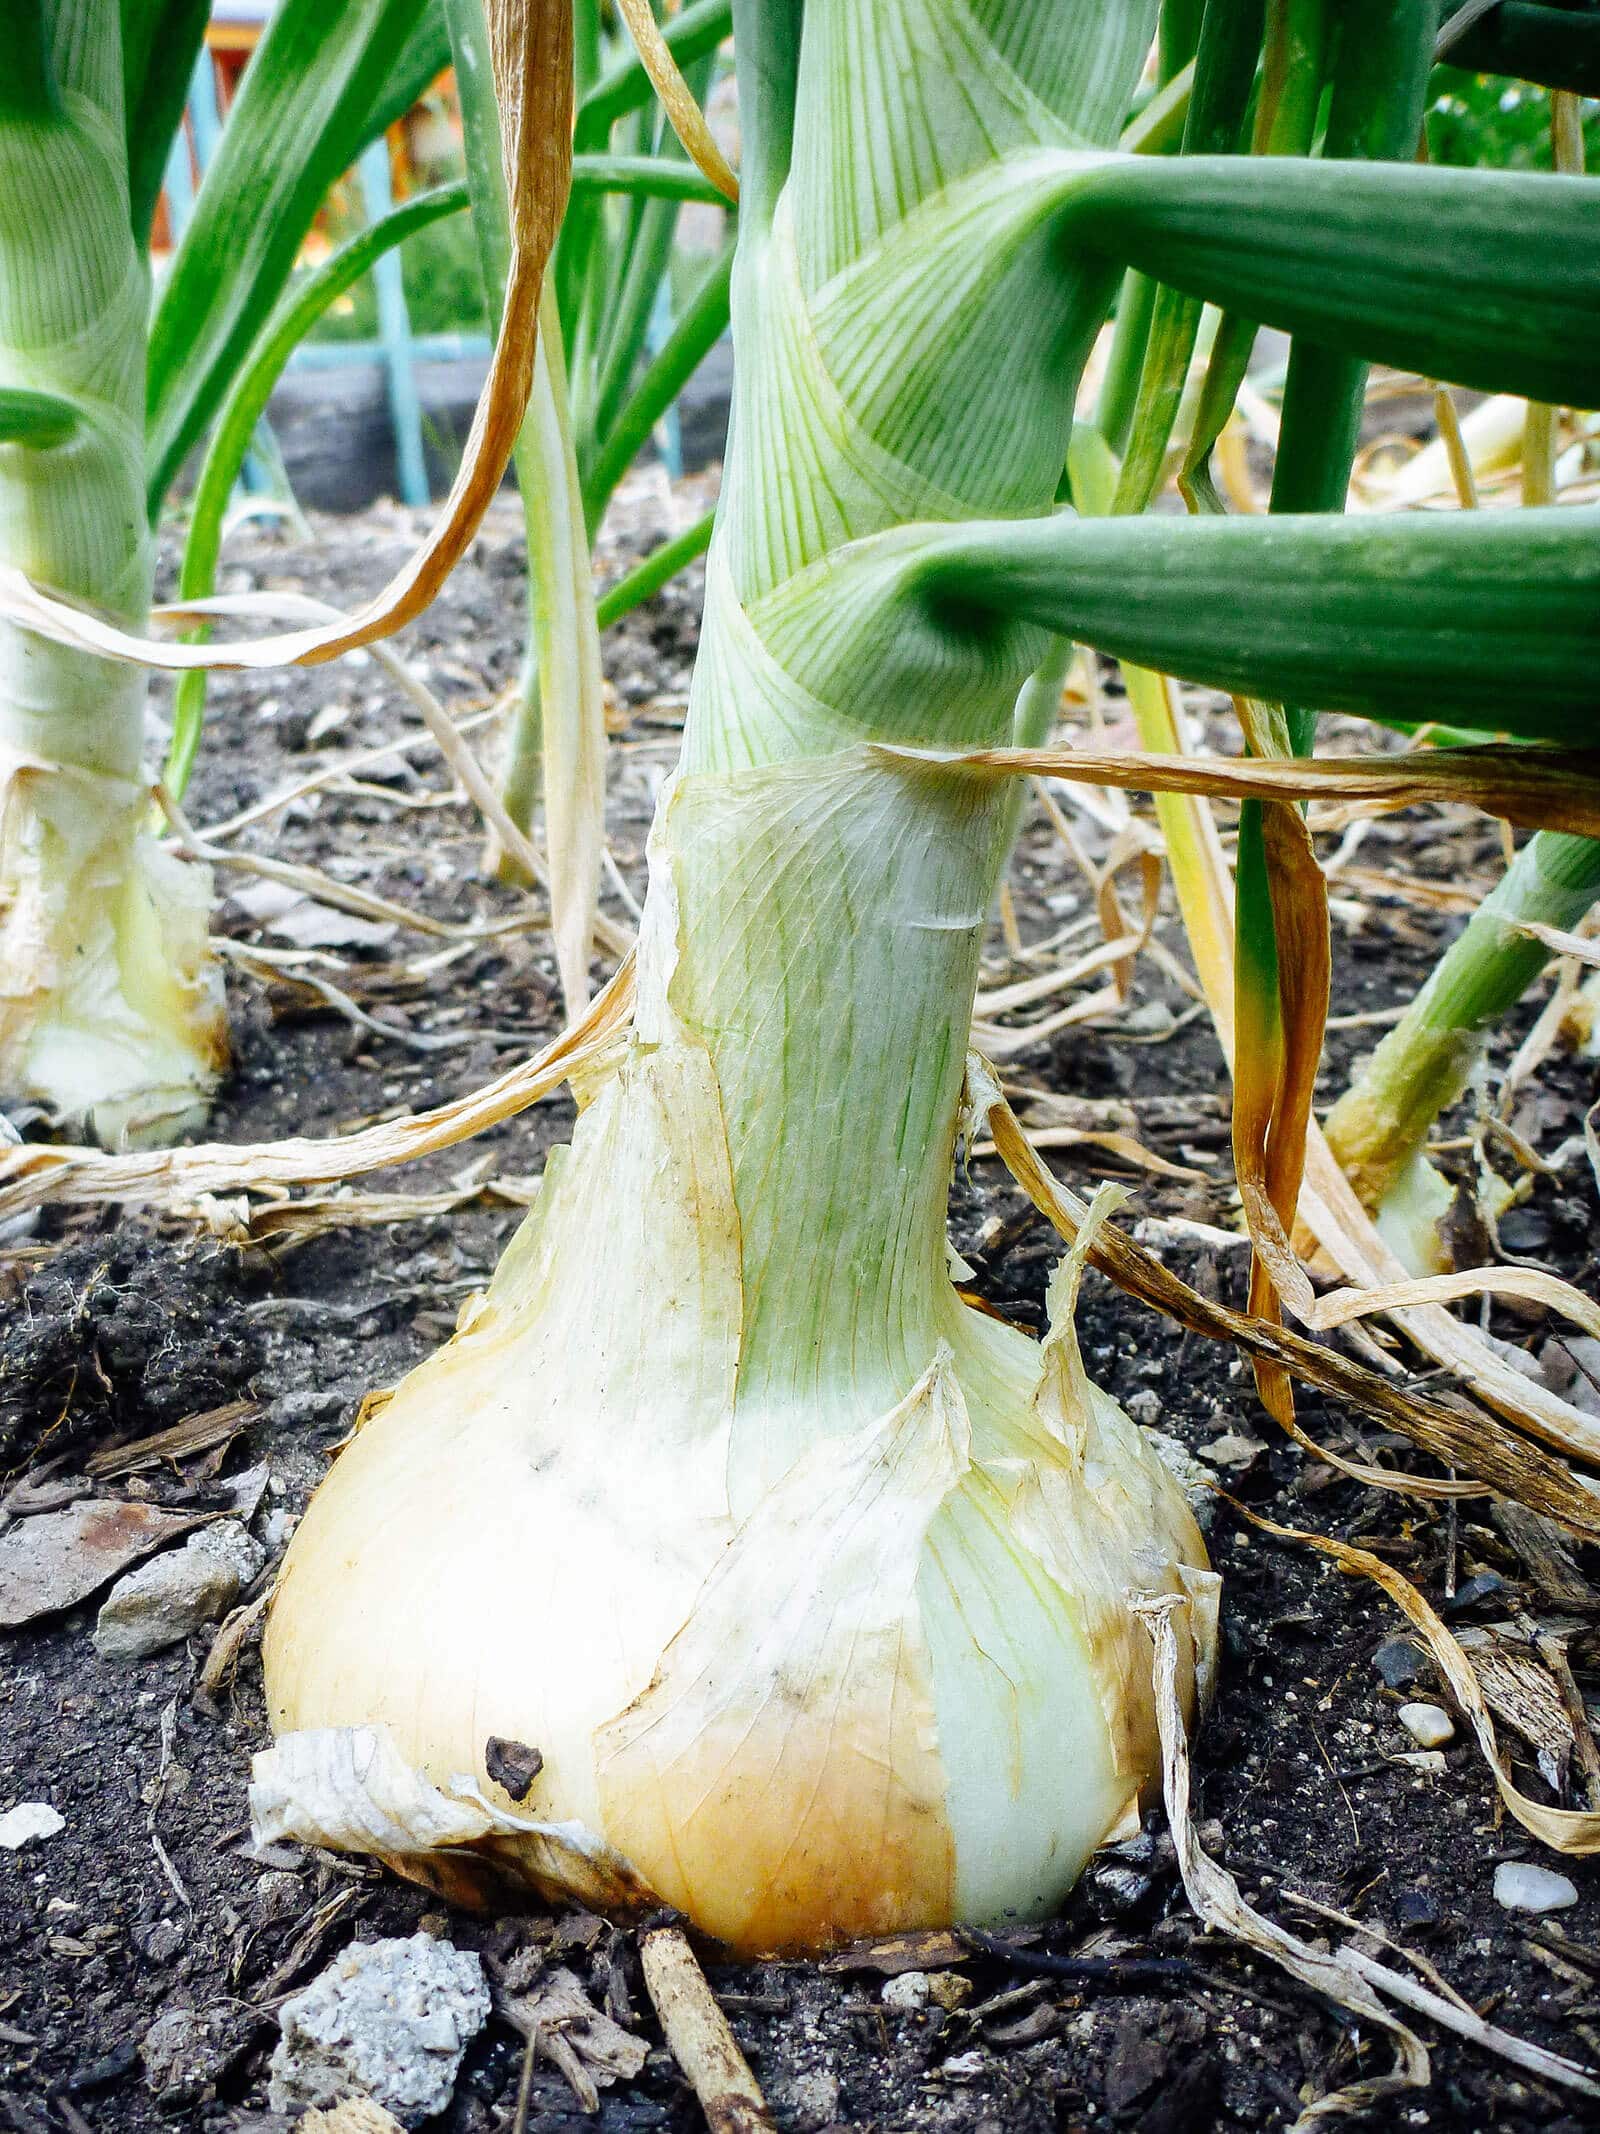
When your onions are vigorously growing through the longer days of spring and summer, their stems are lush and happy and green. You might even have a few onion flowers topping those stems.
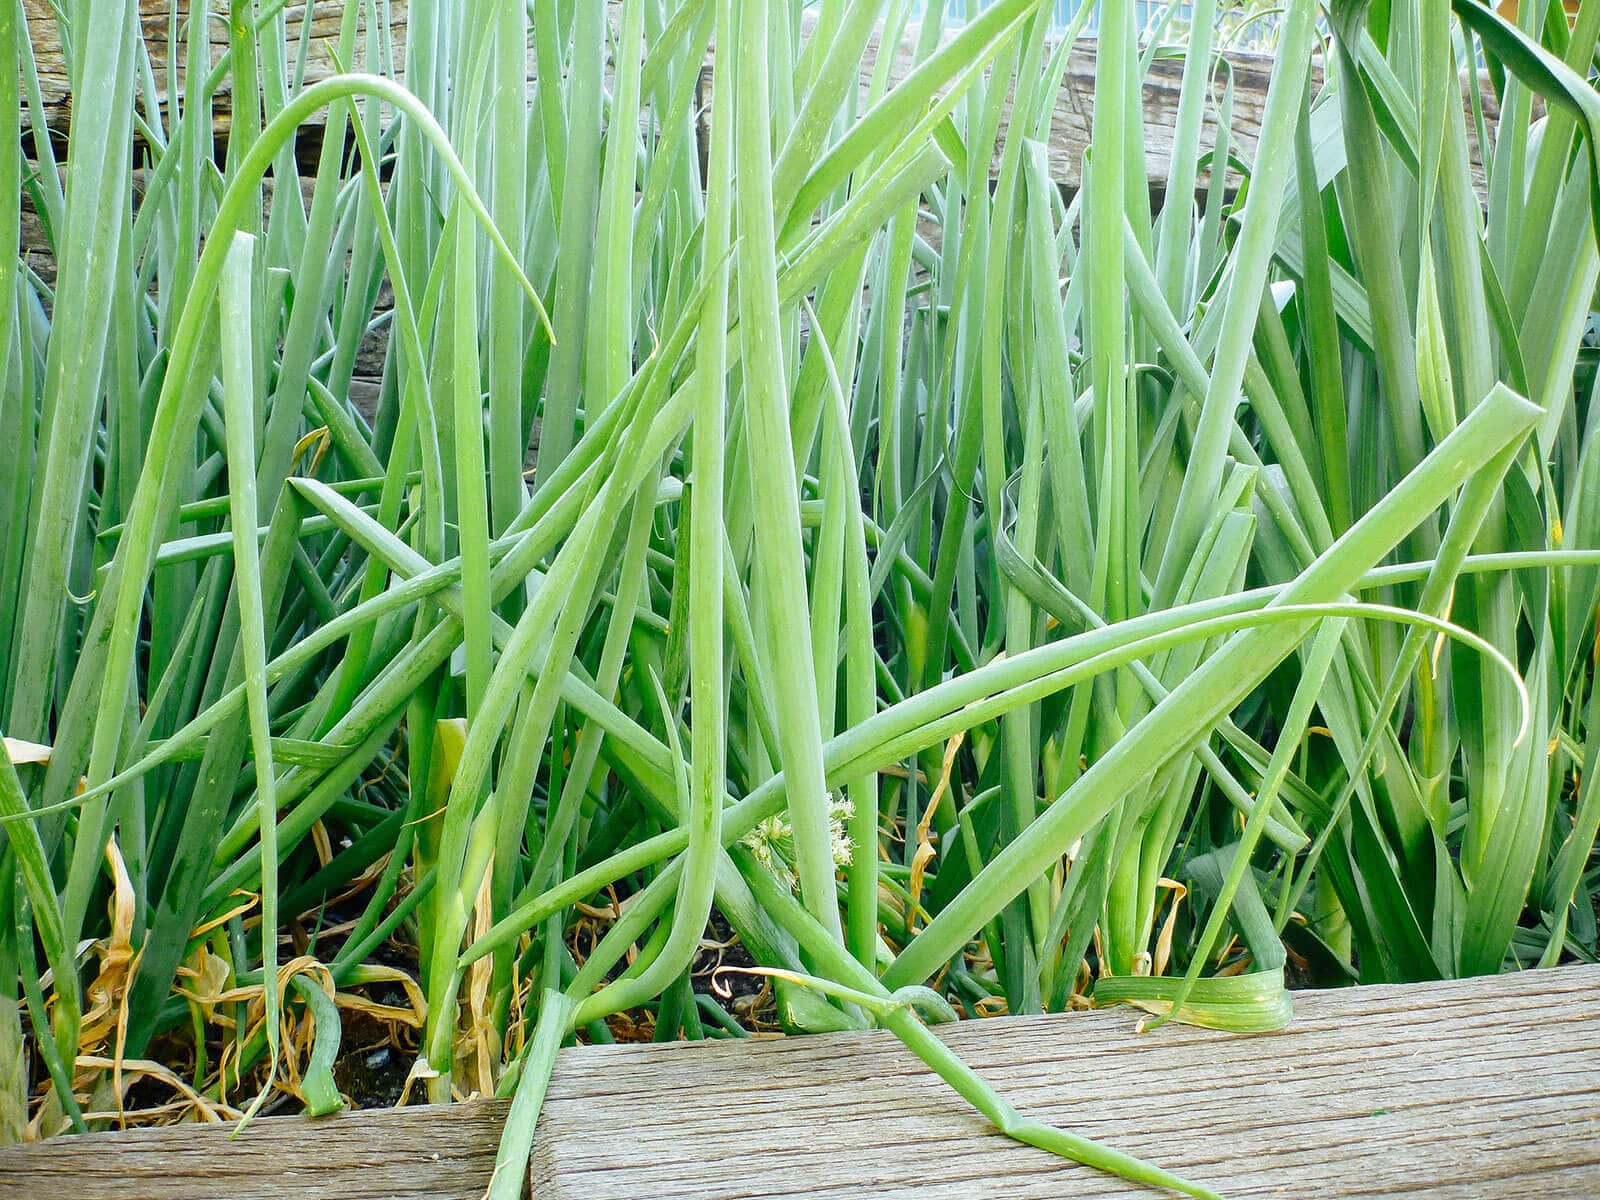
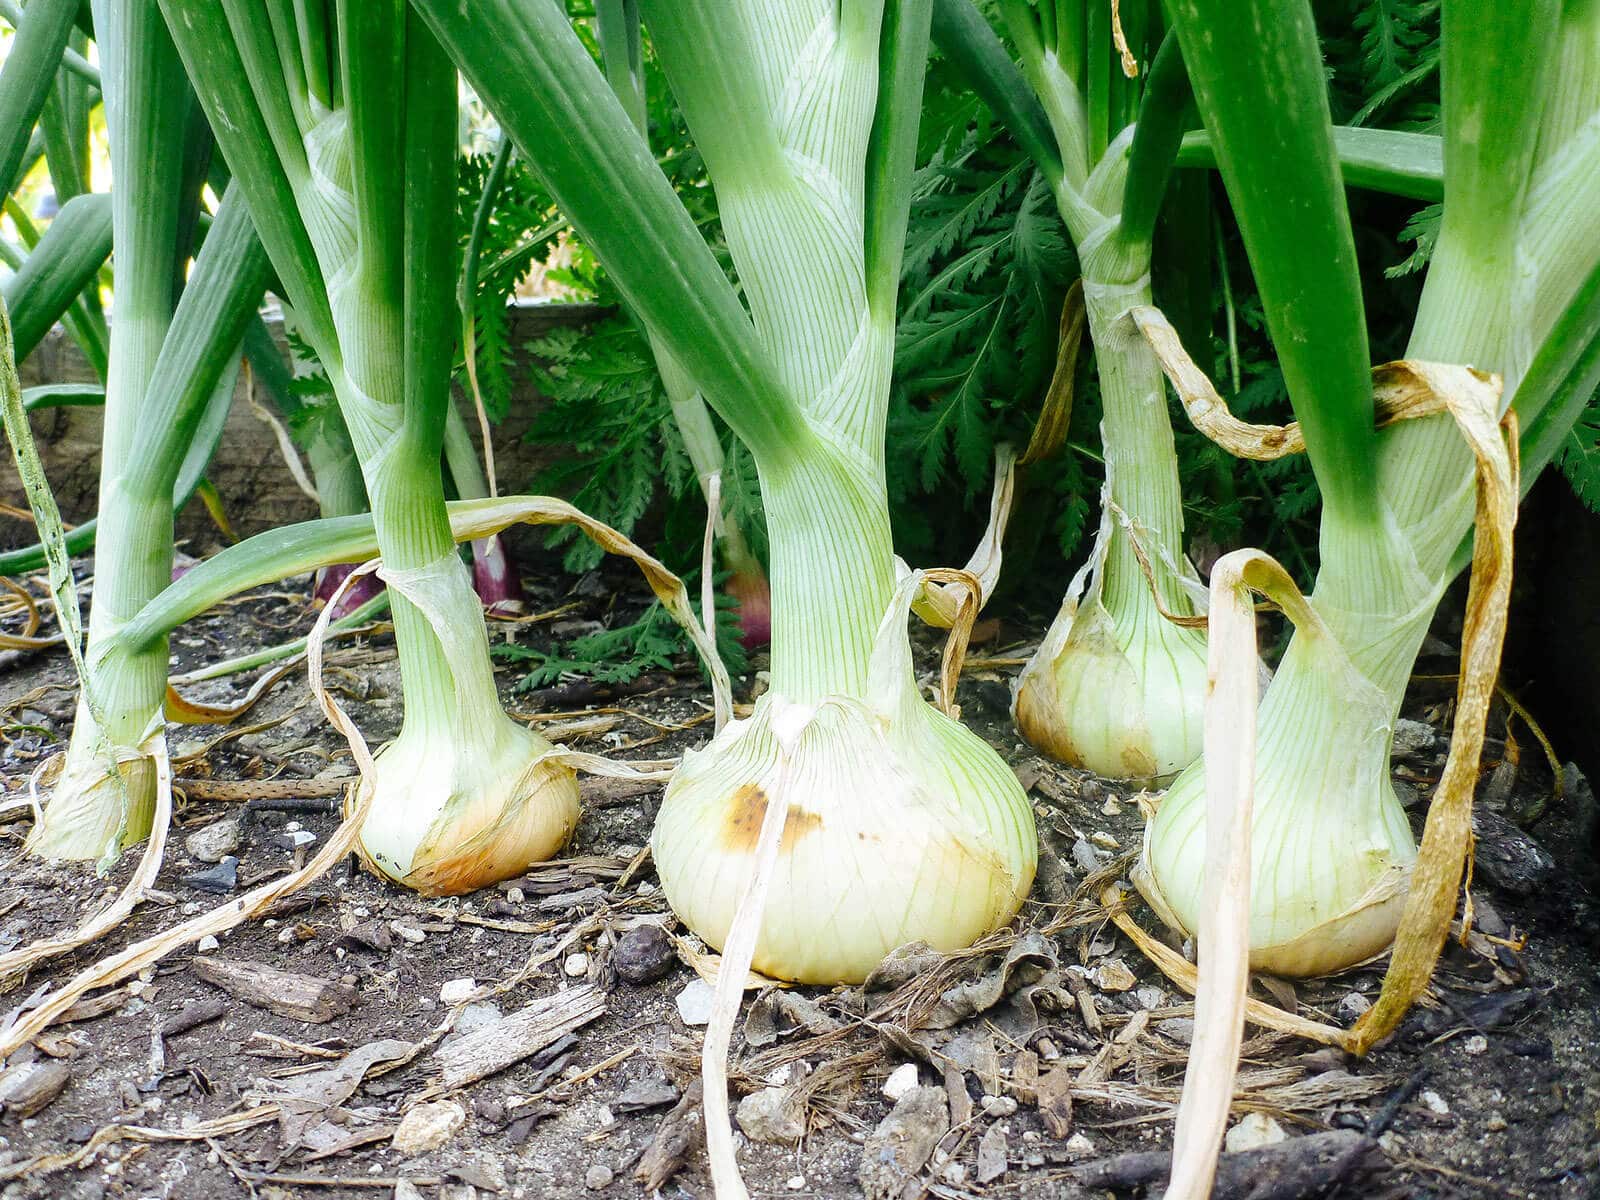
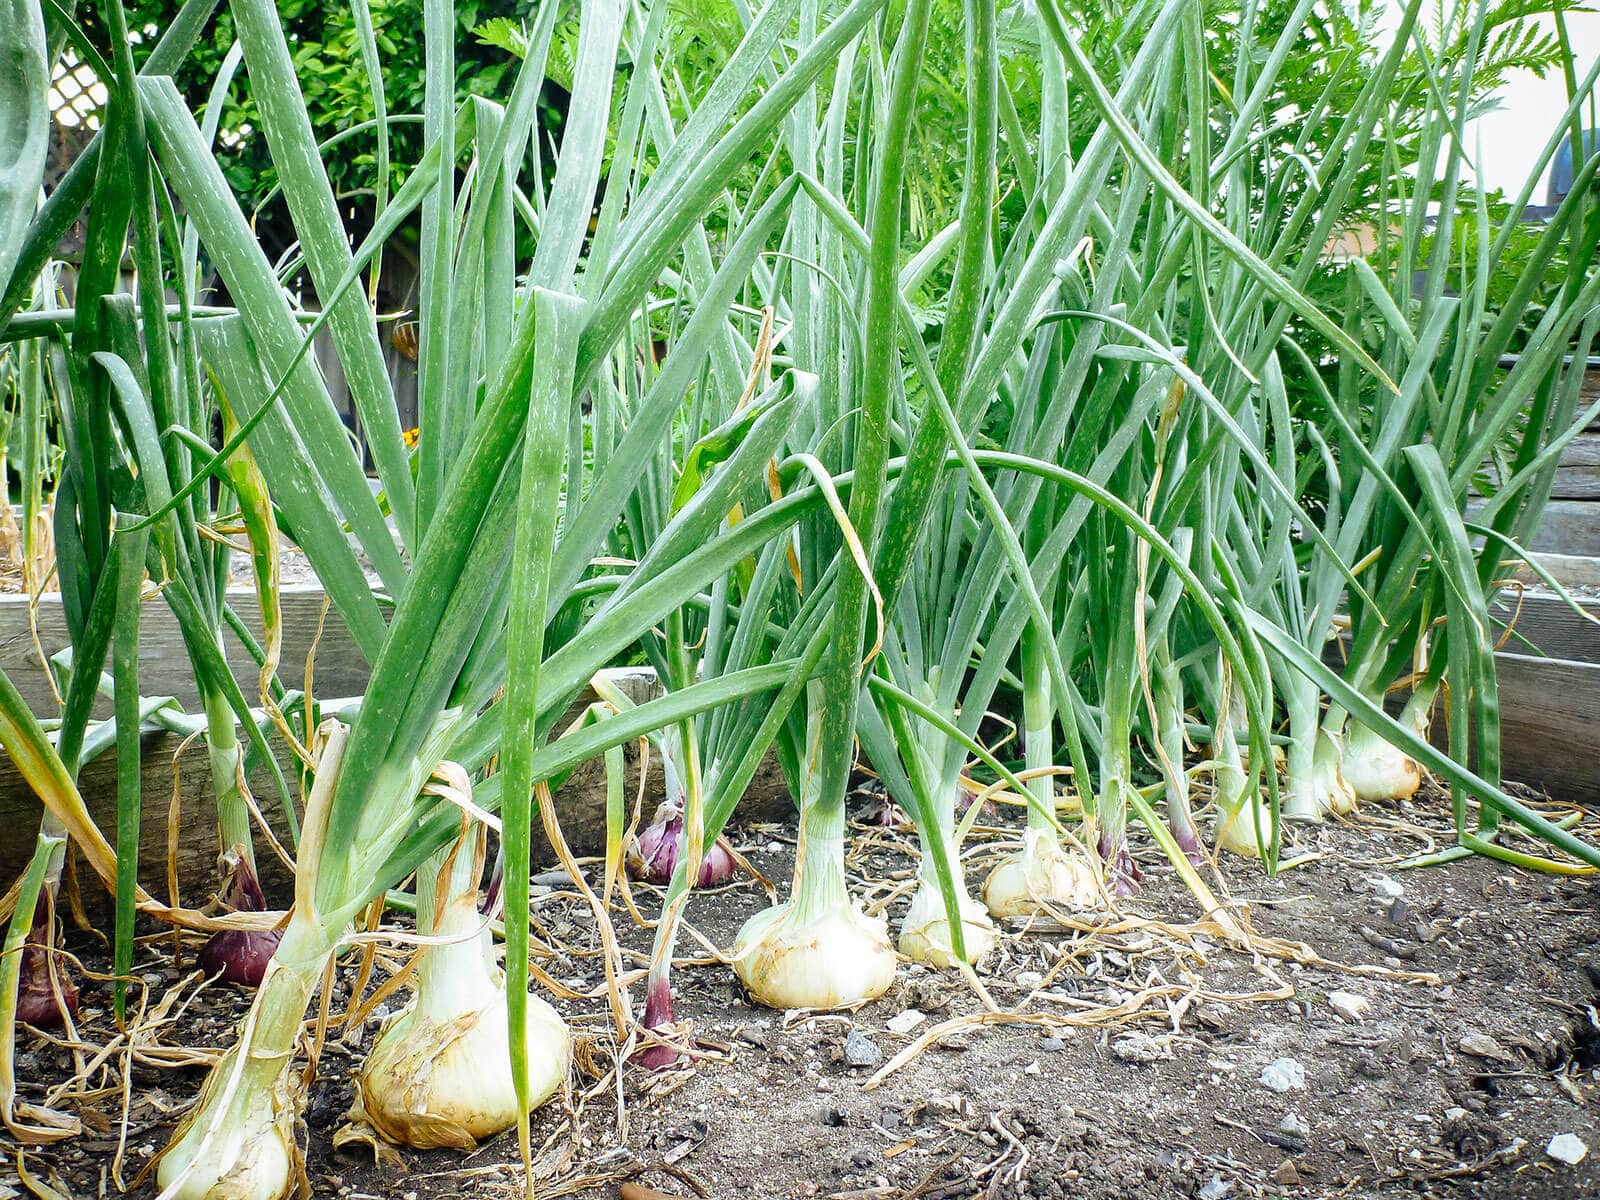
When the bulbs finish developing in mid to late summer, you’ll notice the lowest leaves start to yellow and wither. Shortly after, the stems will flop over at the neck. It starts with one or two plants, and then the rest, until it looks like your whole crop is dying.
Fear not. The leaves are key in knowing when your onions are ready to harvest!
Wait for one-half to three-quarters of your crop to flop, then bend over the stems of any remaining upright plants. You can simply bend them above the bulb with your hands; this is a signal for the plants to enter dormancy.
If some of your onions sent up flower stalks, you can just leave them be. The leaves around the flower stalk will still wither naturally when the onion is ready for harvest, so you don’t have to bend over the stalk. I don’t recommend cutting it off, because it could introduce bacteria into the onion during the curing process.
2. Stop watering your onion crop before harvest.
When you notice the leaves on the first few plants start to fall over, stop watering and leave the onions in the ground for 7 to 14 days (depending on how dry or humid your climate is) to allow them to finish maturing. Withholding water at this stage helps keep the onions from rotting.
The same holds true for rain—if most of your onions are fully grown, harvest them all before a big rainstorm is expected because moisture spells trouble for mature onions.
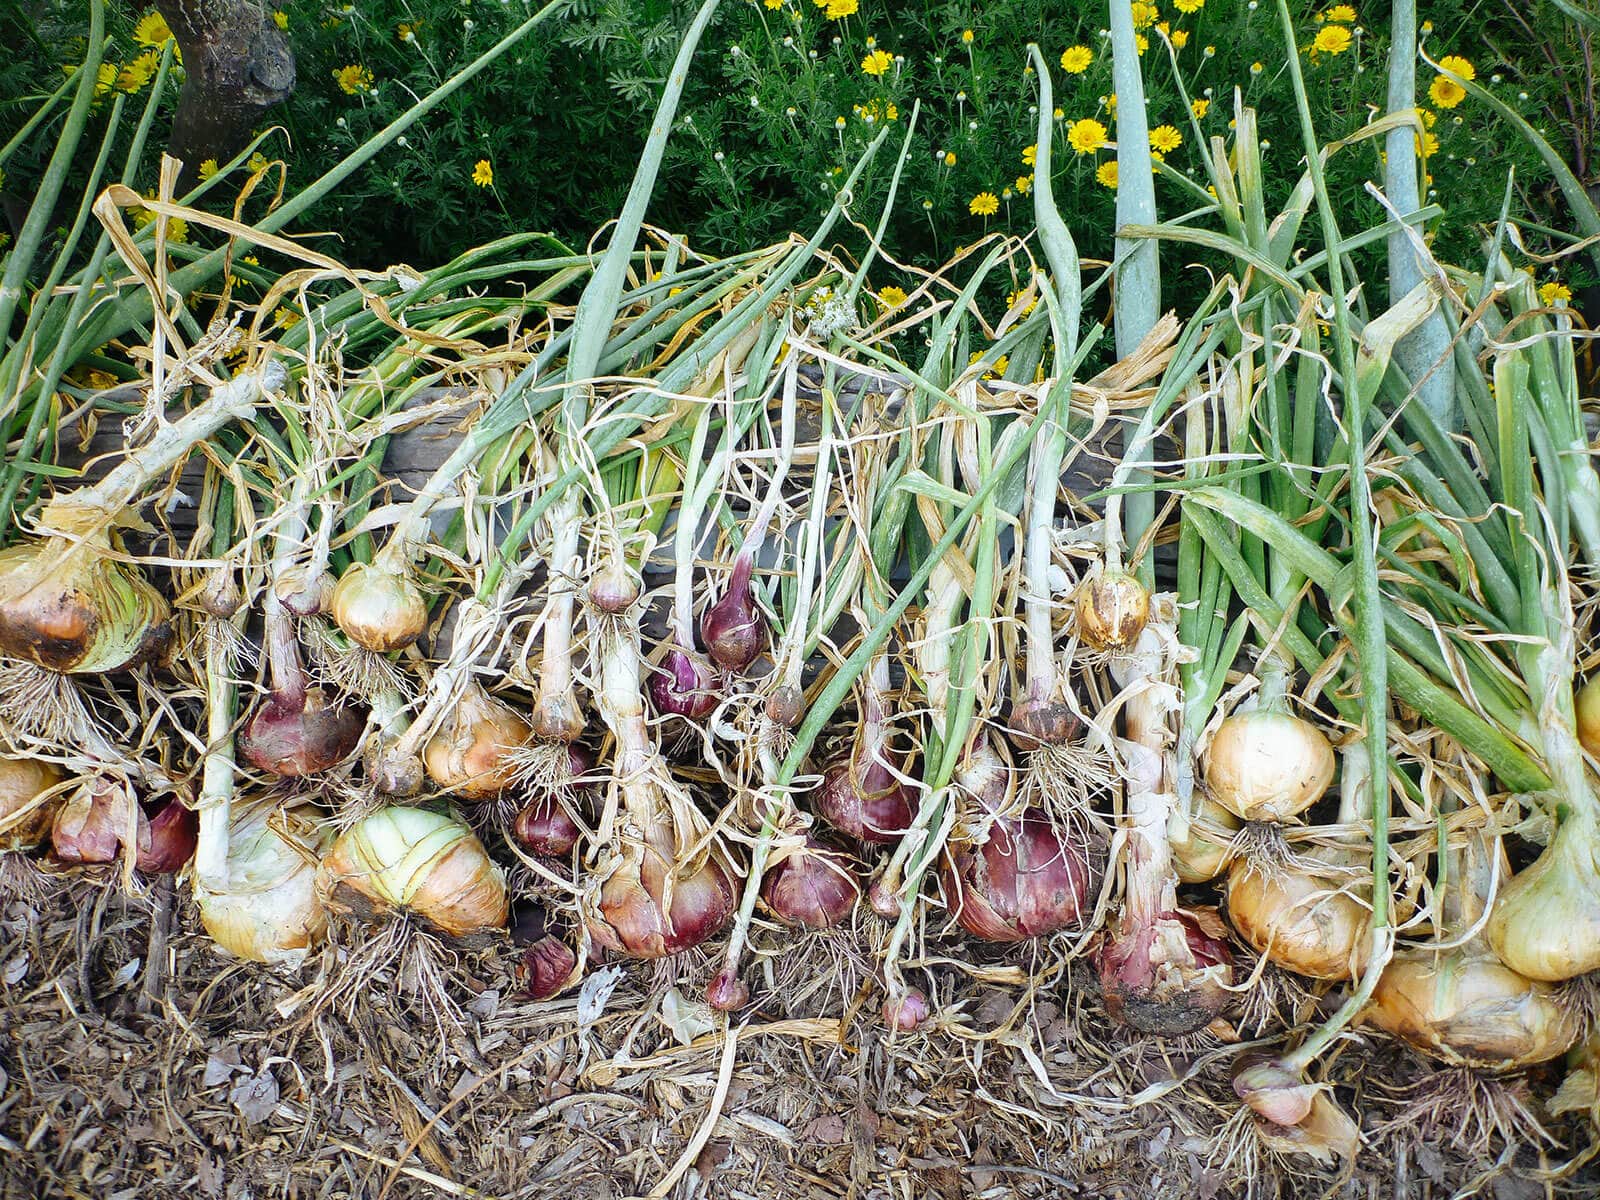
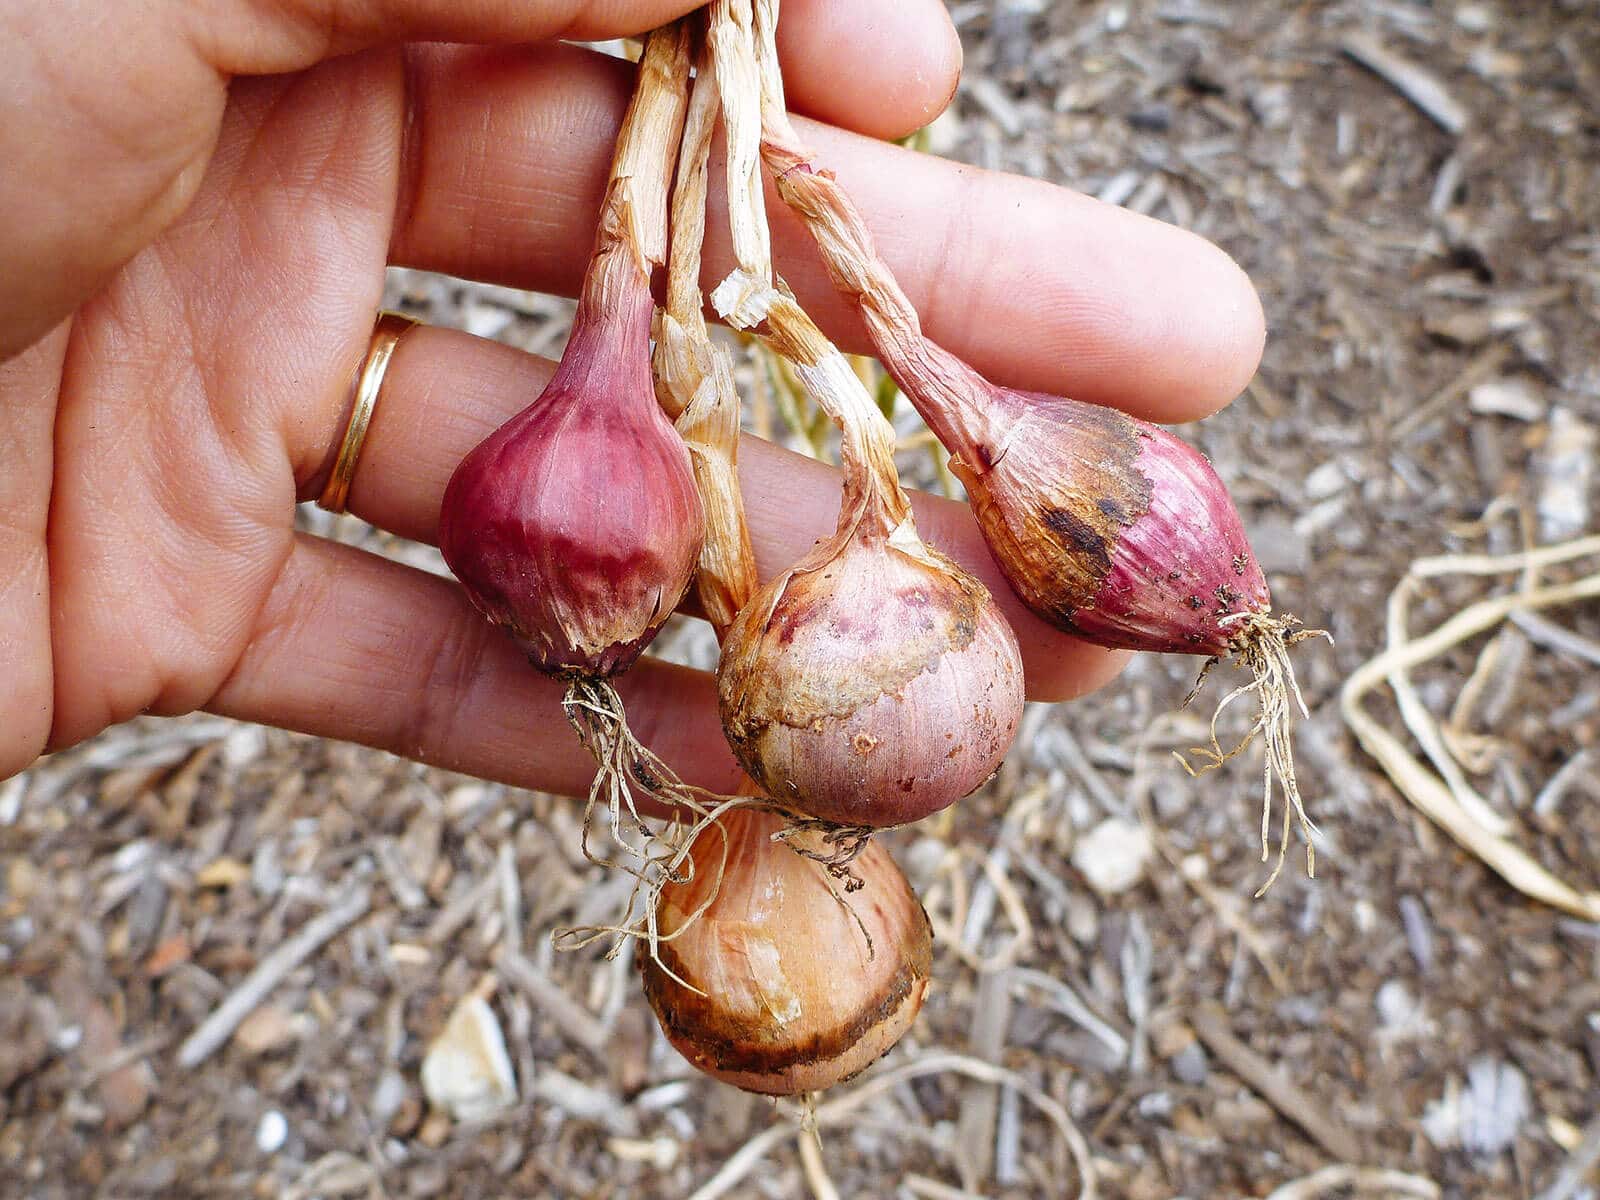
3. Dry out the roots immediately after harvest.
On a dry, sunny day, carefully pull each onion out by the bulb, or dig around the plant to lift the bulb from the soil.
Grabbing the weakened stem could cause it to pull off entirely, so make sure the stem stays intact to reduce the likelihood of rot.
Lay the onions out on the ground or in another open, sunny area for a day or two to dry out the roots.
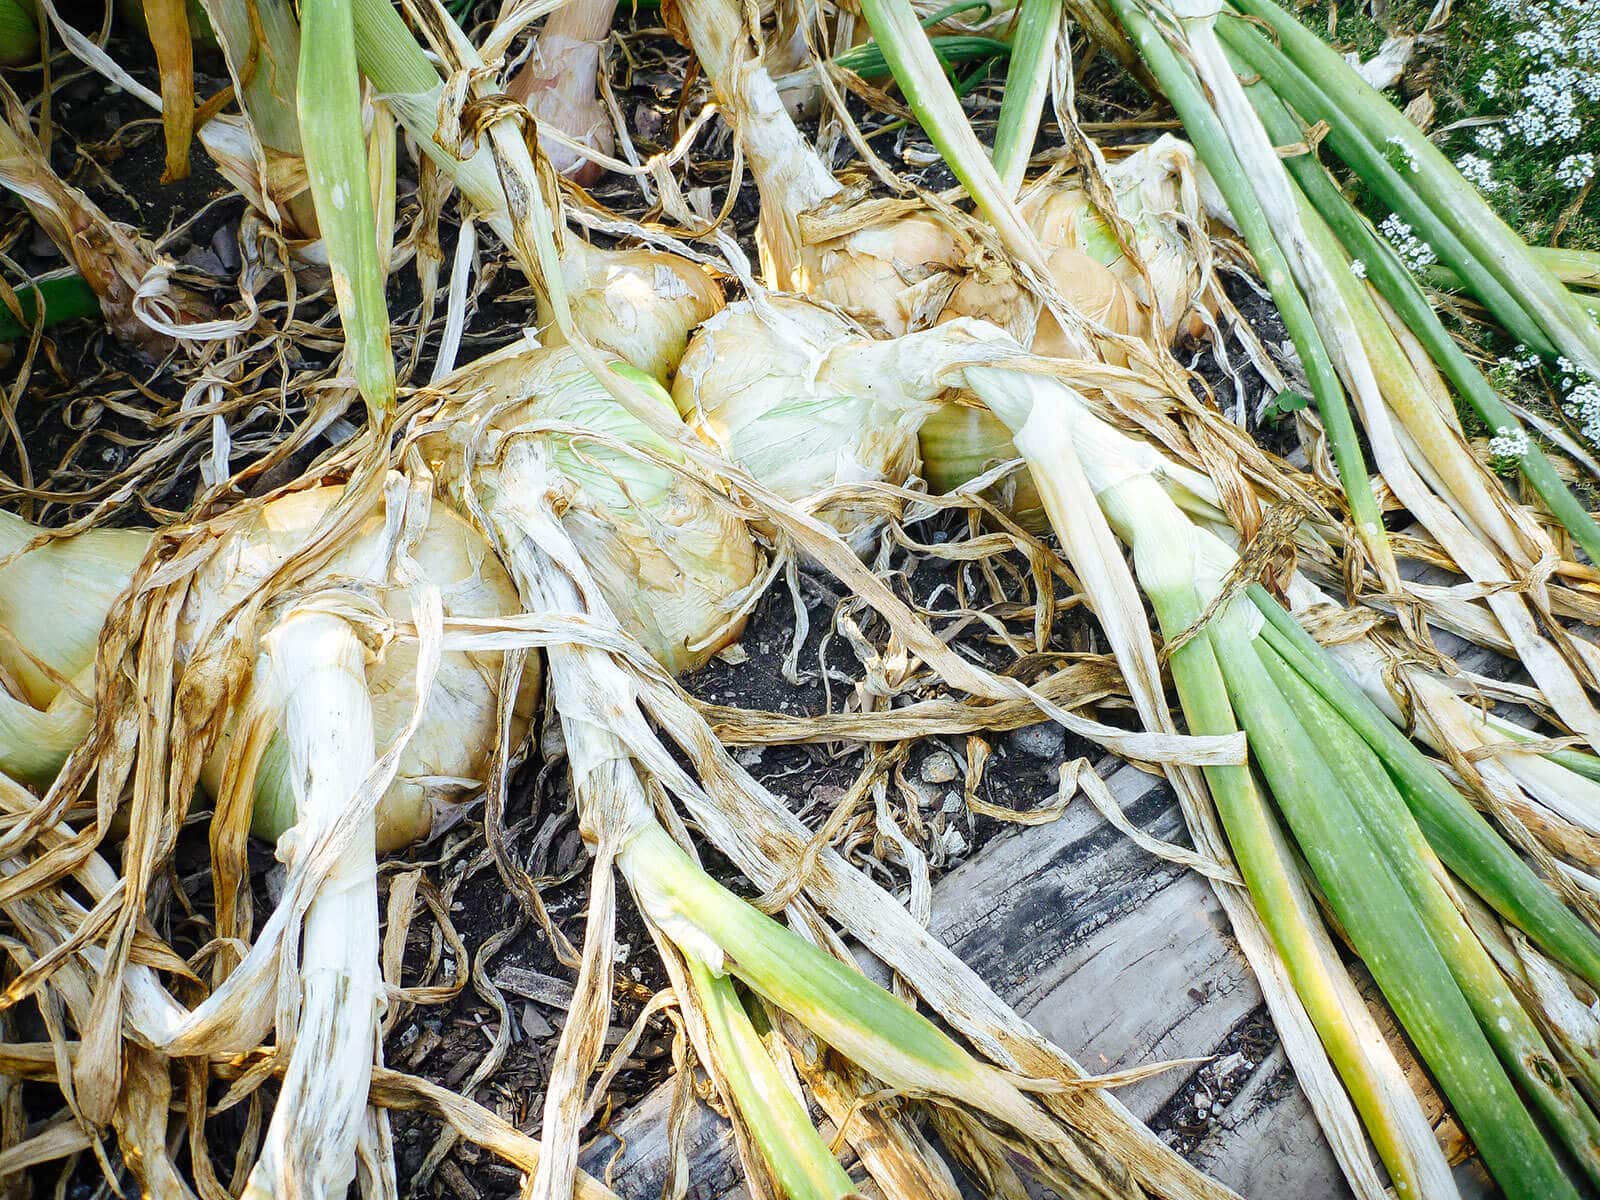
4. Continue curing the onions.
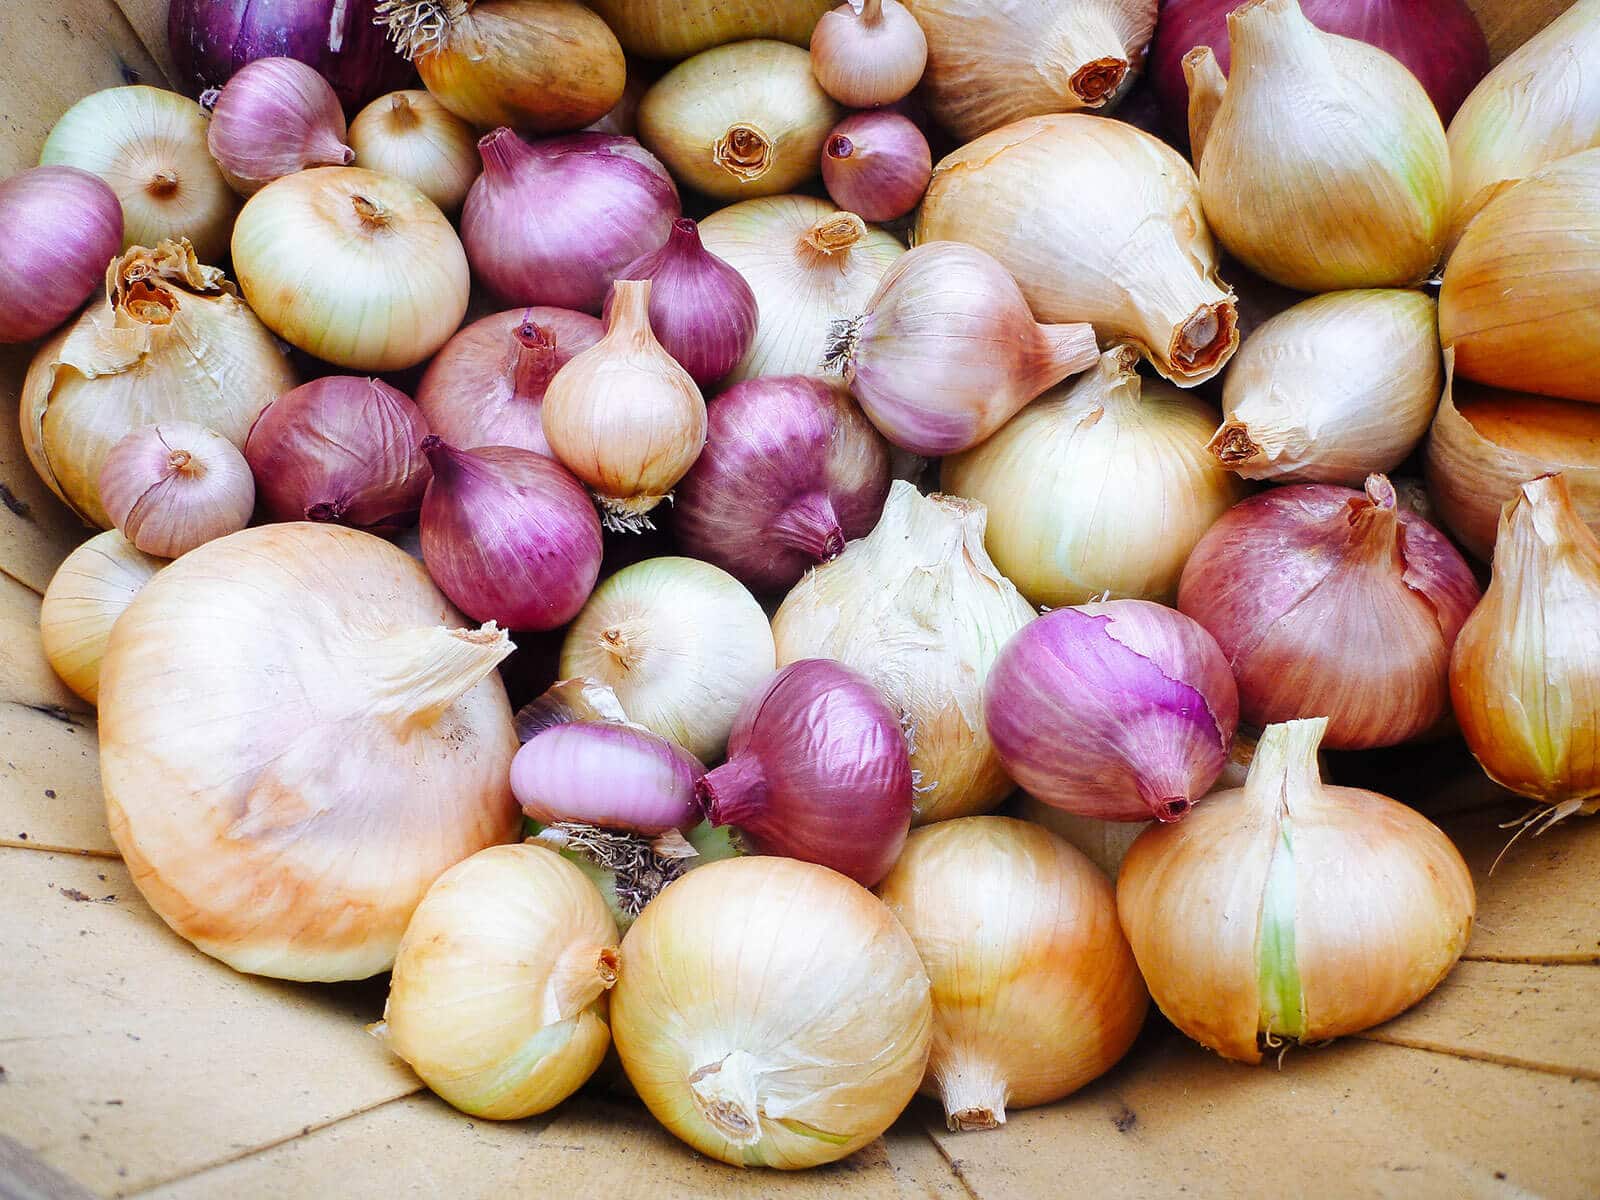
After a nice day of getting some sun, move the onions into a sheltered, shady spot (under a tree, on a covered porch, or in a well-ventilated garage, for example) and spread them out one by one.
You don’t need to clean off the onions yet. Just set them out to dry, dirt and all, until the stems turn brown and brittle. This rest period allows the onions to go deeper into dormancy so that they’re less susceptible to disease.
If you have absolutely no shade around your house, you can lay them in the sun but covered with a thin cotton sheet to prevent sunburn. (Never use plastic, canvas, or other thick, non-breathable materials, which could stifle them.)
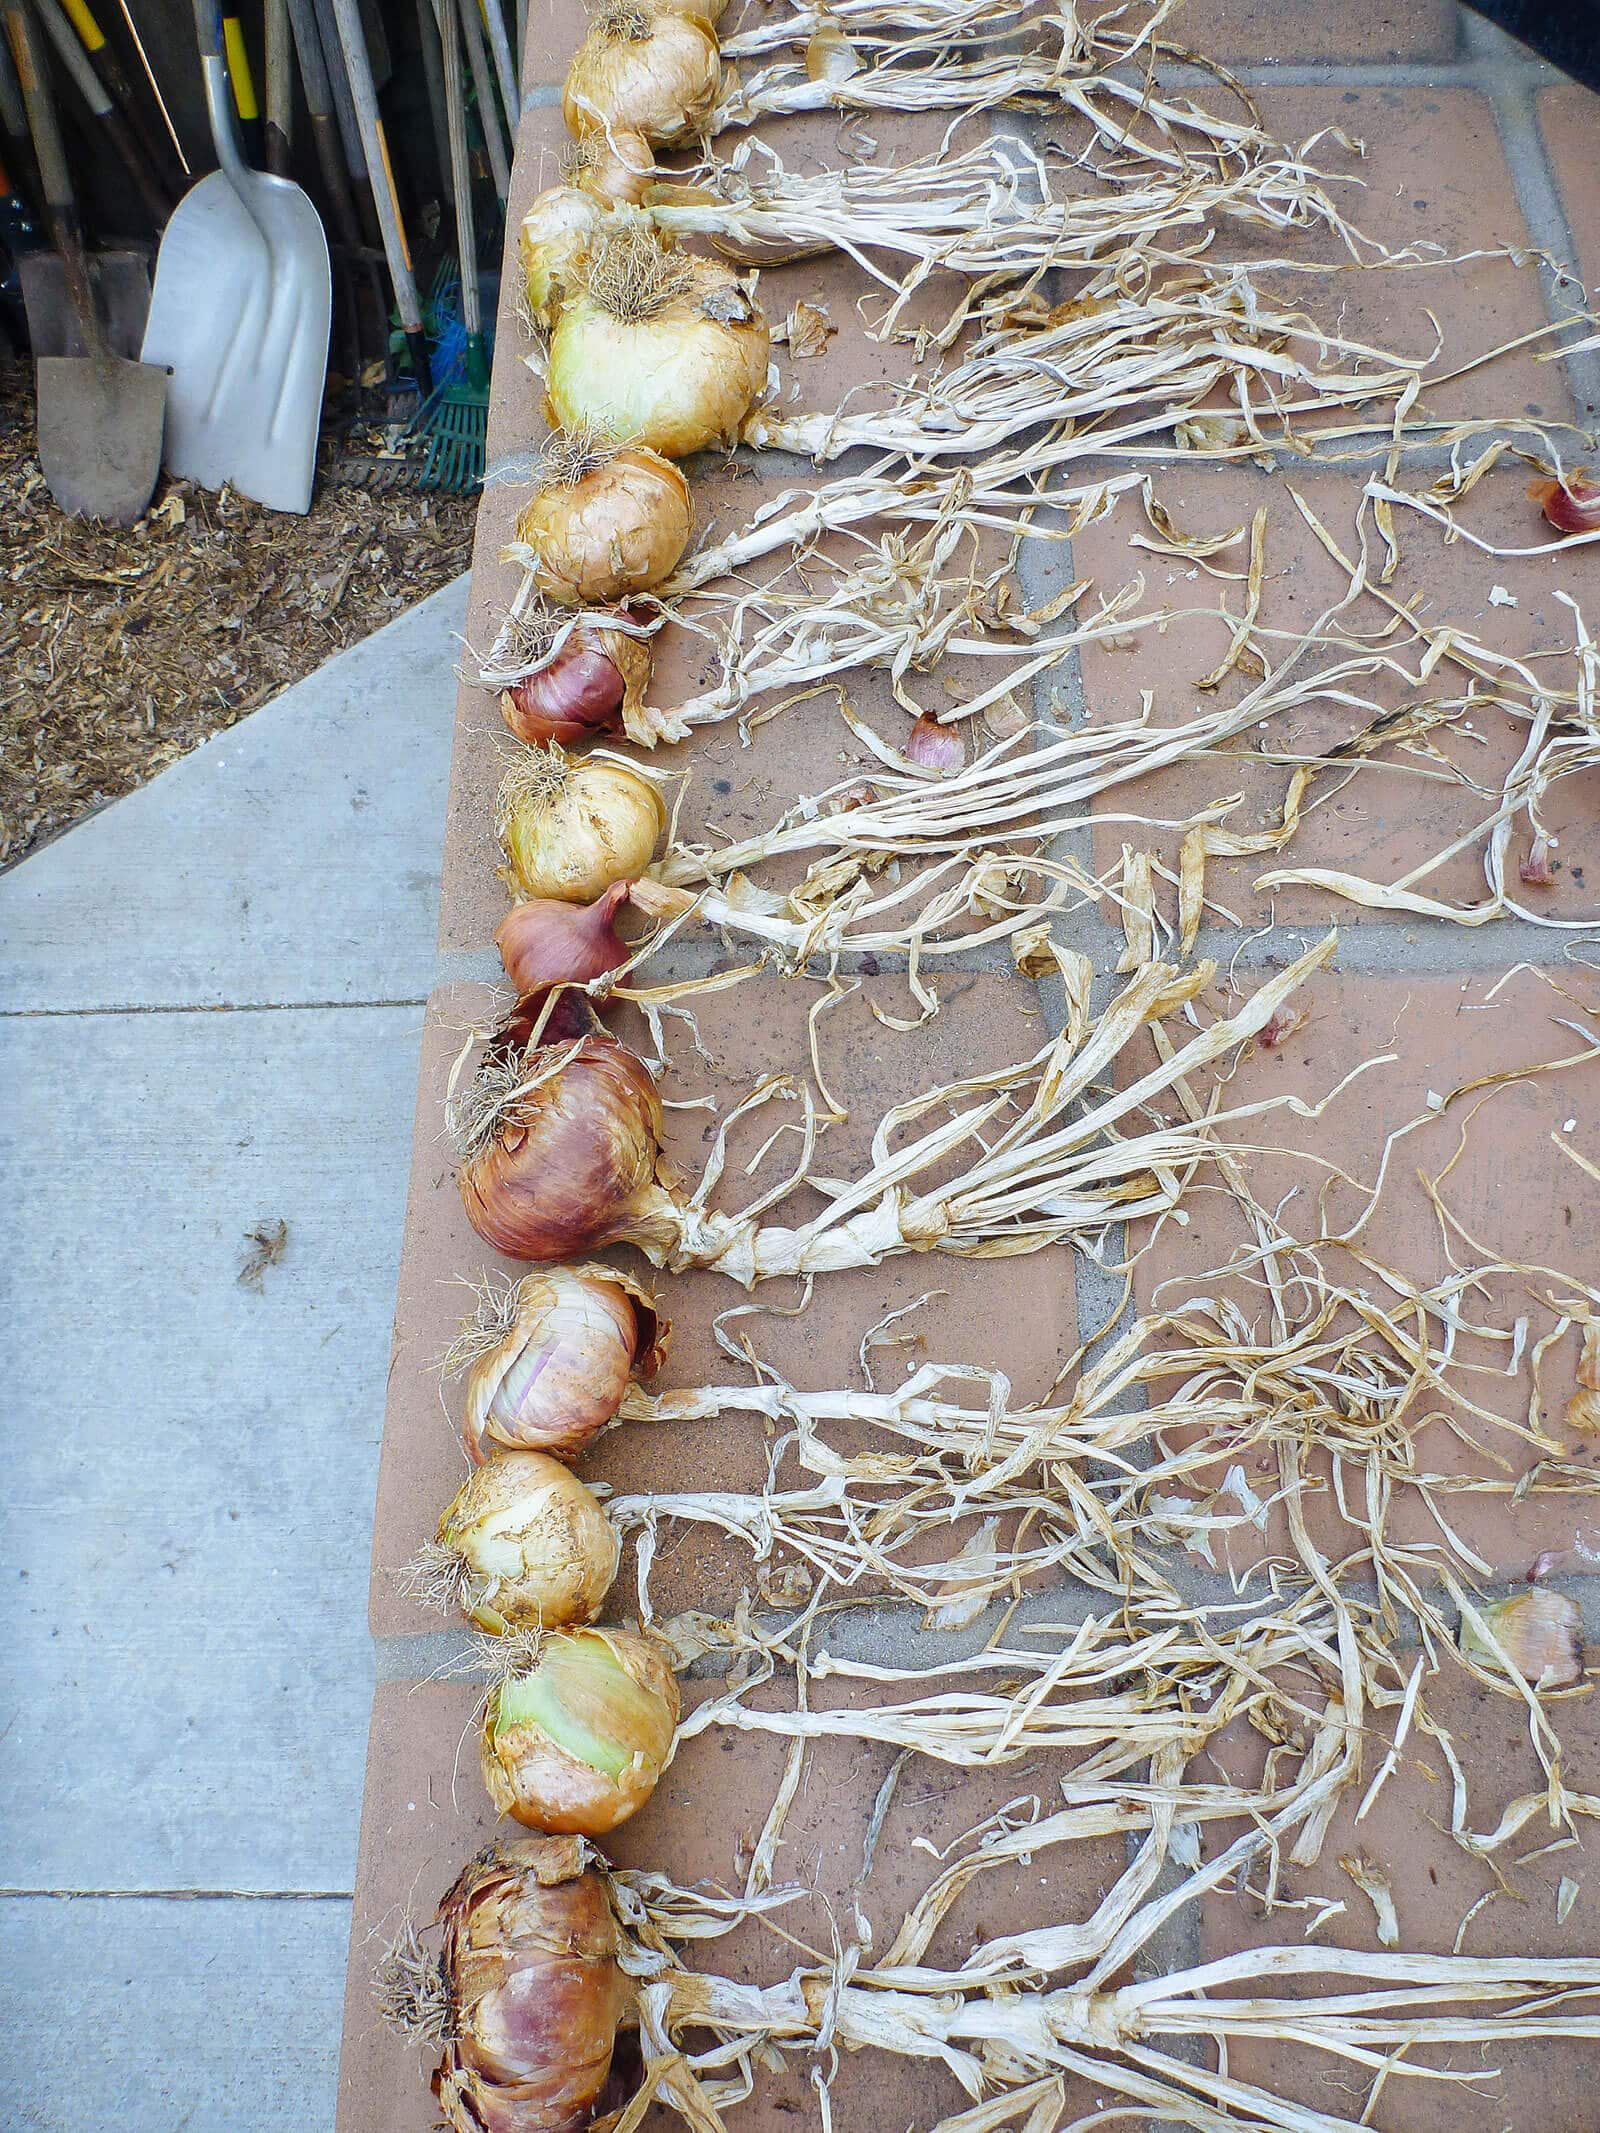
If you often get rain in the summer, you can cure your onions in a garage or basement, but turn them over a couple times a week to ensure even drying. While they’re curing, onions like it warm (75°F to 80°F) but breezy.
The most important part of curing is giving them enough shade and having plenty of air circulation around the bulbs.
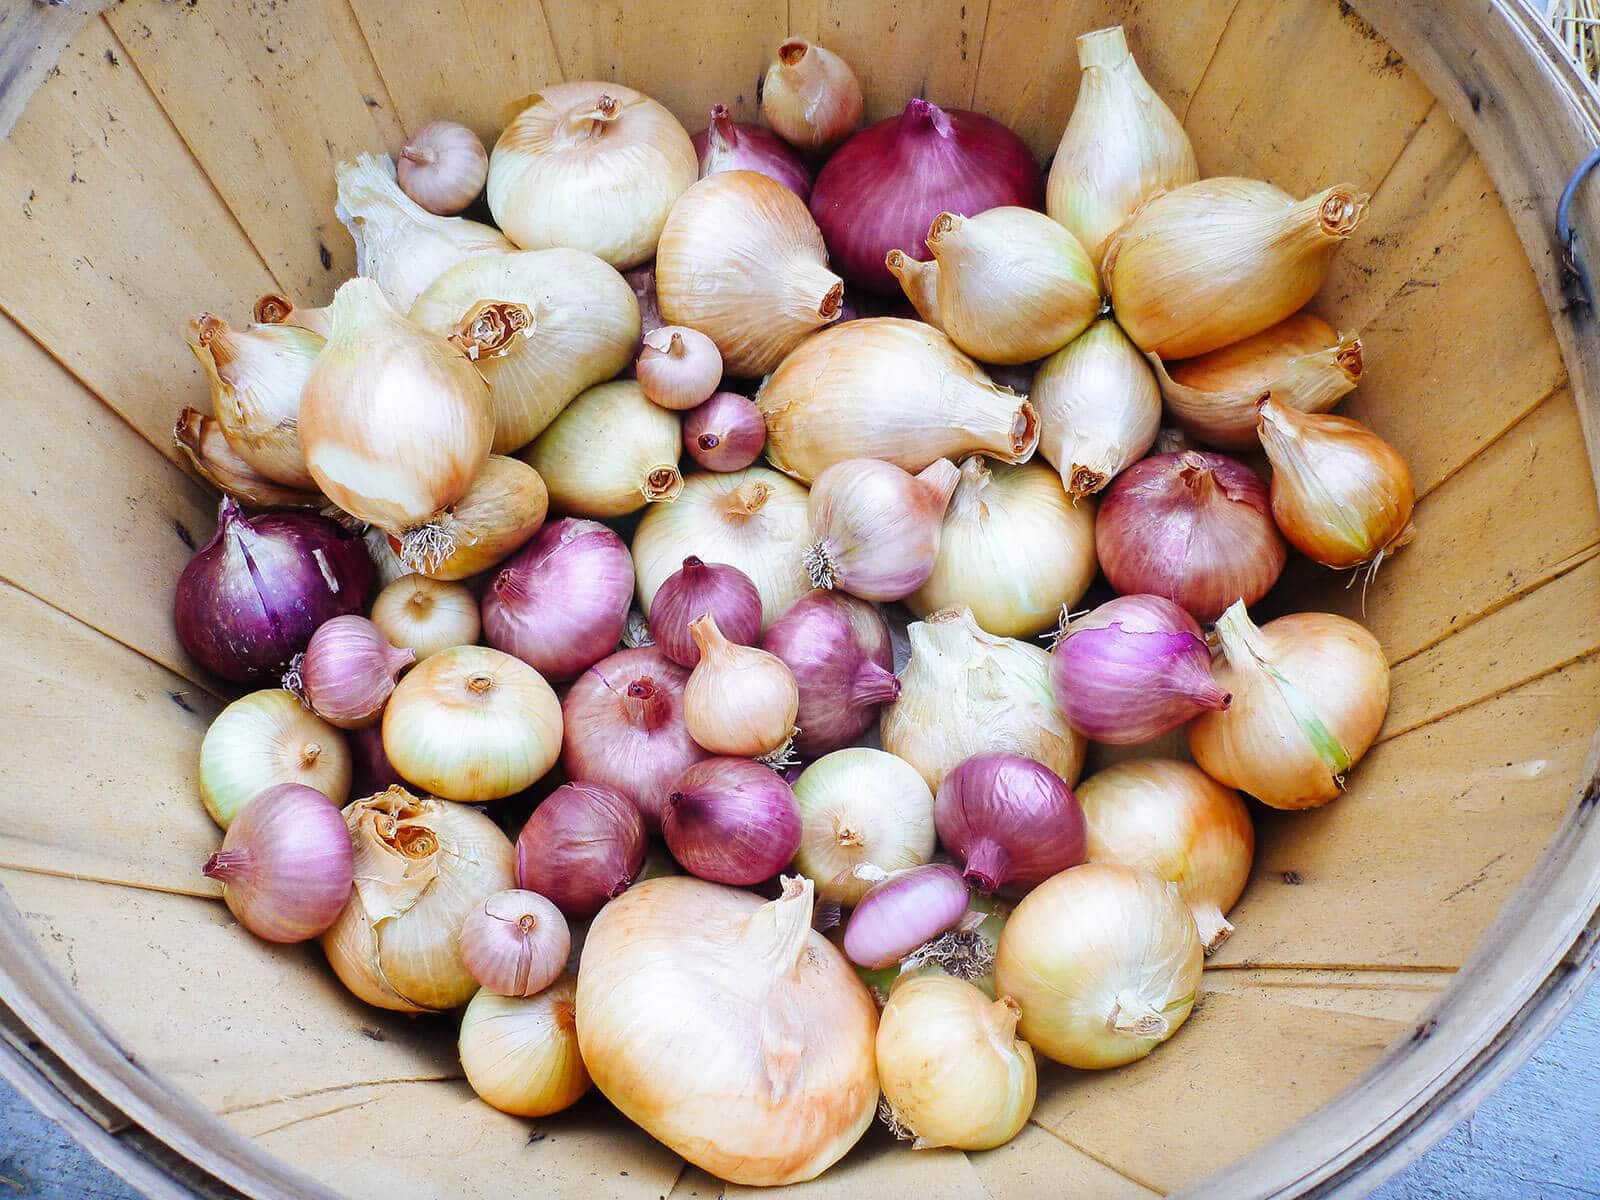
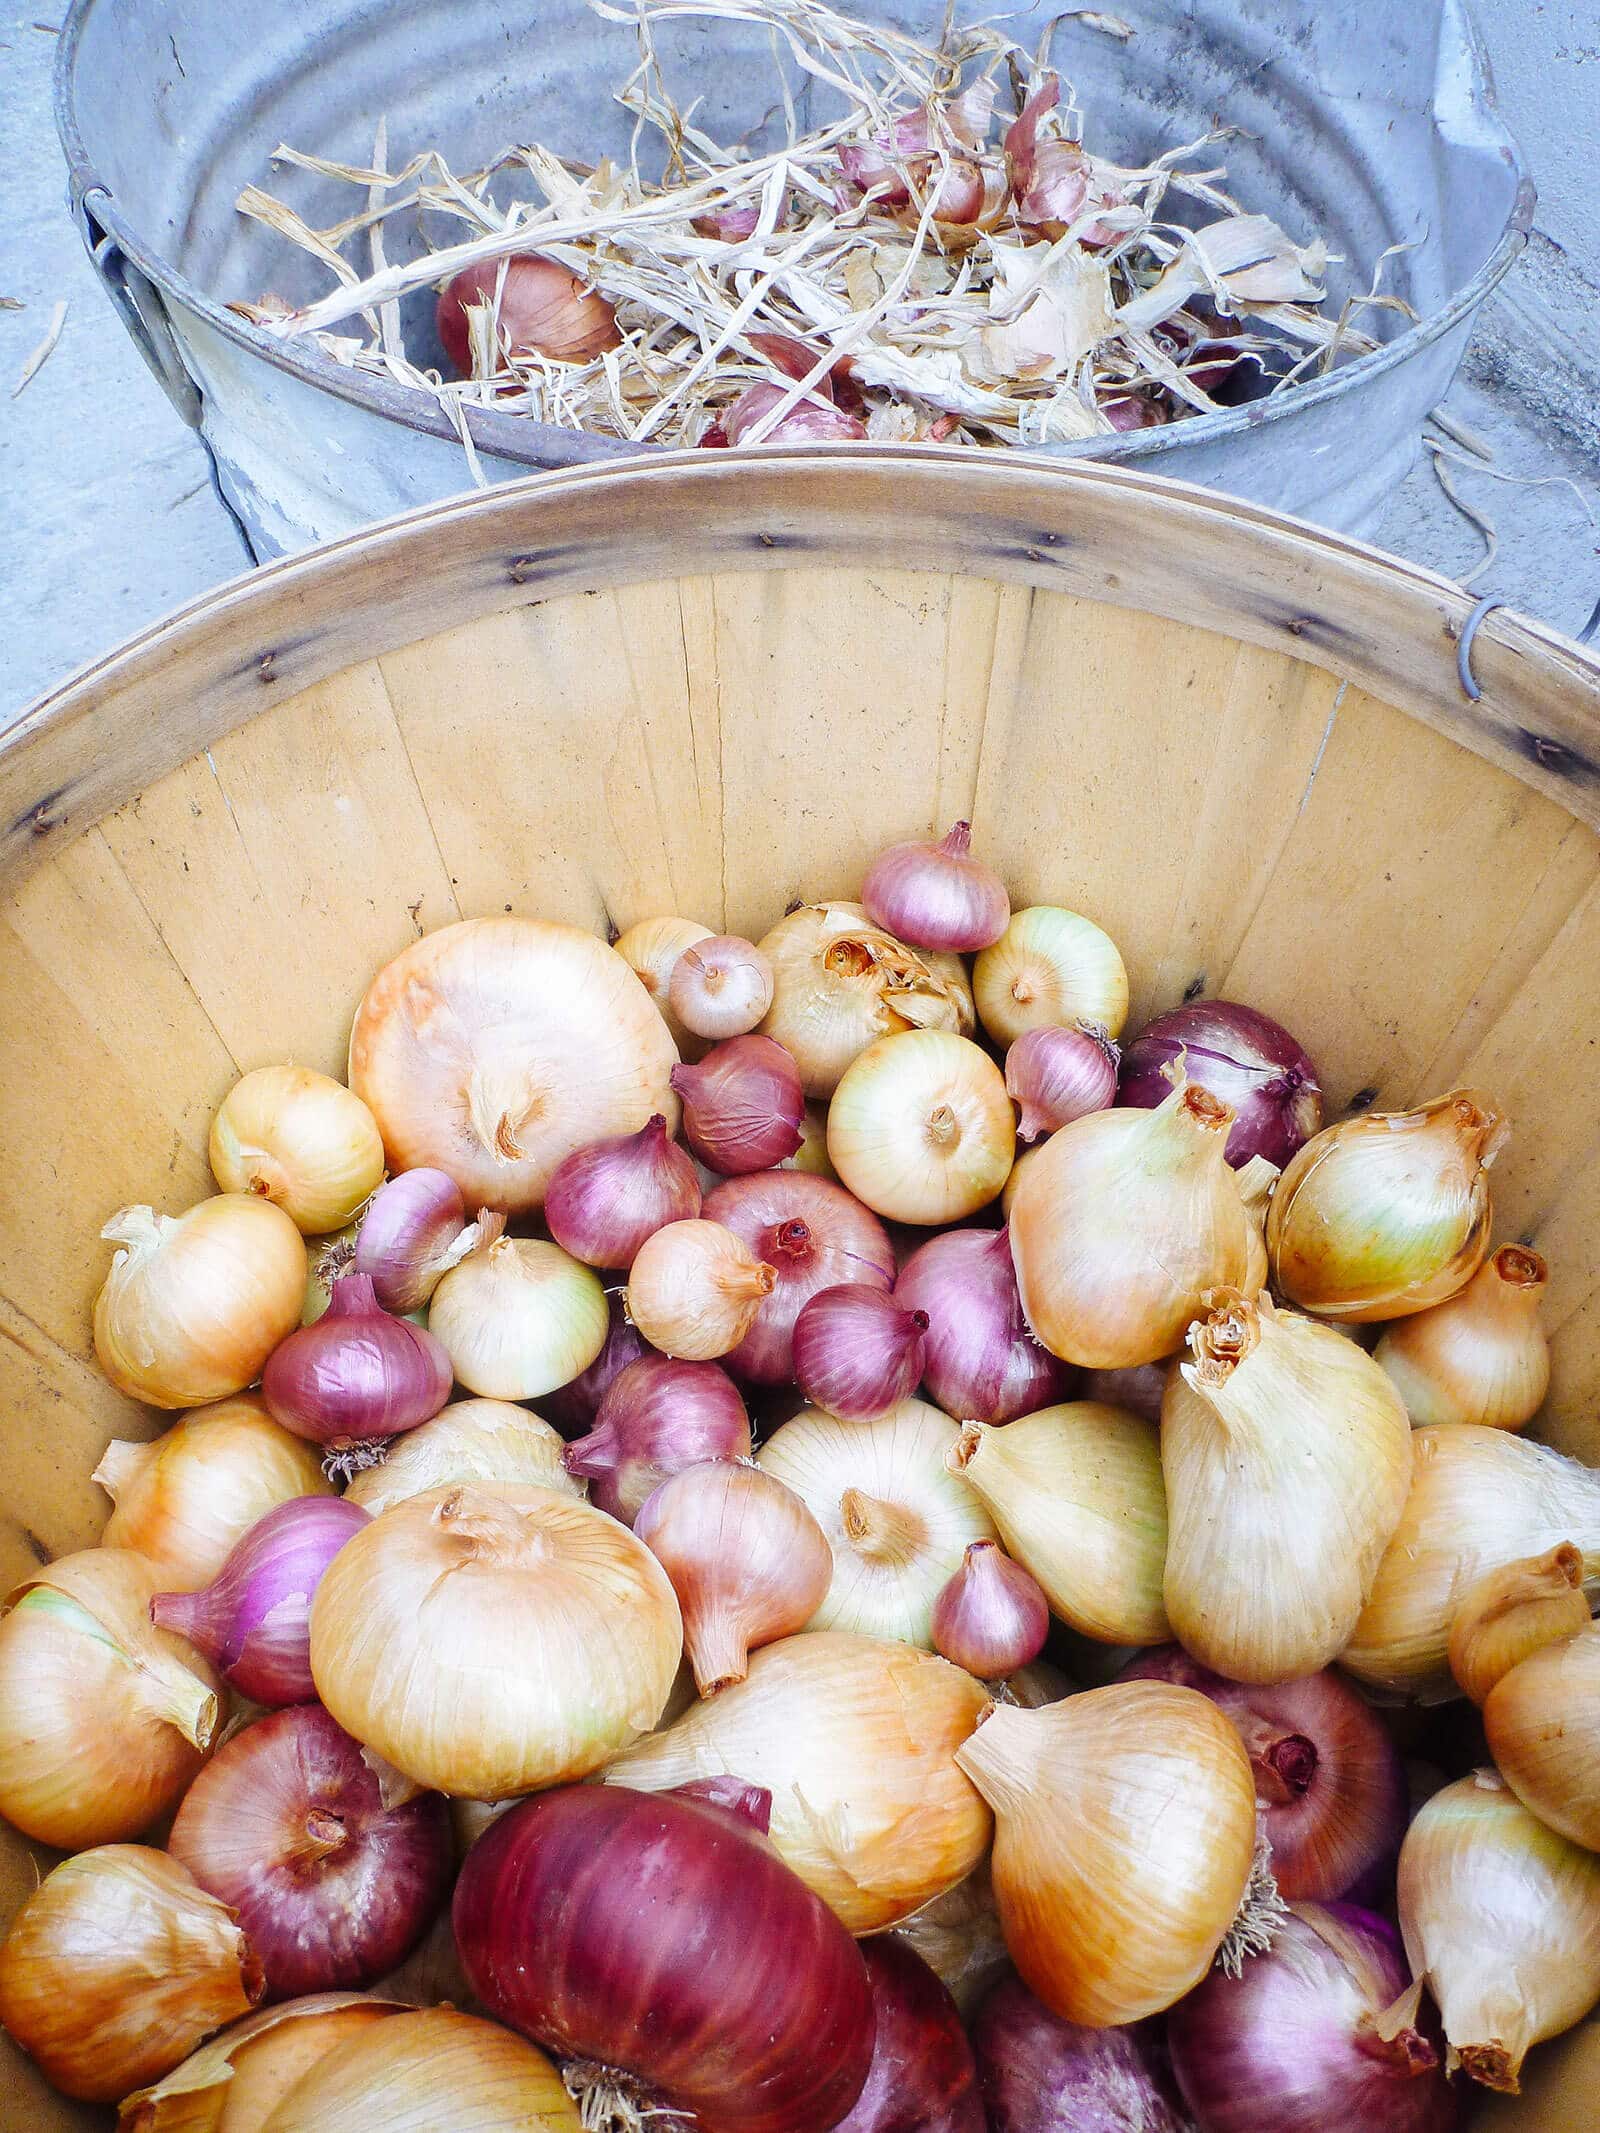
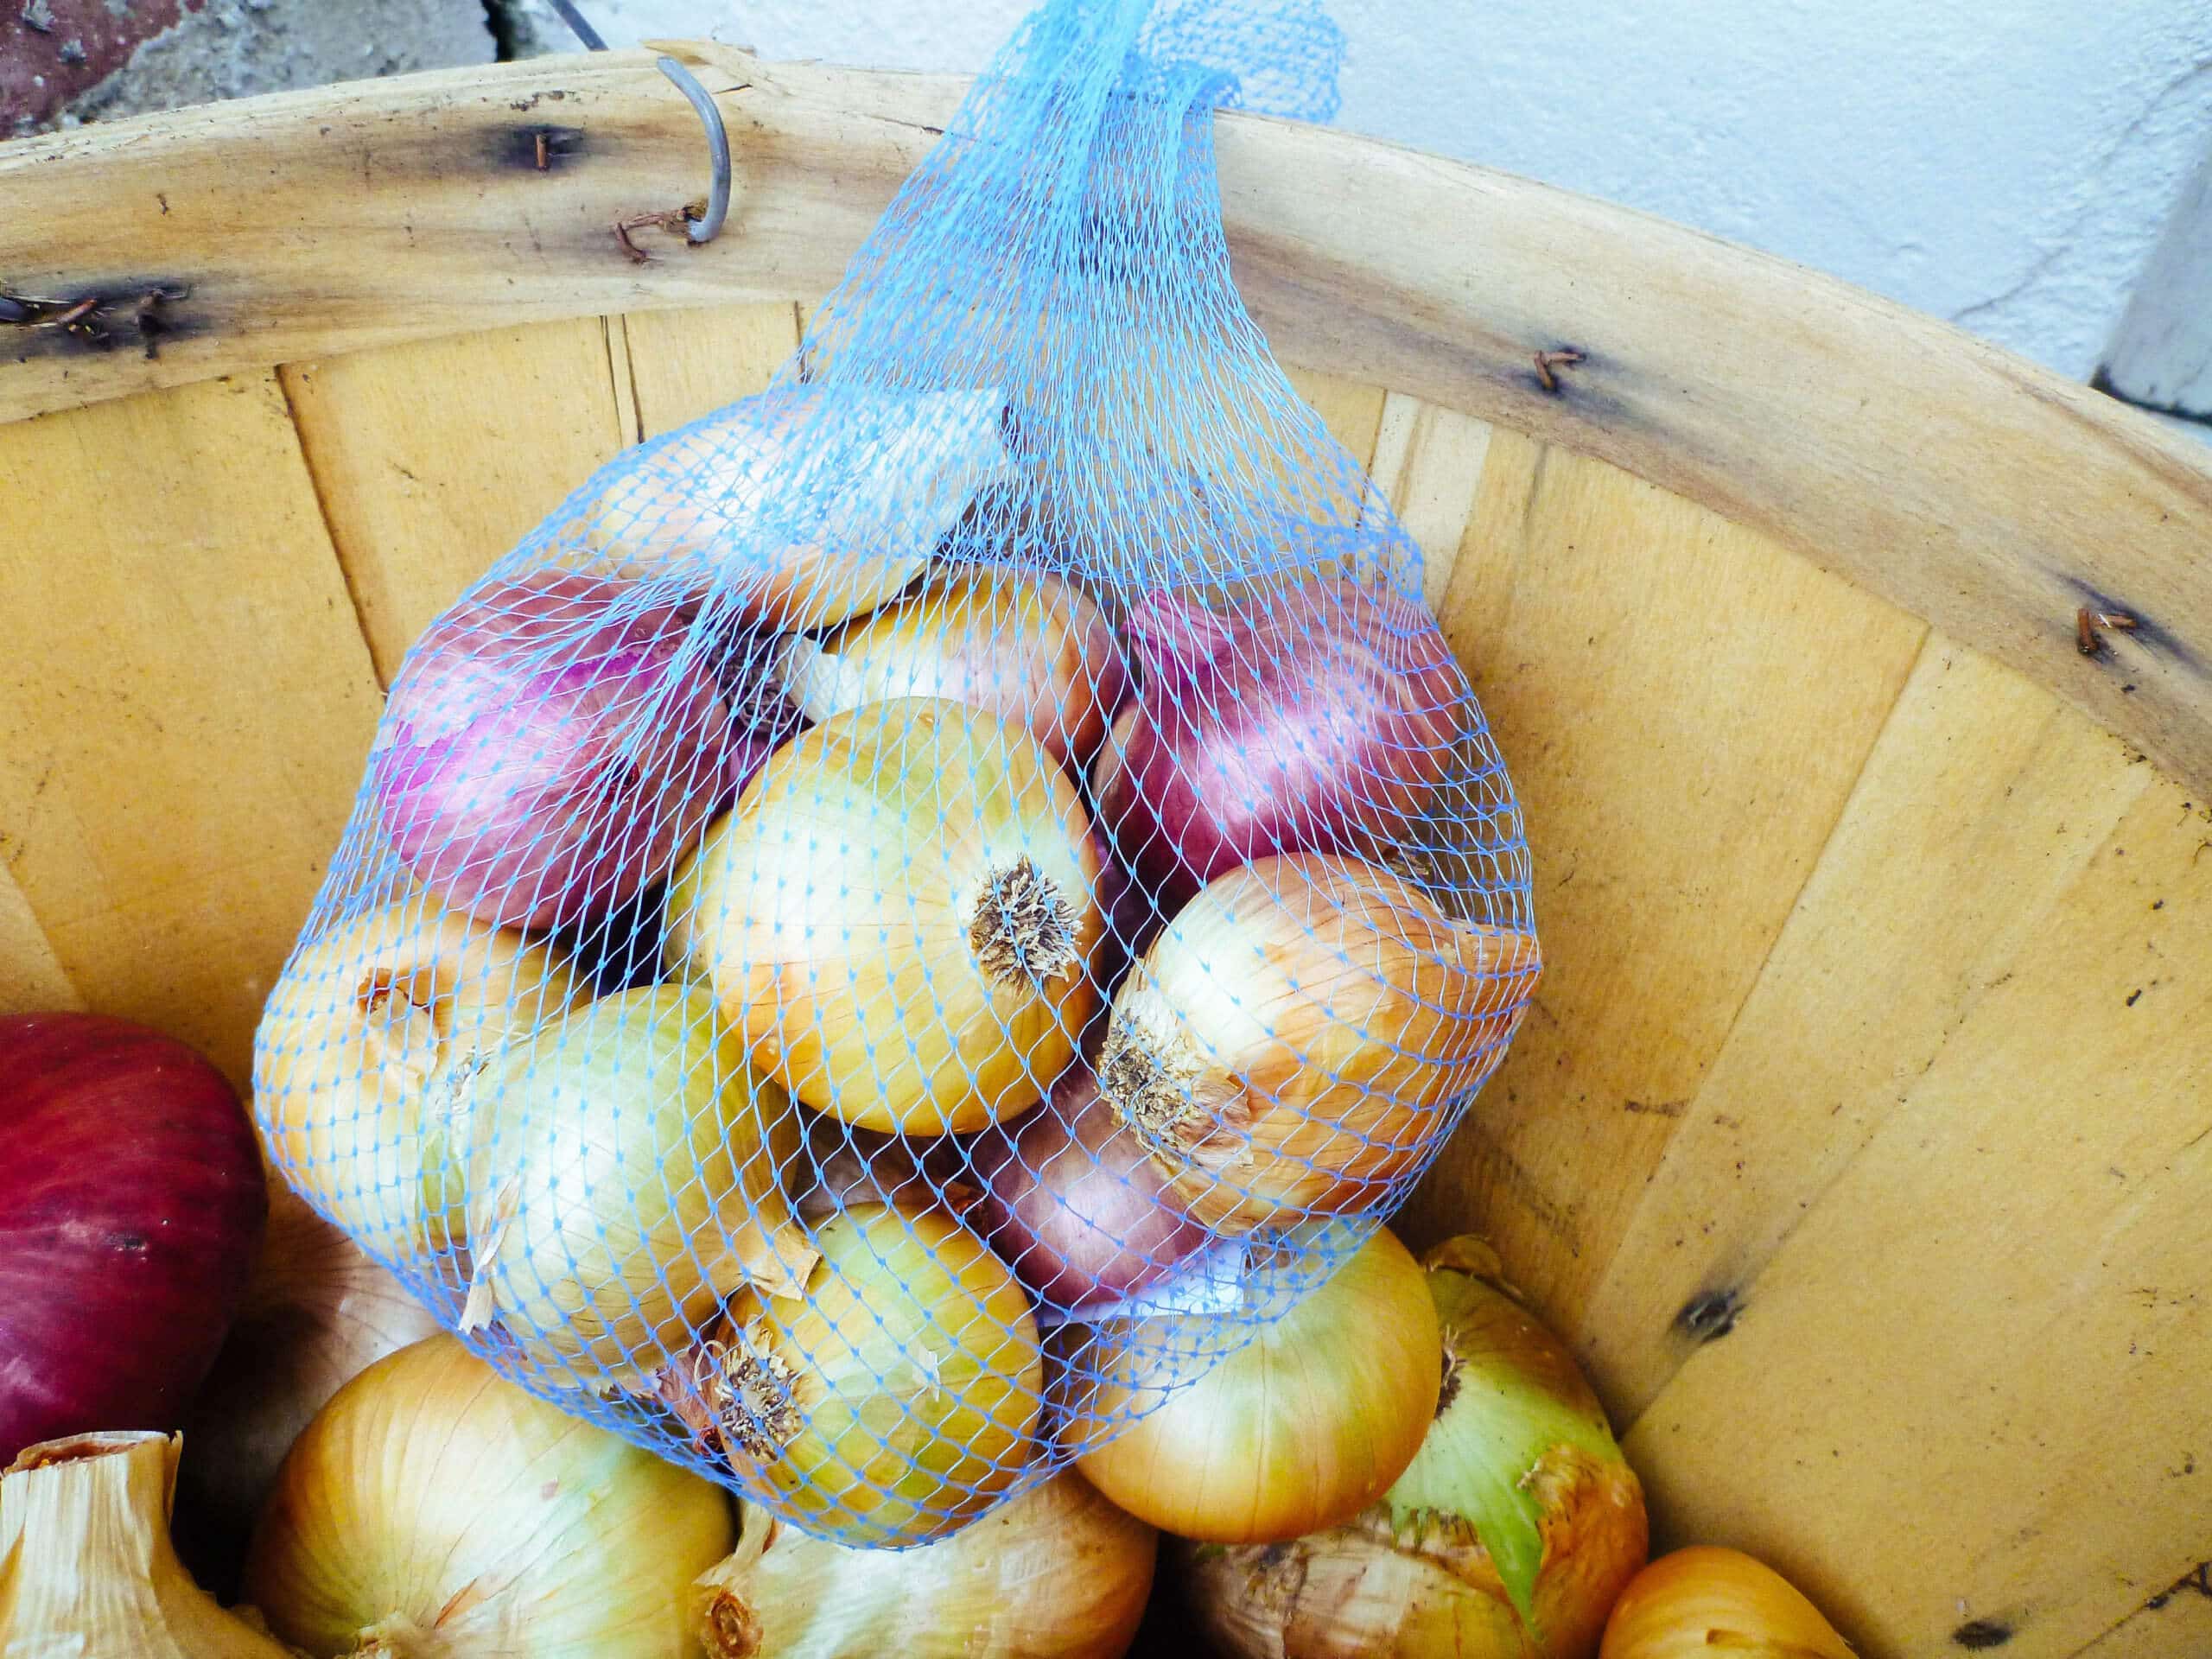
Because of this, it’s best to lay them out without crowding them, rather than heaping all your onions into a basket.
This last step in the curing process takes two to three weeks (and sometimes up to four weeks, if your summers are very humid).
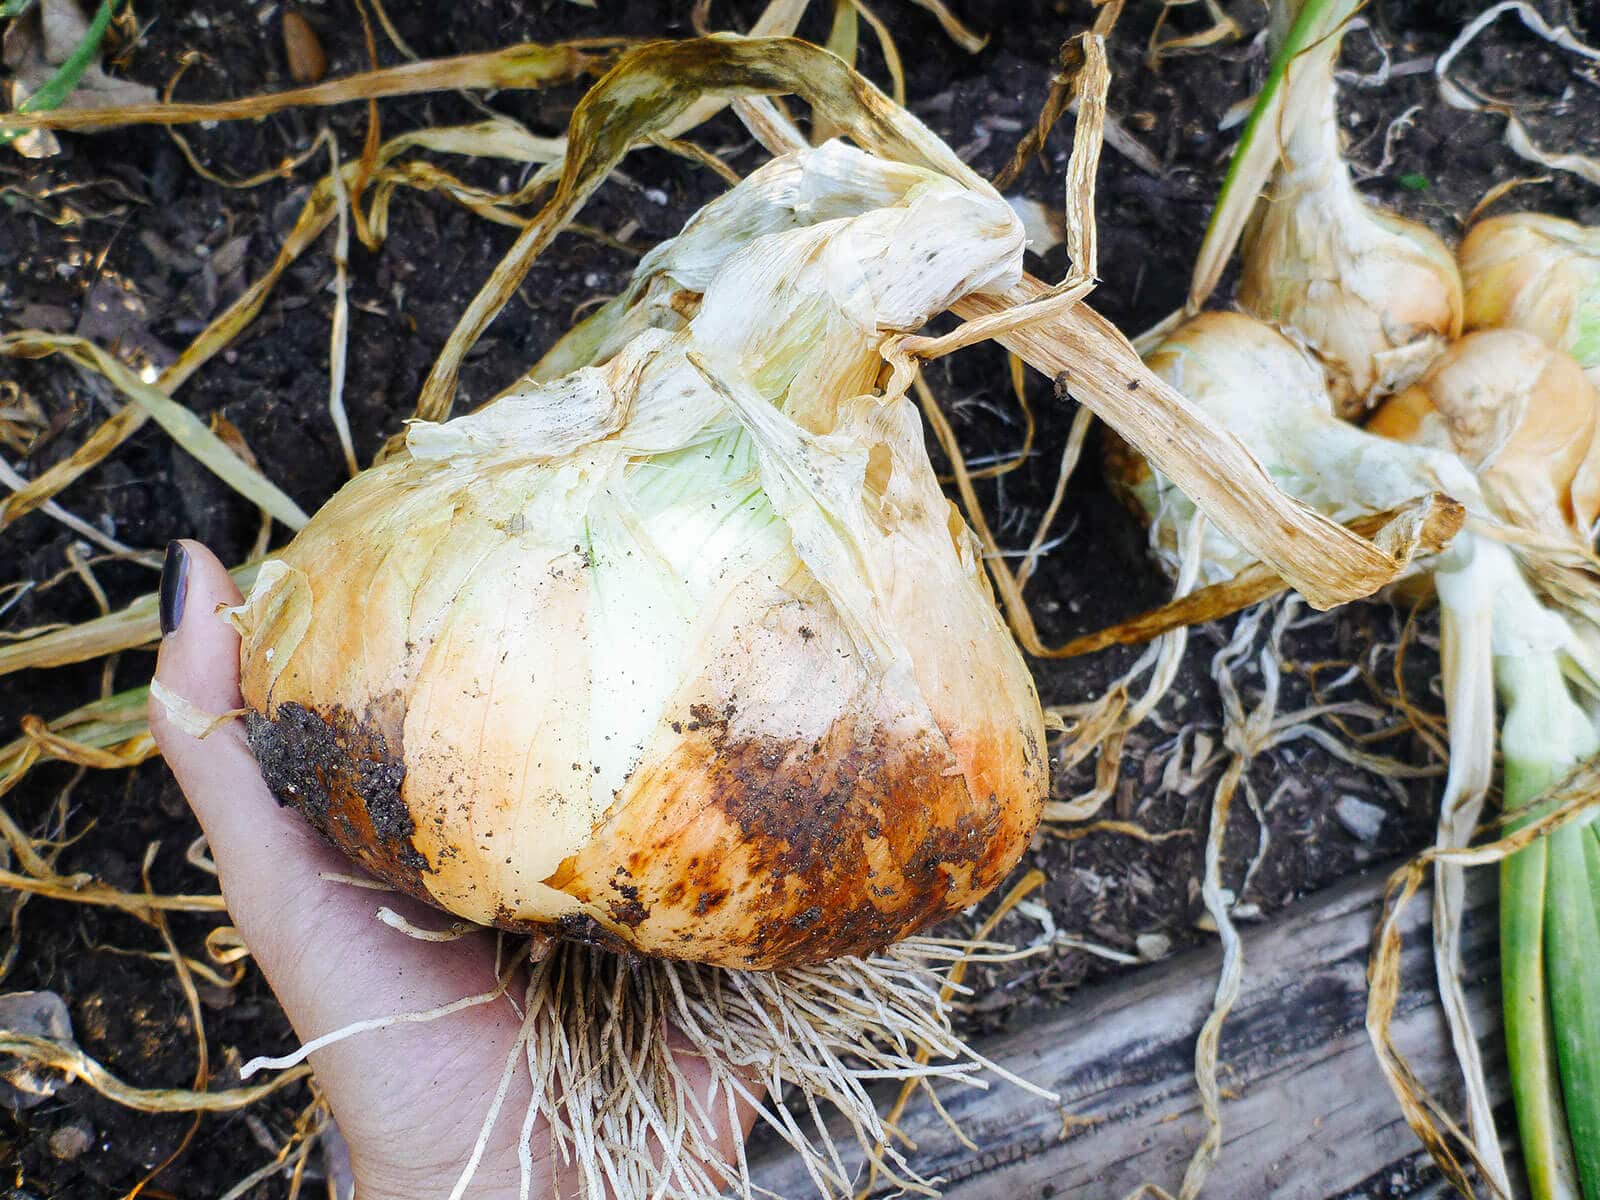
You want your onions to be dry, dry, dry. The roots will become stiff and wiry, and the papery outer skins will dry out and constrict around the bulbs.
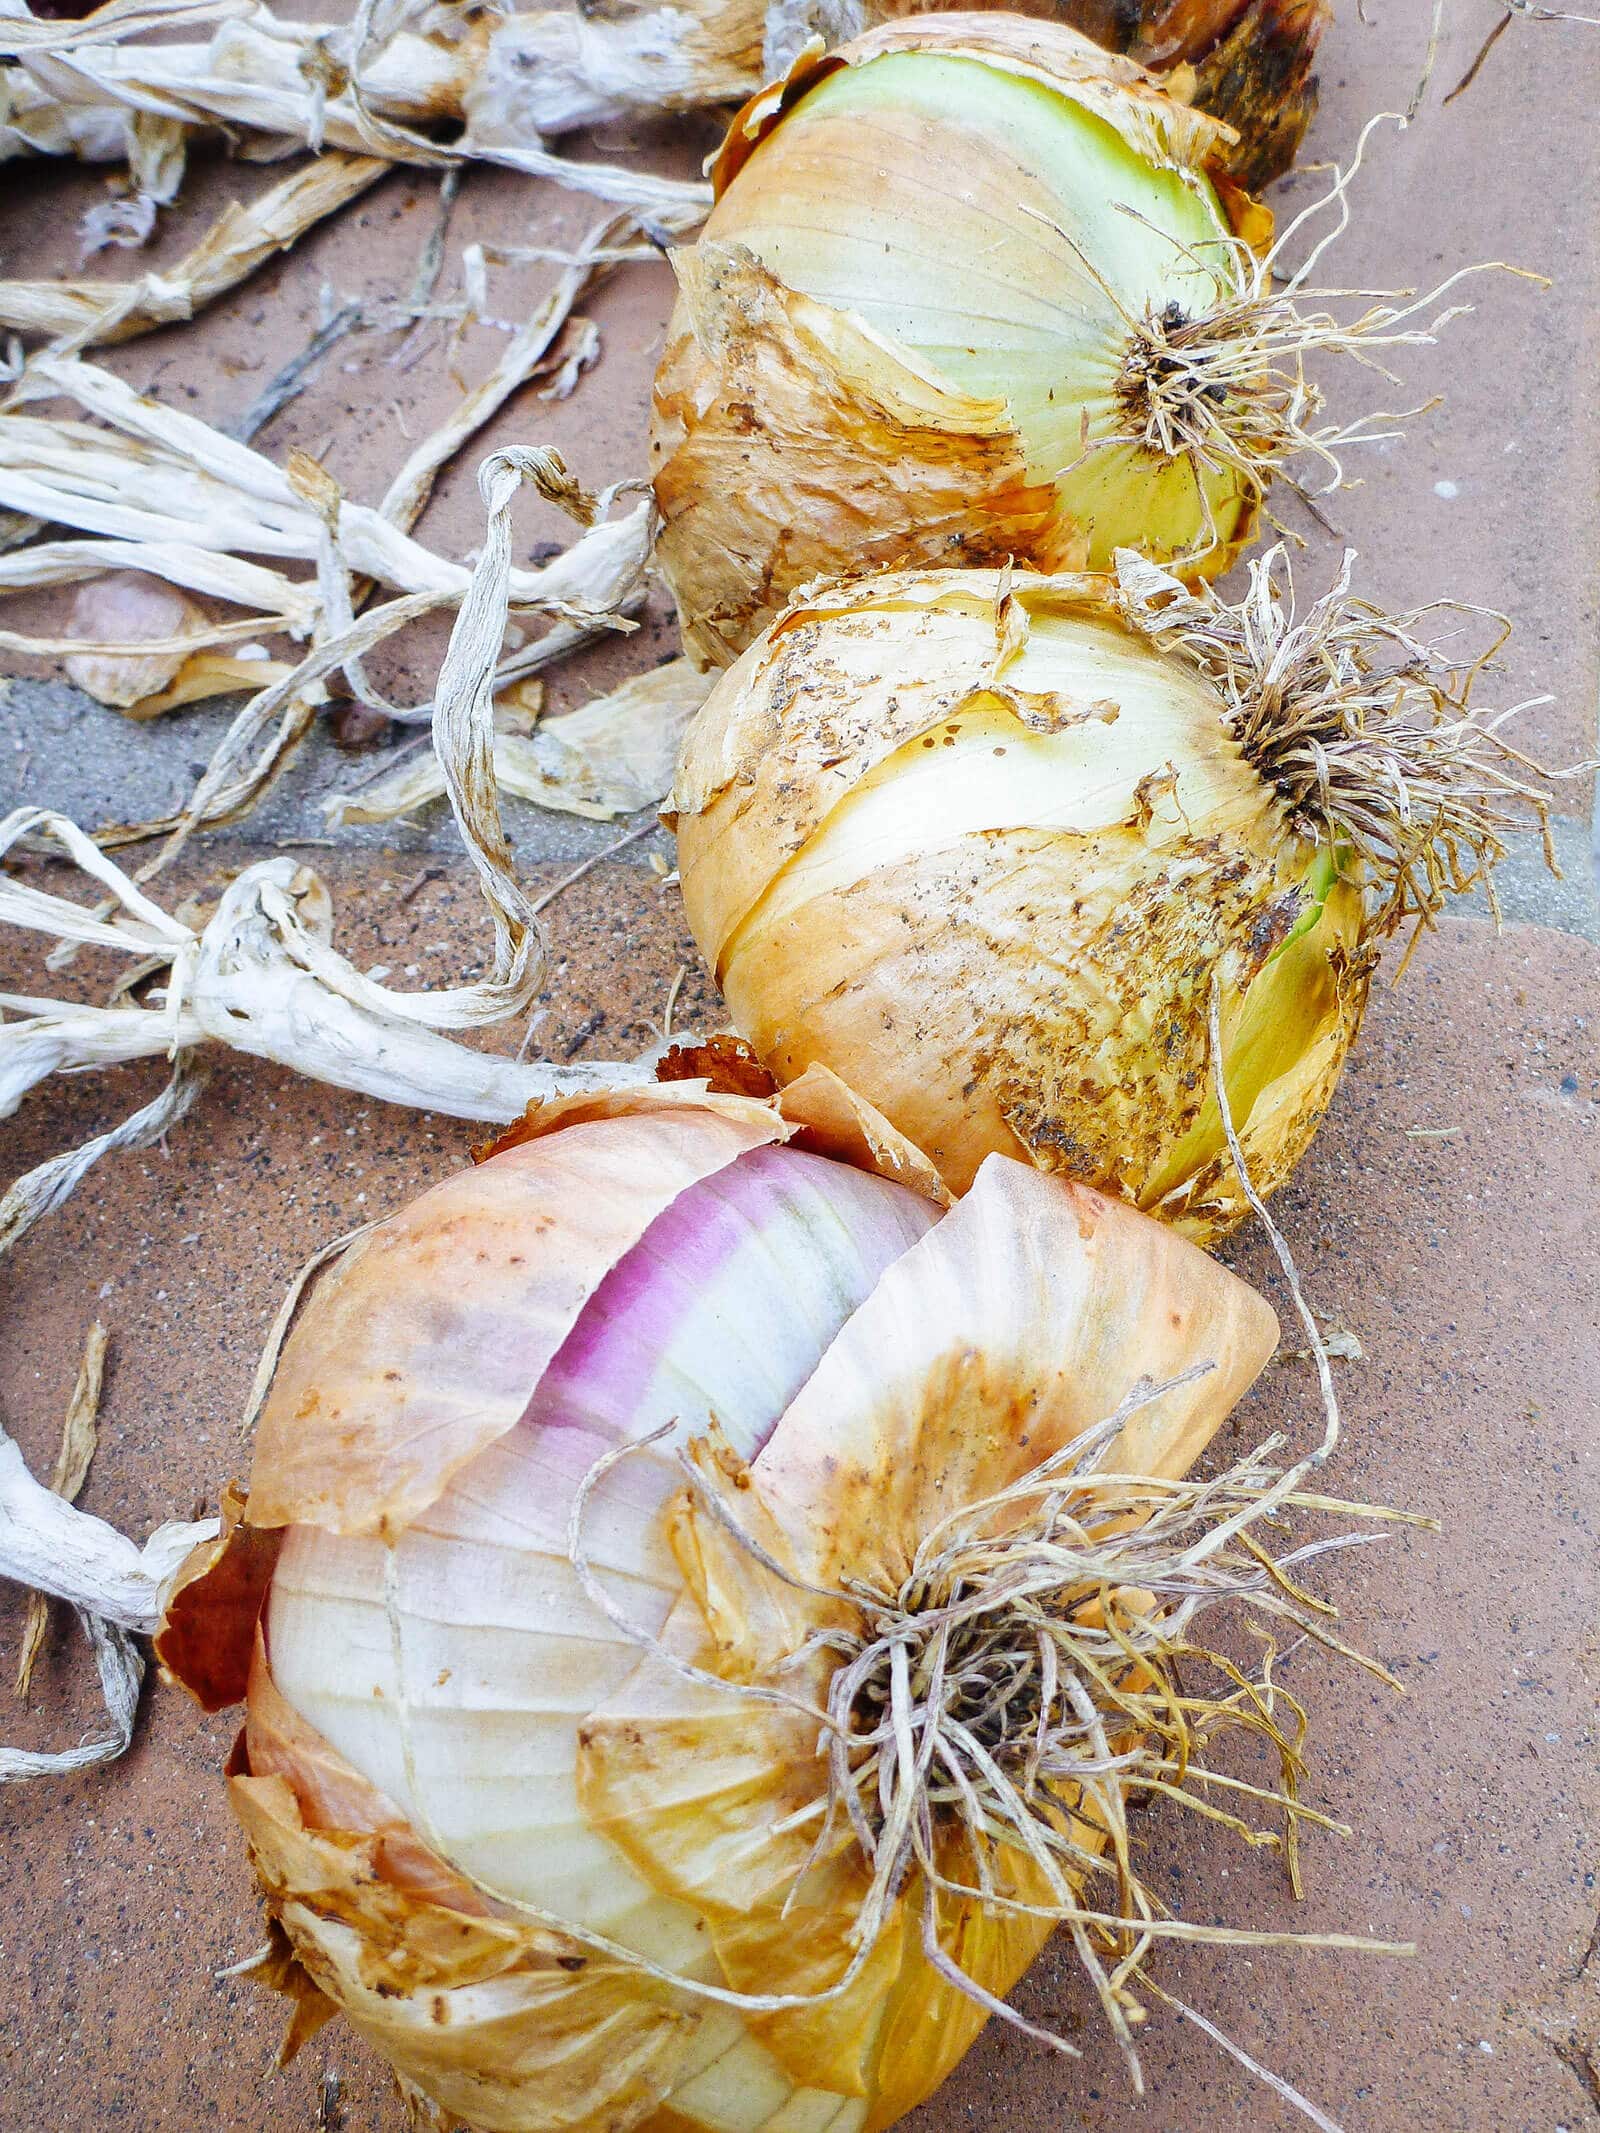
5. Trim the onions so you can see which ones to use up first
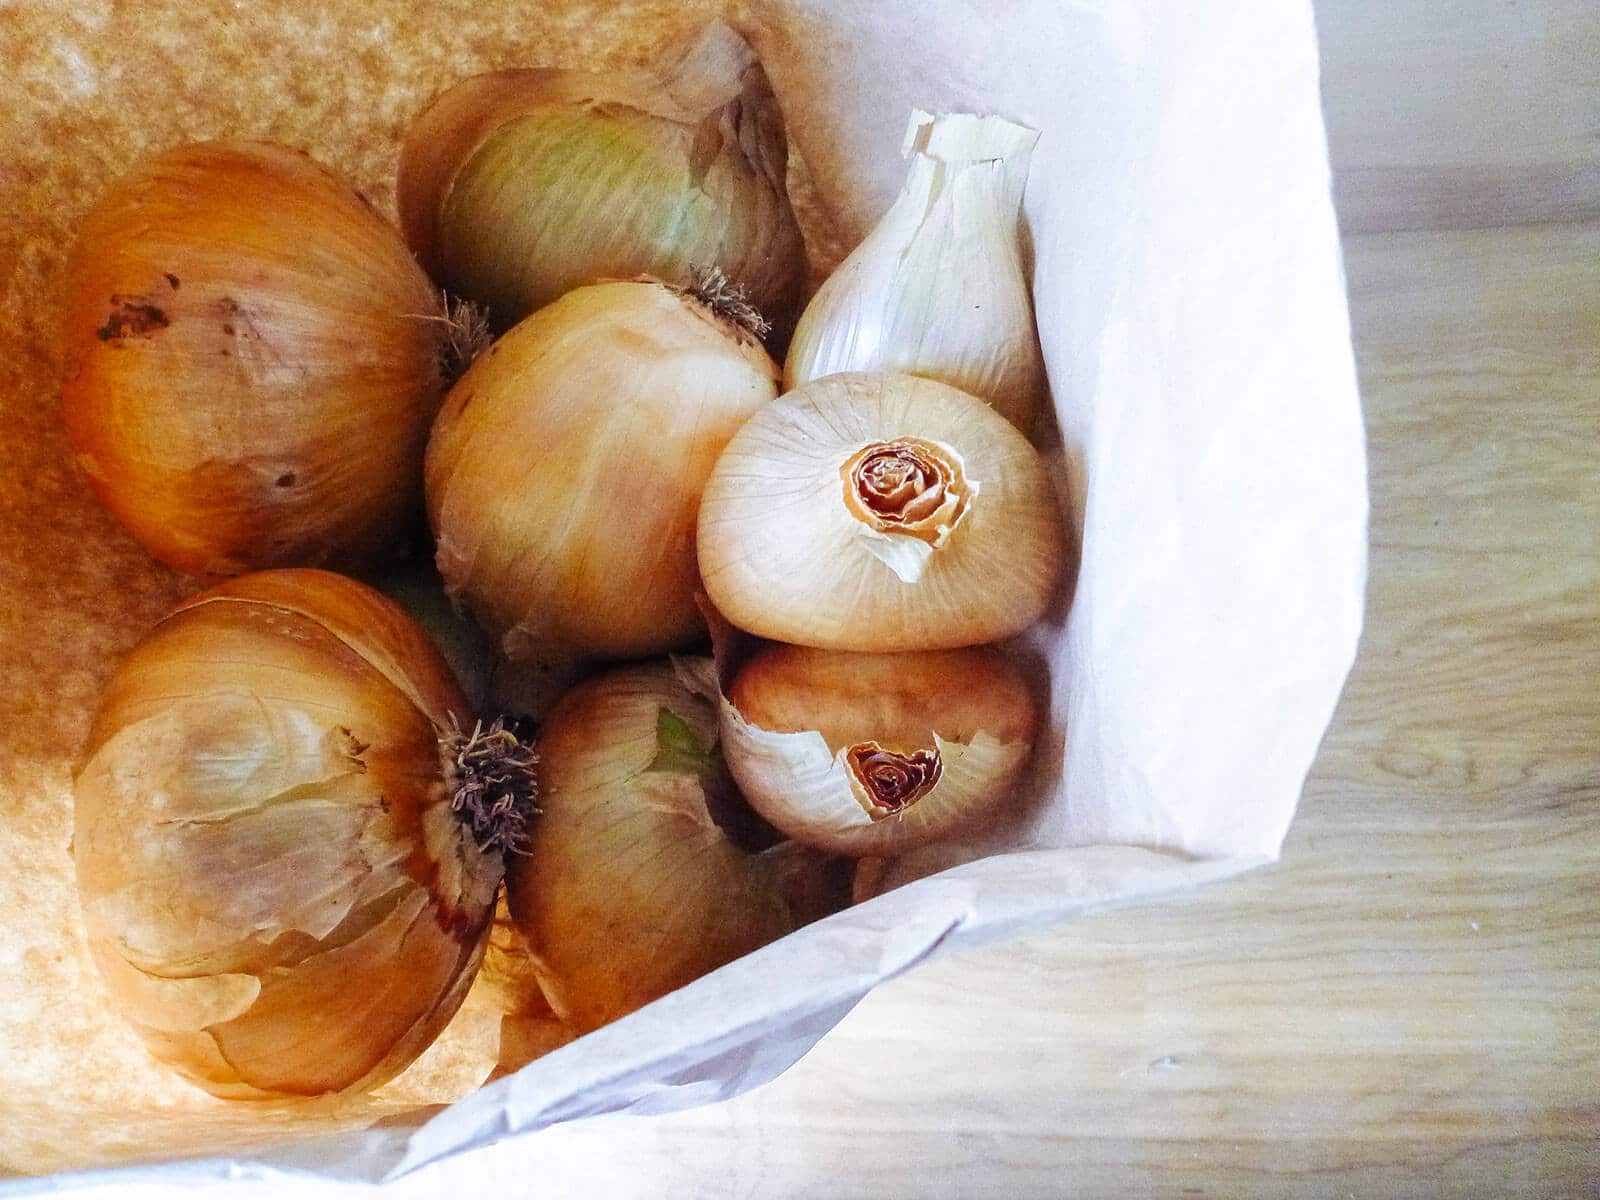
Once the onion tops and roots have fully dried, you can tidy them up by trimming the roots and cutting off the stems with garden scissors. A couple layers of the outside skin will usually flake off with the stems, leaving you with a clean, smooth onion.

If you had a few onions with flower stalks growing through the bulbs, use those up first. The flower stalks retain a lot of moisture (even after curing) and will cause the onions to decay quicker in storage. They’re perfectly fine to eat and usually keep for a month or so.
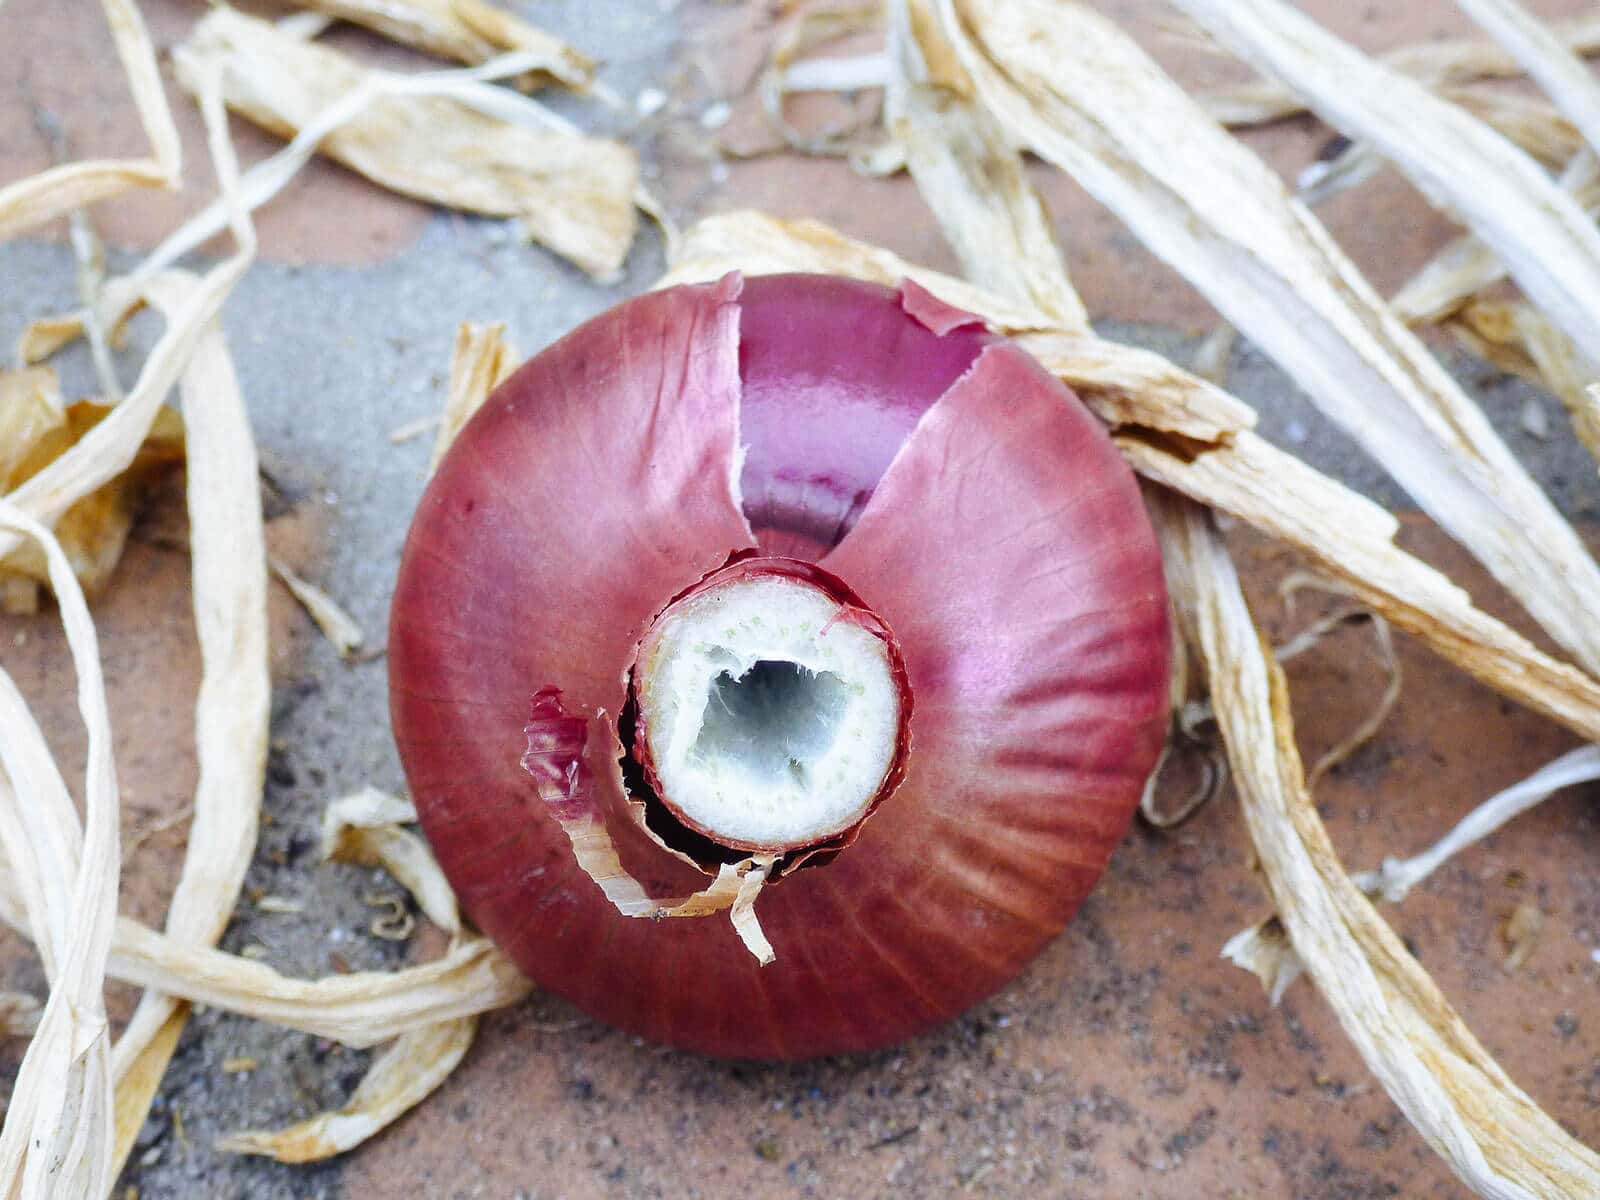
Onions with blemishes or bruises should also be used up first, as well as onions whose skins came off completely.
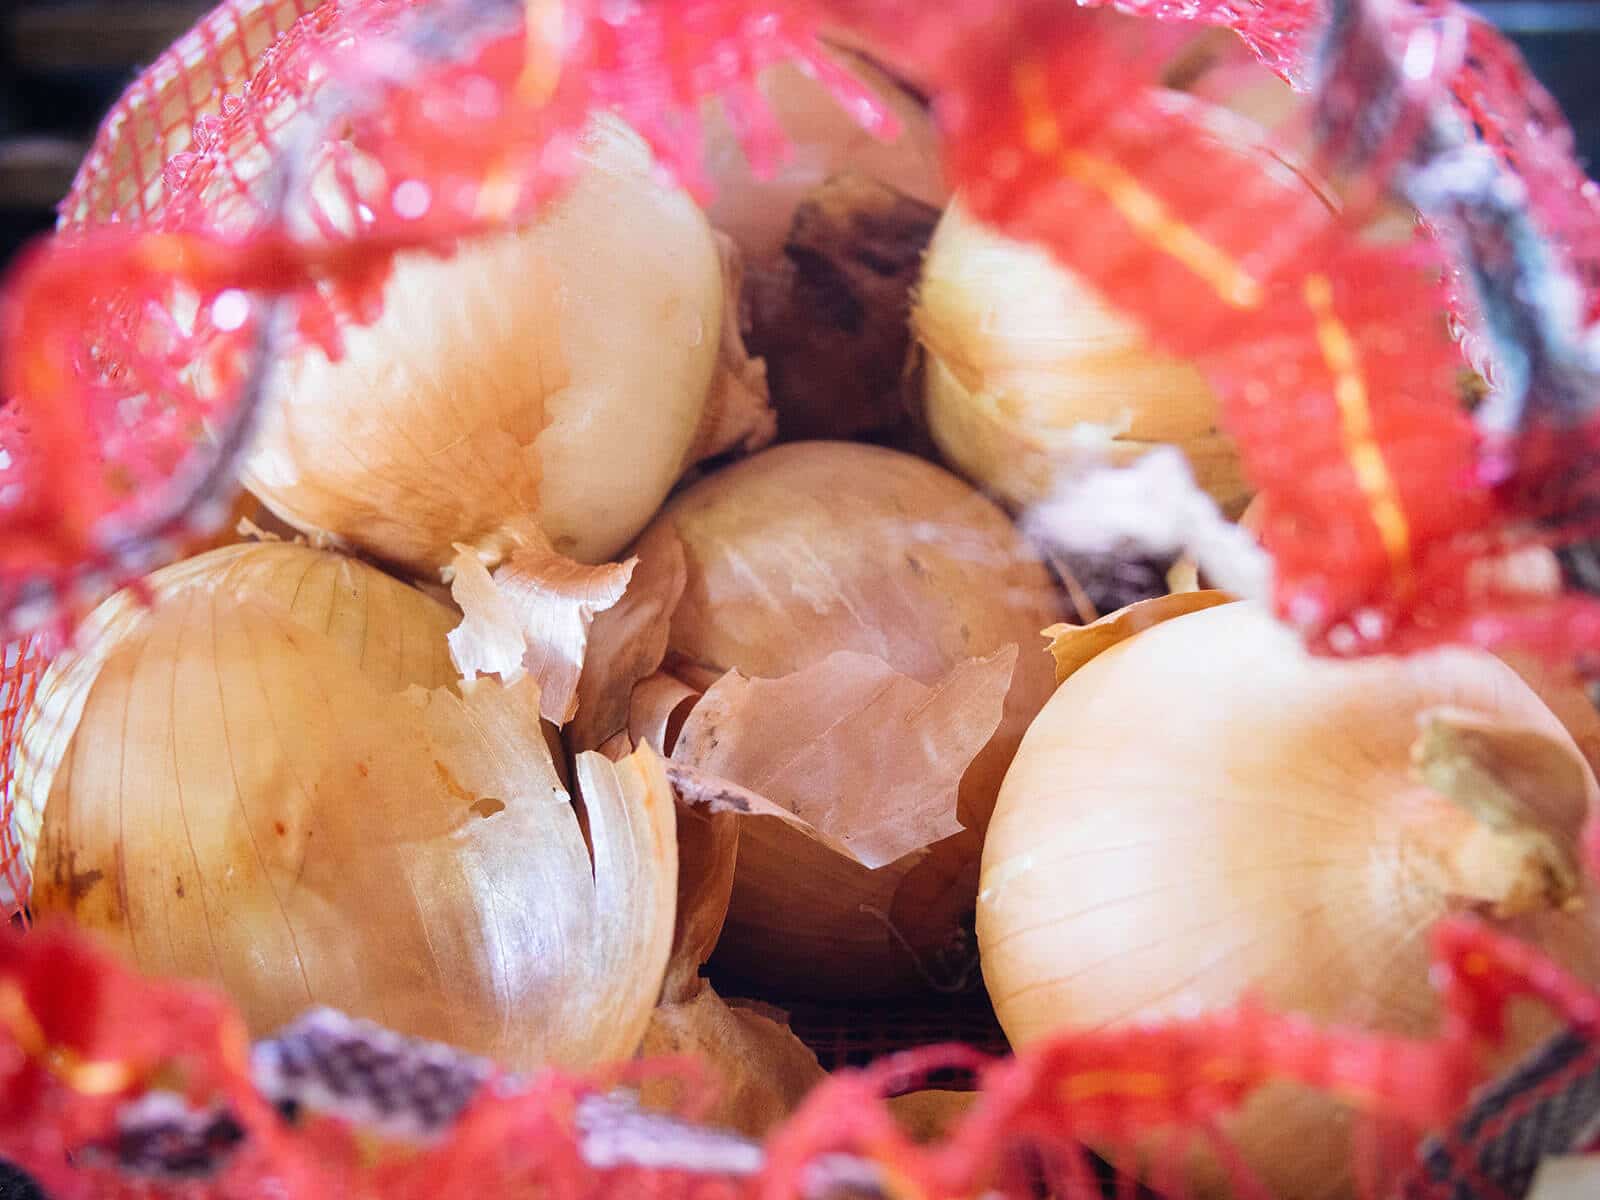
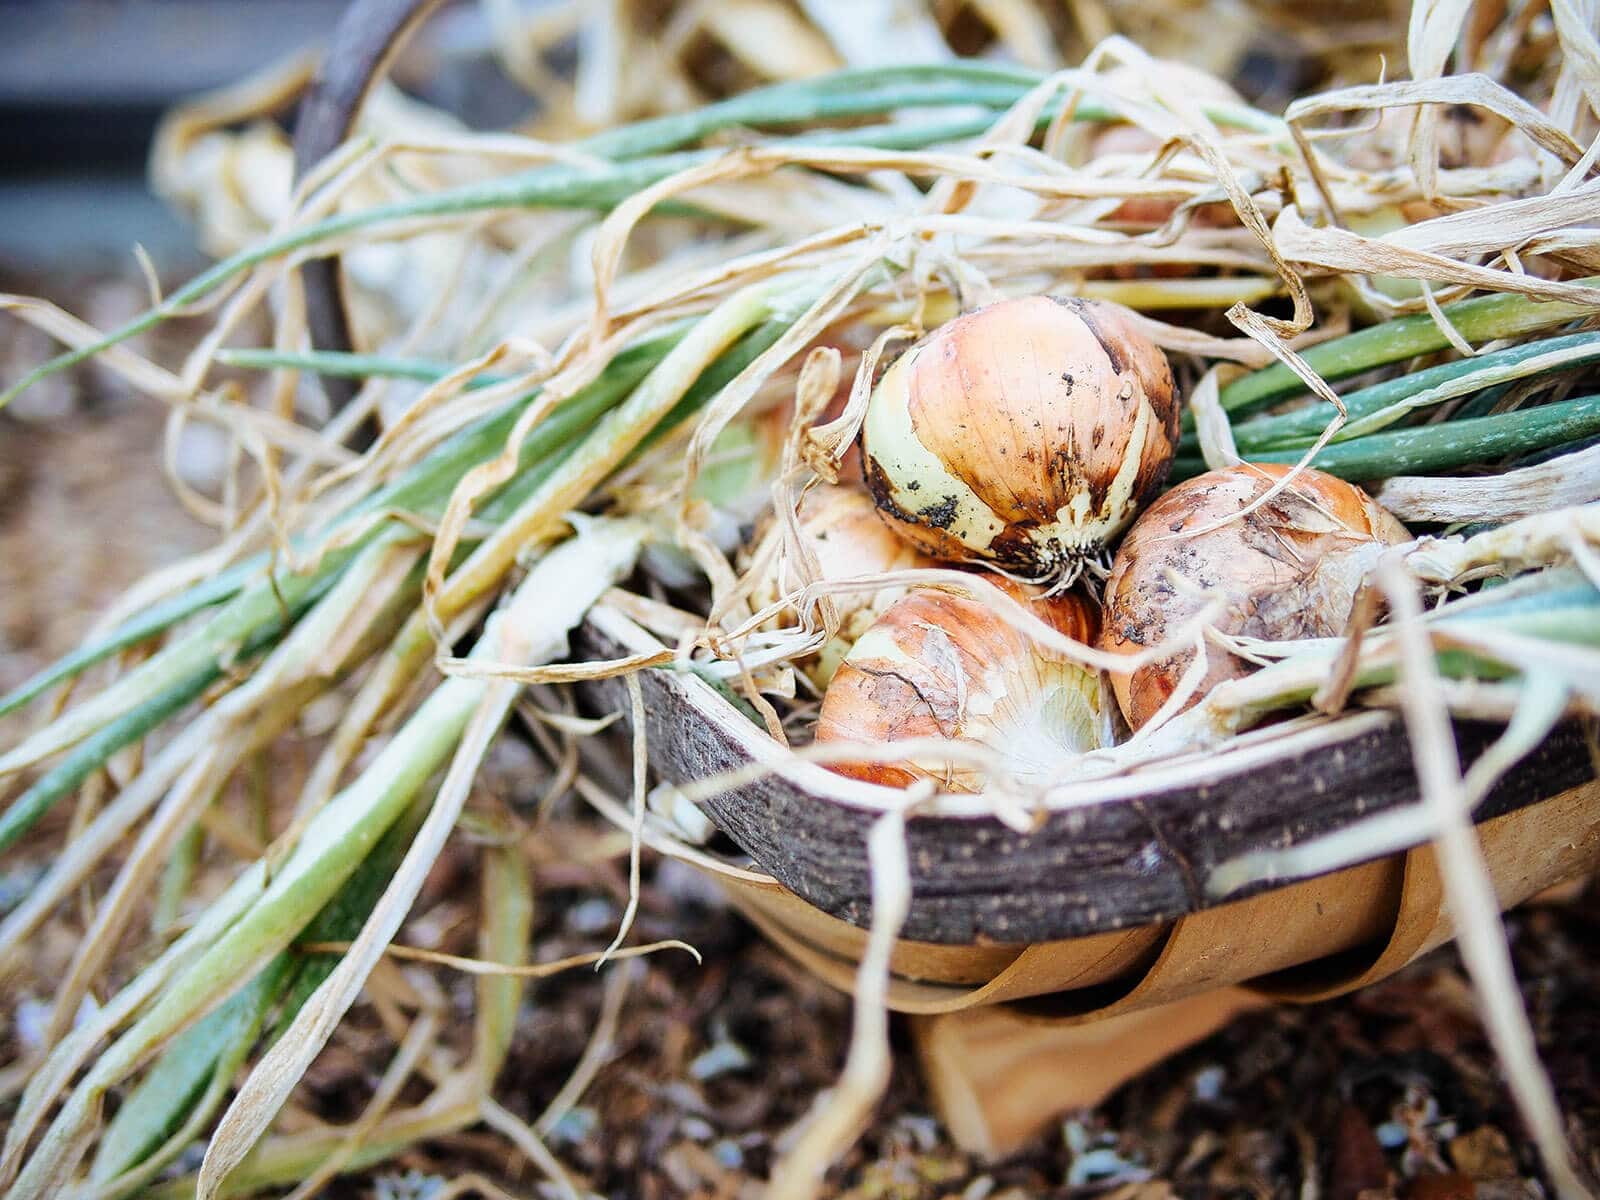
6. Store onions in a dry, dark, and airy space for maximum longevity.
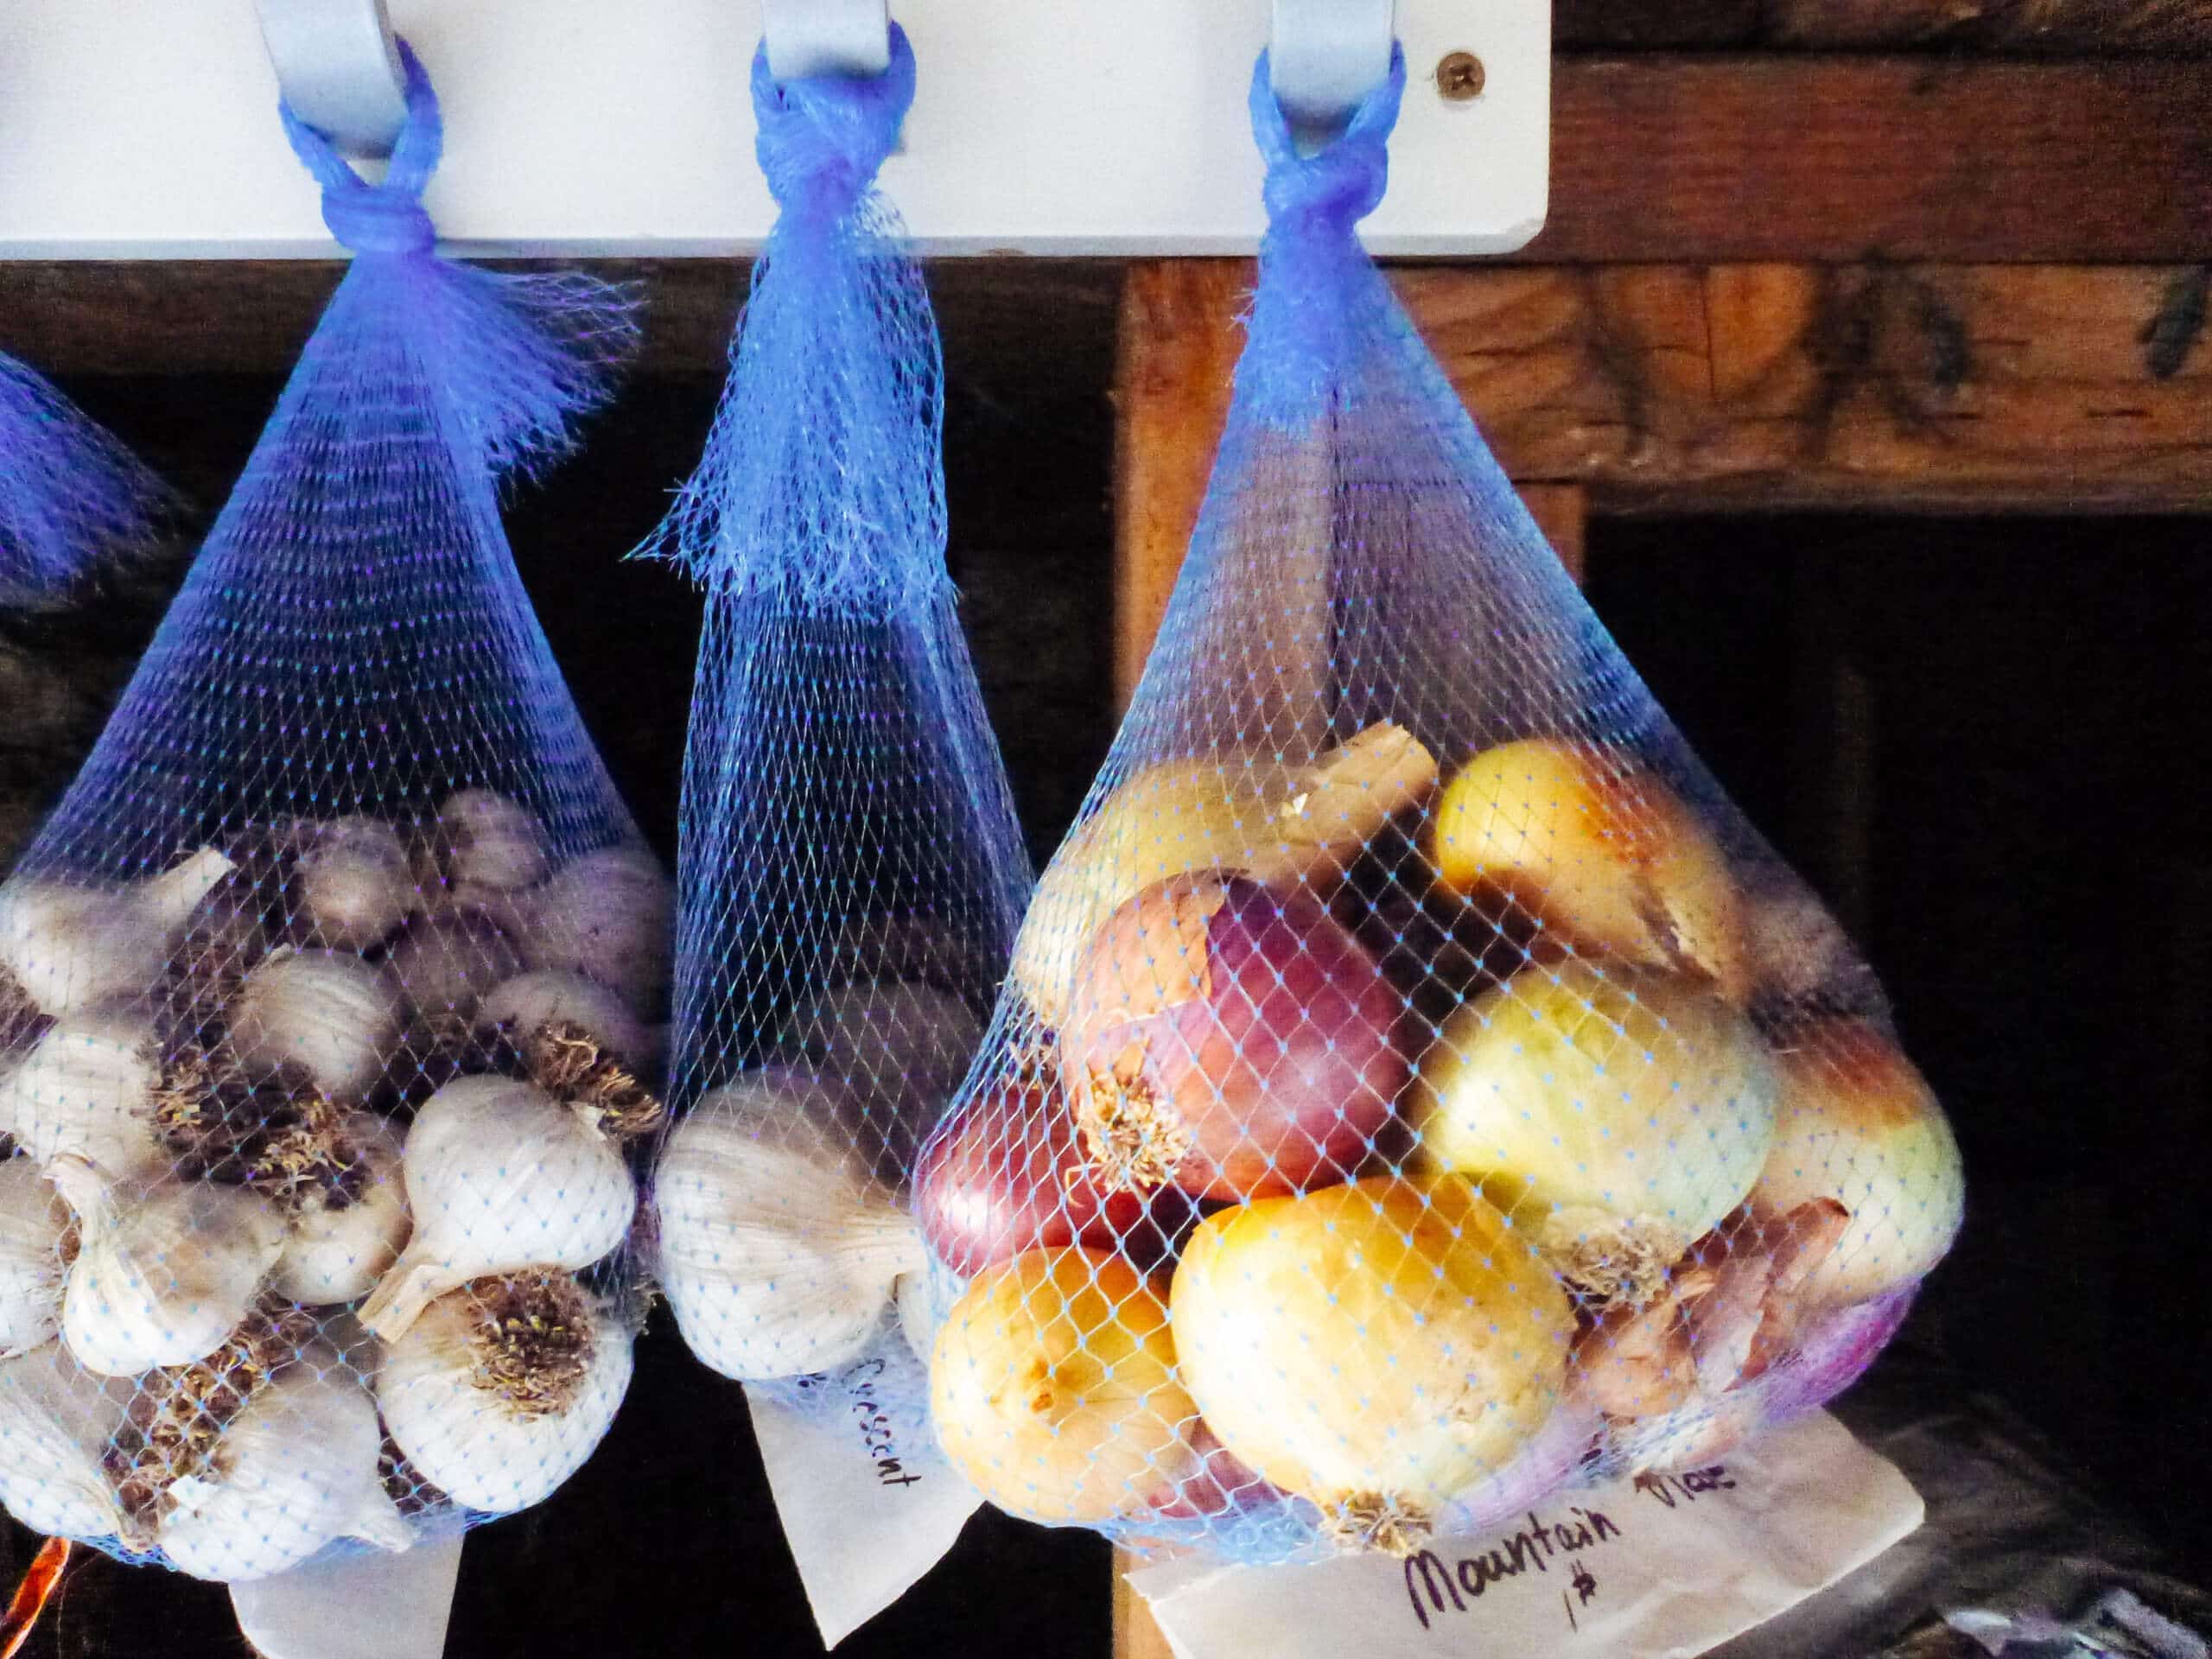
Onions store best in a cool and dry, dark and airy space, inside brown paper bags, nylon mesh bags, wire or wicker baskets, milk crates, or burlap sacks.
The recommended temperature for long-term storage is 32°F to 45°F at 65 percent to 70 percent humidity, but should never exceed 70°F if you want your onions to last. Ideally, you should keep them just above freezing but below room temperature.
Related: How to harvest, cure, and store garlic for the longest shelf life
Keep in mind that even after curing, onions are still very much alive and need cool, dry conditions to stay dormant. Any change in temperature or humidity can cause them to break dormancy and sprout again.
Don’t let good food go to waste
Get my tips for making your produce last
Download my Fruit & Vegetable Storage Guide for printable charts, helpful tips, and secret tricks for keeping all your produce—both homegrown and store-bought—super fresh for as long as possible.
You should check your onions every few weeks for green shoots that might emerge in storage. I once let my onions linger in a warm room for a couple of months, and came back to alien-like green tentacles taking over my shelf!
Bonus tip: save tiny onions to plant in spring
If you happen to have some teeny tiny onions (I usually get a few that never got around to growing, but are too small to be used like shallots), cure them and save them for next year—you’ve just grown your very own “set” of onions!
Replant the baby onions in spring, where they’ll mature into full-sized bulbs in much less time… and you’ll have a brand-new harvest even sooner!
Read more: Timing is everything—find out when to start seeds or set out transplants with my interactive planting calendar
What if you harvest onions too early?
The great thing about onions is that they can be harvested at any stage of growth. If you like the tender leafy tops, you can pick onions when they look like scallions; if you like small, salad-type onions, you can simply harvest them in spring.
If you harvest onions too early, however (before they’ve fully matured), plan to use them up sooner. Immature onions won’t store well compared to mature onions that have been cured.
Do you really need to cure onions?
No. Onions are edible right out of the ground and can be eaten at any stage of growth. You only need to cure onions that you want to store.
Also, gardeners in warm climates who grow short-day onions may not want to go through the entire process of curing. If the onion’s only going to last a month or so, it can simply be dried (in the shade) for a few days after harvest, trimmed, and stored in the pantry for use over the next several weeks.
Curing works for shallots too
Shallots are cured and stored the same way globe onions are. Because of their smaller size, however, they cure in half the time (just one to two weeks).
Shallots mature in about 90 days (just a little before your onion crop) and are ready to be picked in mid to late summer when their leaves start to turn brown and fall over. Just as you do with globe onions, watch for the tops to flop, then stop watering for several days. When at least half the crop has brown leaves, pull the shallots from the ground.
Disclosure: If you shop from my article or make a purchase through one of my links, I may receive commissions on some of the products I recommend.
Where to buy
Onion storage supplies
This post updated from an article that originally appeared on July 12, 2012.


Thanks so much for this article. I just got my first successful onion harvest after trying for the last three years. I kept getting super tiny onions that didn’t bulb up. I now have the idea to keep the small ones and plant them in the spring. I never even thought about that after reading and watching countless videos. I’m in Southern California and didn’t realize I had to plant short day onions over fall/winter.
thank you for the information on curing! one of my neighbors in the community garden gave me four of her newly harvested onions, and I wasn’t sure what to do with them.
Yet another dazzling piece, keep up the exceptional work!
Thank you!
Hi, I have to say I have used many of your methods, for garlic curing and choosing types especially. Thank you! The only good place I have to dry them is high up in my gazebo which means I would have to hang them. Otherwise they get rained on. Have you ever tried hanging them or will the stems break as they dry? Thanks!
I needed some advice on when to harvest my onions. There was so much information that I am now in a good place to prepare them ready for storage. I look forward to reading the rest of your information on fruit and vegetables, great stuff and thank you
Can you store long storing onions in a refrigerator with temp around 38f
Super helpful. Thank you so much. Following step by step and it is so much fun. Love the taste of onions but now I’m enjoying the beauty of them too.
show me the microscope
I started onions from seeds indoors and transplanted them outside. I was careful not to plant too deeply but wondering if I still did because none of them are sitting on top of the ground like you see in pictures. The greens look healthy, I’ve kept them trimmed to around 3 or 4 inches because they started flopping all over the place. Can I dig one up to see if there’s a bulb and then replant it if there is? If there are no bulbs by now does that mean there just won’t be any no matter how long they’re in the ground? Of note; the soil they’re in is topsoil with peat moss and perlite mixed in but it’s still pretty heavy and compacted.
Few months ago I was Comfirm that I have herpes virus and ever since then I have been on research on how I will get rid of my Herpes but on one faithful day i saw someone testifying about Dr Okosun and she Was saying that she was cured from herpes virus and also I quickly copy his email address and I emailed Dr Okosun and he told me that I need to get some herbs which i purchased and he told me that he will ship the herbal medicine to me through UPS courier service and he also told that his herbal medicine is going to take seven days to cure me from herpes and behold his herbal medicine work accord to him and i am free from herpes now and Dr Okosun is a wonderful man and he is the best doctor I ever met in my life and he is the best doctor in Africa whats app his number +2348130871253 or +1(504)3507342 or call +2349077677320
Wow. Great site. The explanation for “curing onions” left nothing to question. I only had signed up for one garden site, and cancelled due to a complete lack of relativity to my garden needs. Anyway…THIS site reads very well and easy. Especially for my IQ which camps around the speed limit* …..on a good day. Looking forward to “your” take on tomatoes, cucumbers and especially, Basil.
*Autobahn…not included.
I had an old lightweight door next to where I have my onions. This morning, the door blew over and broke the necks of most of the onions. They had pretty much all fallen or started to fall over. What should I do? HELP! This is my first time planting onions and they were doing so well…I think. A lot of them had the little flower thing. Is that normal?
Yes, the flowers are normal — here’s a post that explains why some onions have flowers: https://gardenbetty.com/bloomin-onion/
As for the onions whose leaves were knocked over, they won’t continue growing at this point, so you can harvest them and try to eat those ones first. The onions that had already fallen over are ready to be cured.
This is an excellent article that really helped me a lot. I have grown beautiful onions before in other years but I never knew how to store them properly and some of them went to mush. This article with the pictures really helped me dry my onions successfully this year! I never really knew what they should look like when I pulled them or what they should look like when dry enough. Your pictures really helped me know when each step was right. I laid my onions out in my garage and used a fan to circulate the air in there. Thank you so much!
You’re very welcome! So happy it worked out for you this year!
My onions leaves are still green but they have flopped. The soil is still moist it is in a pot and the leaves are strong
Hi! My onions had been growing great, then got shaded by my zucchini, and stopped growing, then the leaves died. A few started to look like the neck was rotting, so I pulled them all (boo). Are they still safe to eat if the onion itself is firm and not rotted at all? They range from 1″ wide to 2.5″ wide. I hate to throw them out! Thanks! By the way, I’m in S.E. Massachusetts!
Yes, you can eat immature onions! They won’t store well though, so you’ll have to eat them within a few weeks.
This is my first time growing onions. I can’t tell you how many times I’ve googled “how to harvest and cure onions”. I am just so anxious to harvest and want to do it right! So on most of my onions, the bottom 2-3 leaves have yellowed and the tops have fallen over but a lot of them are still green. I’d say it’s probably been a little over a week. We’ve had a few warm, dry days and are supposed to have another one tomorrow. Should I go ahead and harvest or wait a few more days? Thanks for your detailed post!
If the tops have fallen over, they’re ready! The green leaves will dry up during curing.
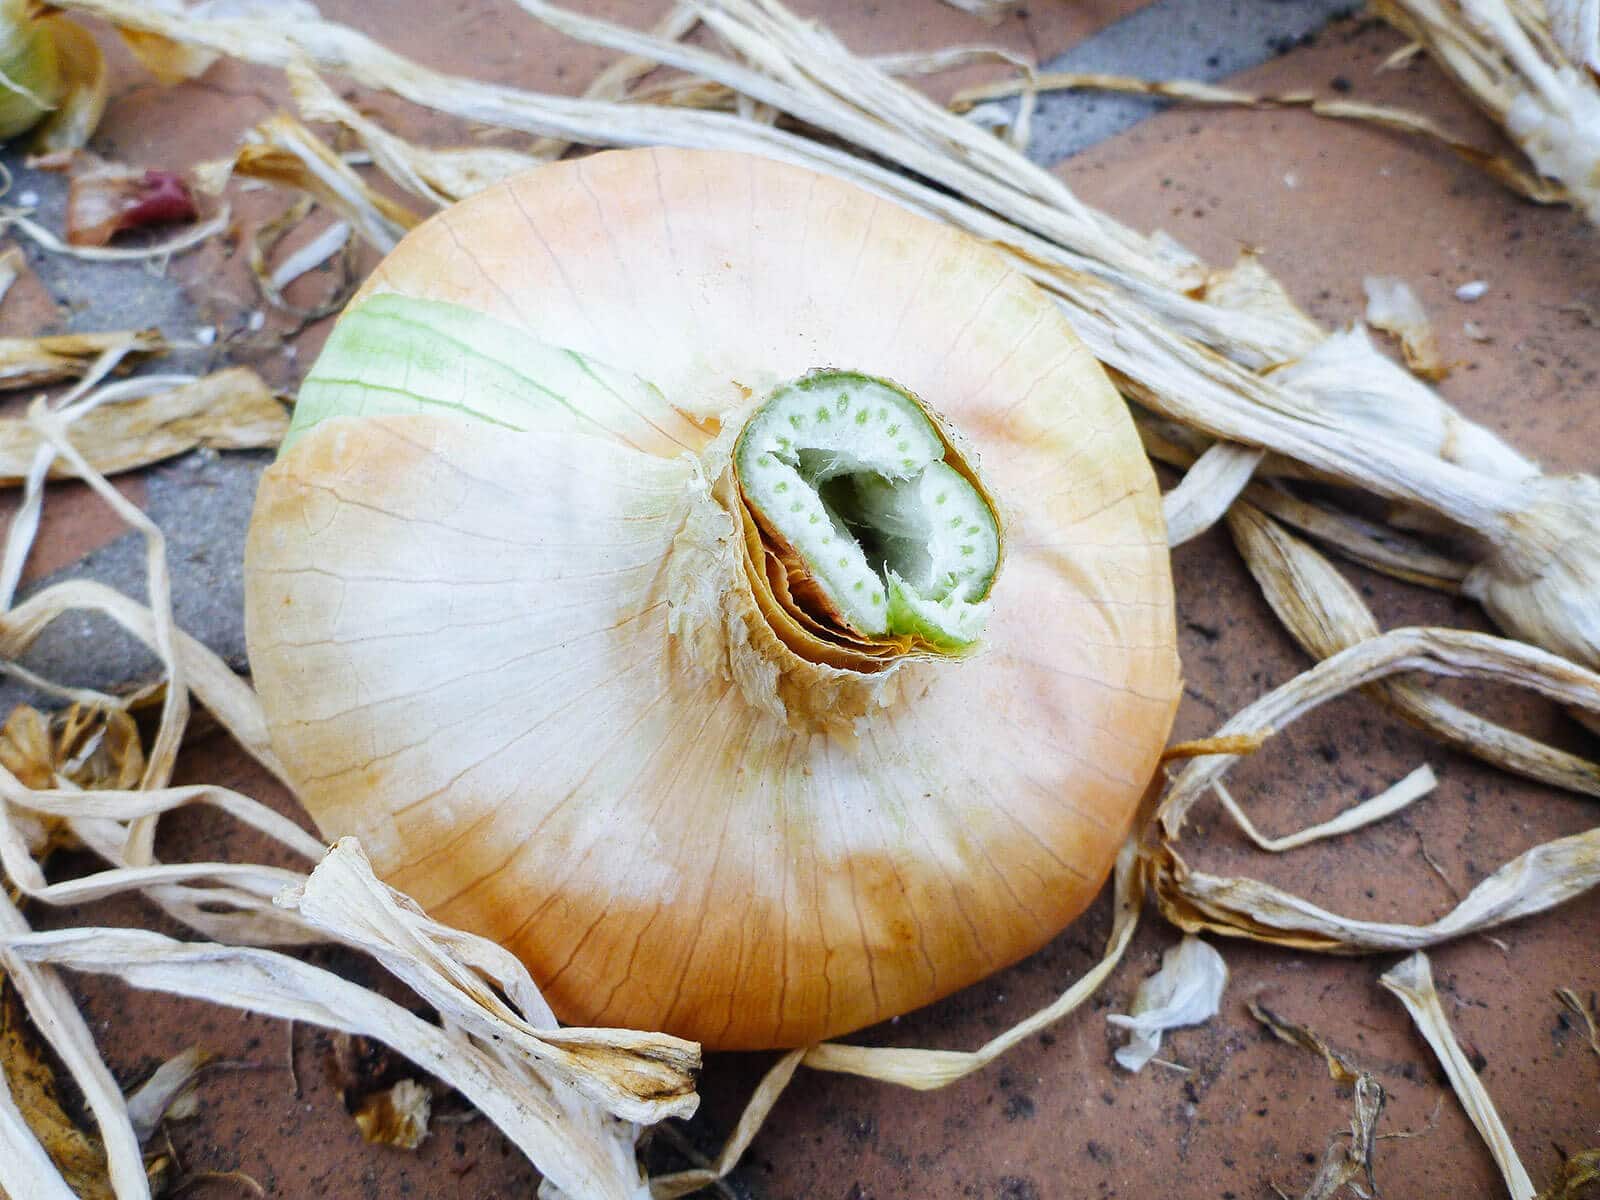
One more question! Is it normal for white onions after curing to have a greenish outer layer? I read it has to do with sunlight. Mine were under the shade of a tree all day long for about 2-1/2 weeks. I just brought one in to eat and after peeling it, the outer layer was green. Is it still okay to eat? Wish I could post a picture!
Yes, it’s still safe to eat.
Hi Betty … just discovered your posts in looking for fava bean info. I love your graphic pix and step by step thoroughness. Fabulous. My onions never balled up. When I pulled them out they were just long like scallions with very little area of actual onions so I used them as green onions, but of course those do not store well. This happened with both red and white onion sets, and both in ground and in pots. I am wondering what I did wrong? North Central FL Zone 8.5-9
In the southern part of the country, make sure you’re planting short-day onions, which will bulb with less daylight available. (Less meaning 10-12 hours a day.) They should go in the ground in fall and be left to grow through spring.
Hi – Help!
I always have a problem with drying out my onions and shallots and lose a lot of the crop to mould. My shallot stems had withered and they’d been in the sun, so I took them out of the ground just over 2 weeks ago and laid them in trays in single layers in a cool breezy shed (with a window in it), taking them out onto the lawn during dry weather. Today I took them out to remove the outer dried layer and found that under the dried outer layers many of them have a thick wet brown layer, like a thick wet blanket around them and some have already begun to go mouldy at the root end. This wasn’t visible if you looked at them, only when the outer dry layers were peeled away – last year I didn’t notice this and almost the whole crop rotted away.
This also happens to my onions too and I’ve found the only way to resolve this is to strip off all the outer dried layers, leaving a ‘naked’ onion – it’s also time consuming and hard on the fingers and nails. Is the shed, which is cool, but gets some afternoon and evening sun, the right place to dry them? Do they need more sun/heat, or will that encourage the mould? Should I leave them in the conservatory (where it can get quite hot)?
I’m going to lift my onions later this week and would love to know how to dry them well enough to store them.
Have you any other suggestions??
Many, many thanks
Millpike
It sounds like your soil may be too moist when you harvest. Mine is super dry in the top 2-3 inches. Also, if you’re waiting until ALL of the stems have completely dried out before you harvest (and there is no green left), you’ve waited too long.
For the next crop, you might also want to be more vigilant in watering only the soil around the bulbs, instead of watering overhead where water can collect in between the leaves.
Thanks for your post it is very informative.
Well, I had all my onions drying in a nice breezy spot and this morning while I am getting ready to go bring them in, it had started to rain, it’s still raining. Will this effect them in a negative way?
They will need to fully dry out again before you store them. You can bring the onions into a garage or other indoor space to to finish curing them, as long as they have good air flow.
Beautiful photos and wonderful post. I love my onions. Every year I think I need more they never make it much past fall.
Ditto! I would need to dedicate my entire yard to onions to keep up with how much I use all year!
Wow, great post! We have yet to have an onion crop that hasn’t been stunted and slowly wiped out by thrip so we have never gotten to this step, but it is great to know how to cure them if we ever do. Thanks for posting!
Oy, good luck next year!
This is great timing! My onions have all flopped and I wasn’t sure if I was supposed to be watering them still or not, thanks for the clarification! I adore onions, but this is my first year growing my own. So far they look great, and now thanks to you I know the next steps to take. Great post, thanks Linda!
Enjoy your soon-to-come harvest!