
Seed starting doesn’t always mean going out and spending money on all those nifty peat pellets and peat pots and plug trays. Often times, you can recycle seed starting containers you already have in your house.
Related: Dollar Store Deals: Secrets to Scoring Cheap Seed Starting Supplies
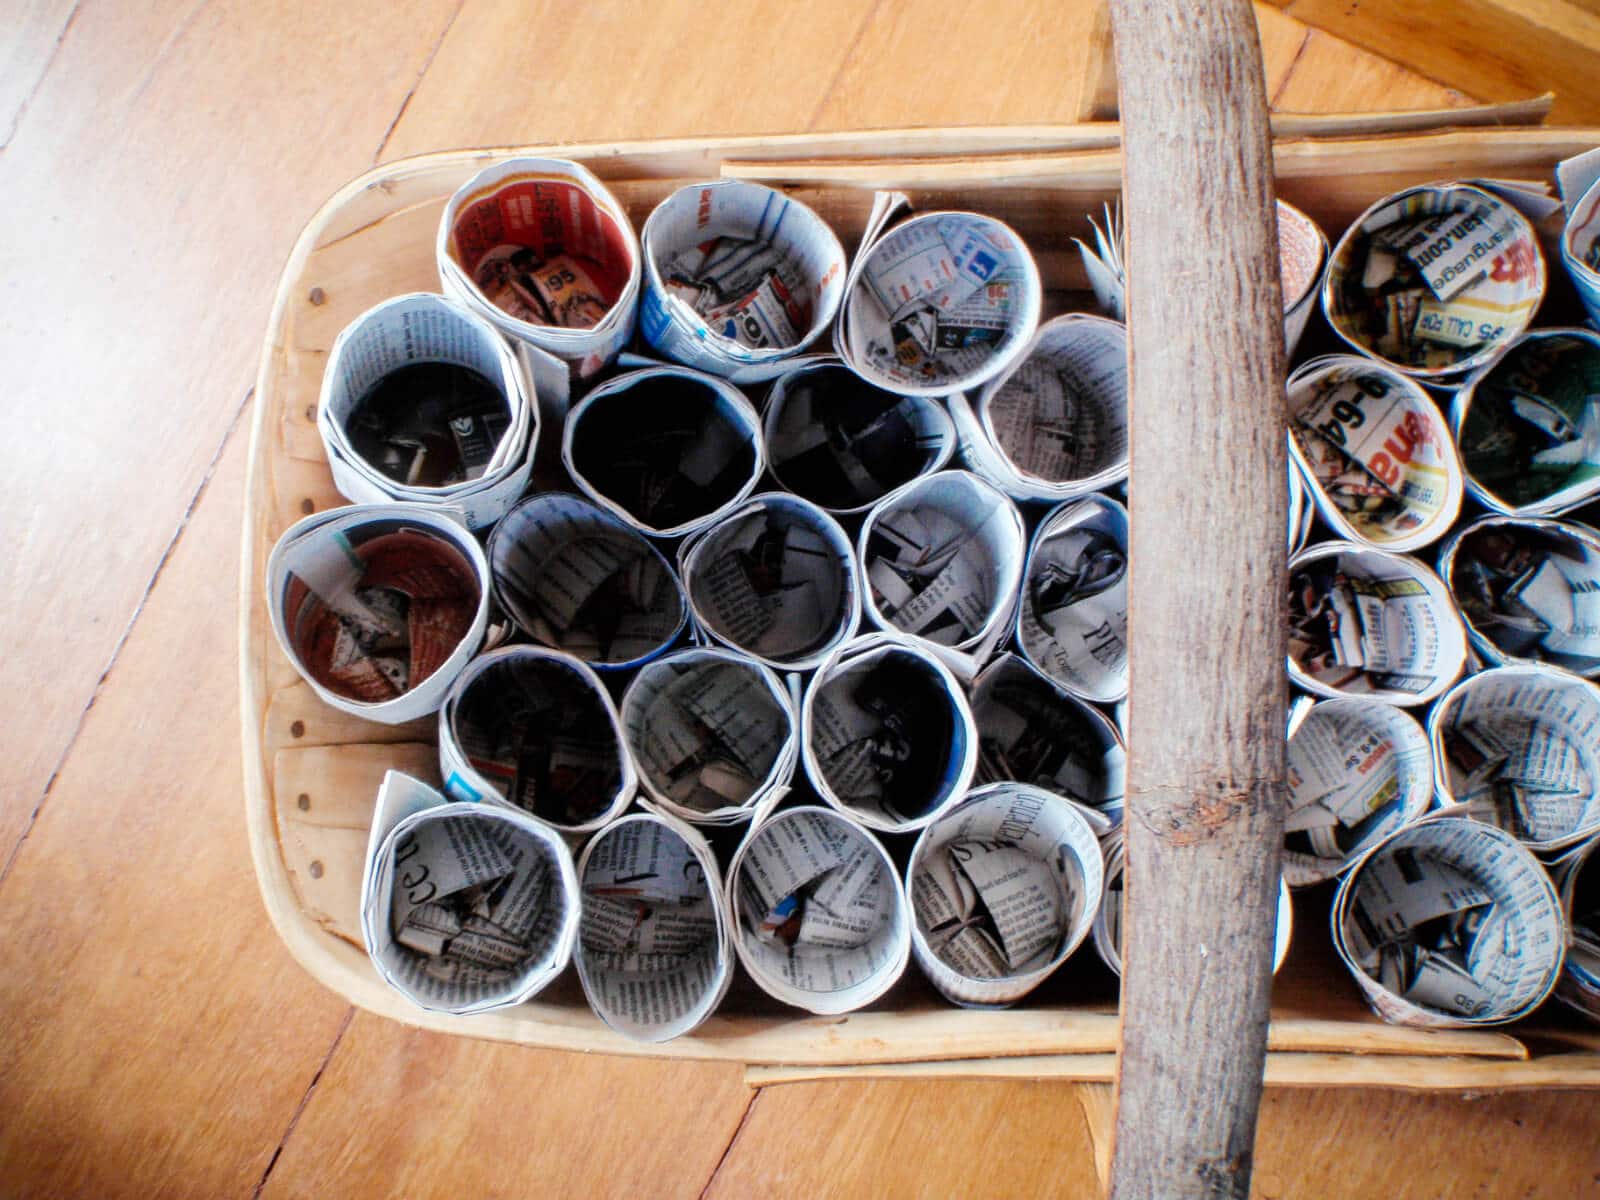
These newspaper seedling pots are a great, simple weekend project to use up all those newspapers you’ve already read or, if you’re like me, the Sunday sections you’ll never read.
I cranked out 40 of these newspaper pots in an hour in front of the TV one night! If you have kids who love a crafty project, making seed pots is also a good way to pass a rainy day at home.
Related: Starting Seeds in Eggshells… Cute and Yes, Even Practical
You only need three basic materials that you likely already have around the house: newspapers, scissors, and a small can.
How to Make Newspaper Pots for Seed Starting
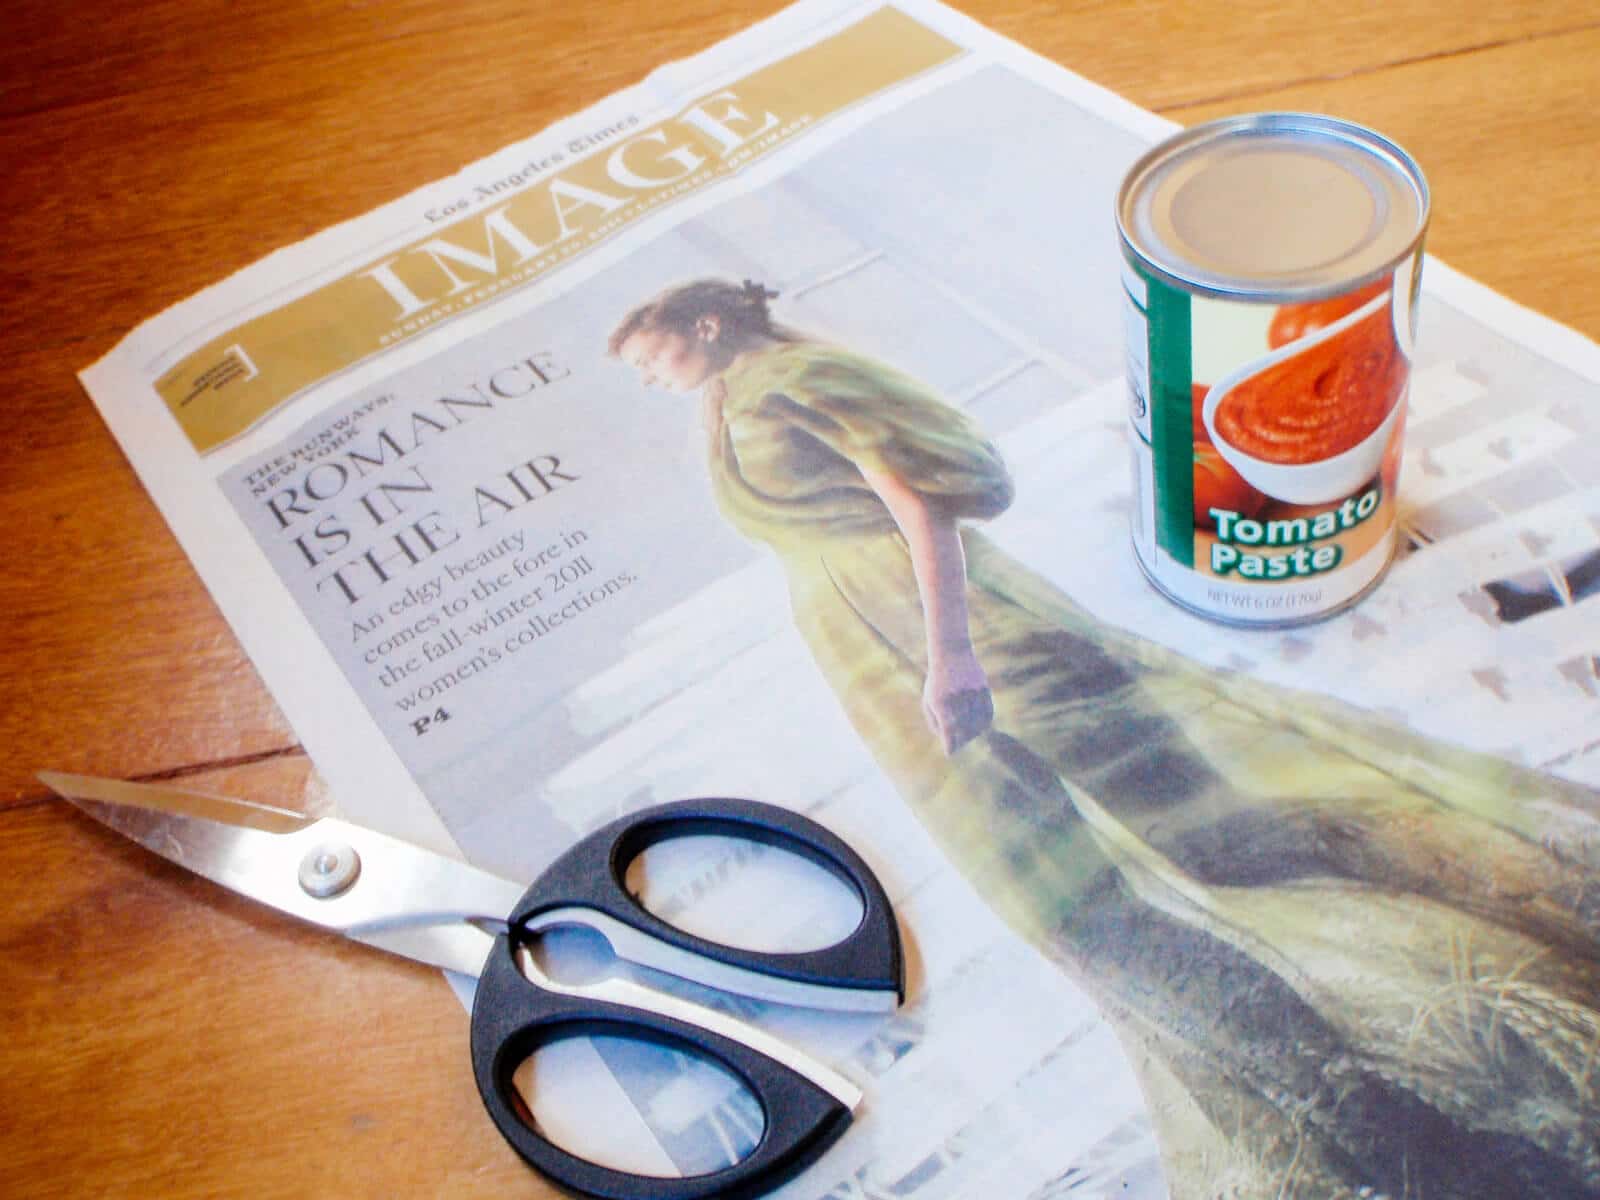
Step 1: Gather your supplies.
Gather a stack of old newspapers, a pair of scissors, and a 6-ounce can of tomato paste.
Note: For seedlings, I find that a 6-ounce can (the kind that tomato paste usually comes in) is the perfect size. A shot glass also works well, or even a small jar (what you might find capers or curry paste in).
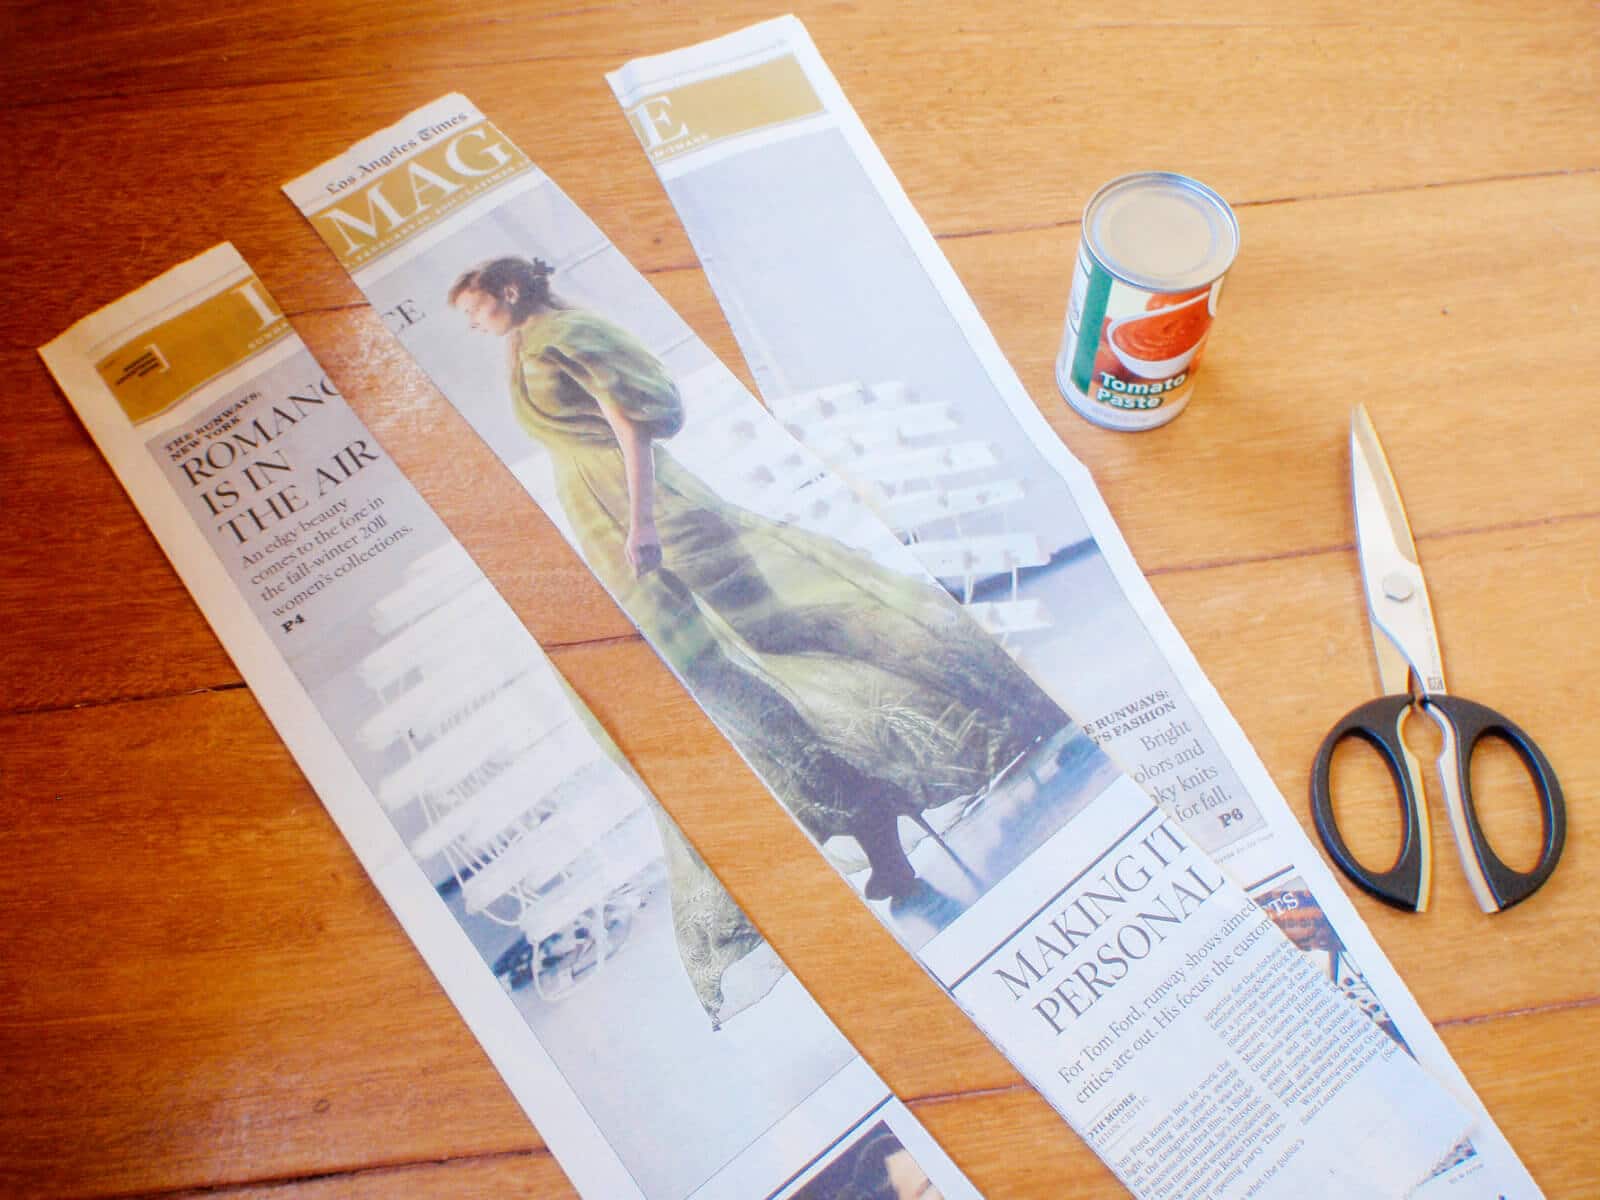
Step 2: Cut the newspaper into long strips.
Grab two pages of newspaper (so you have a four-sheet stack). Cut the newspaper into thirds lengthwise, giving you three long strips.
Step 3: Use the can as a mold for rolling the newspaper.
On the end closest to you, lay the can on its side across the strip of newspaper. Leave about 1 inch hanging off the end of the can.
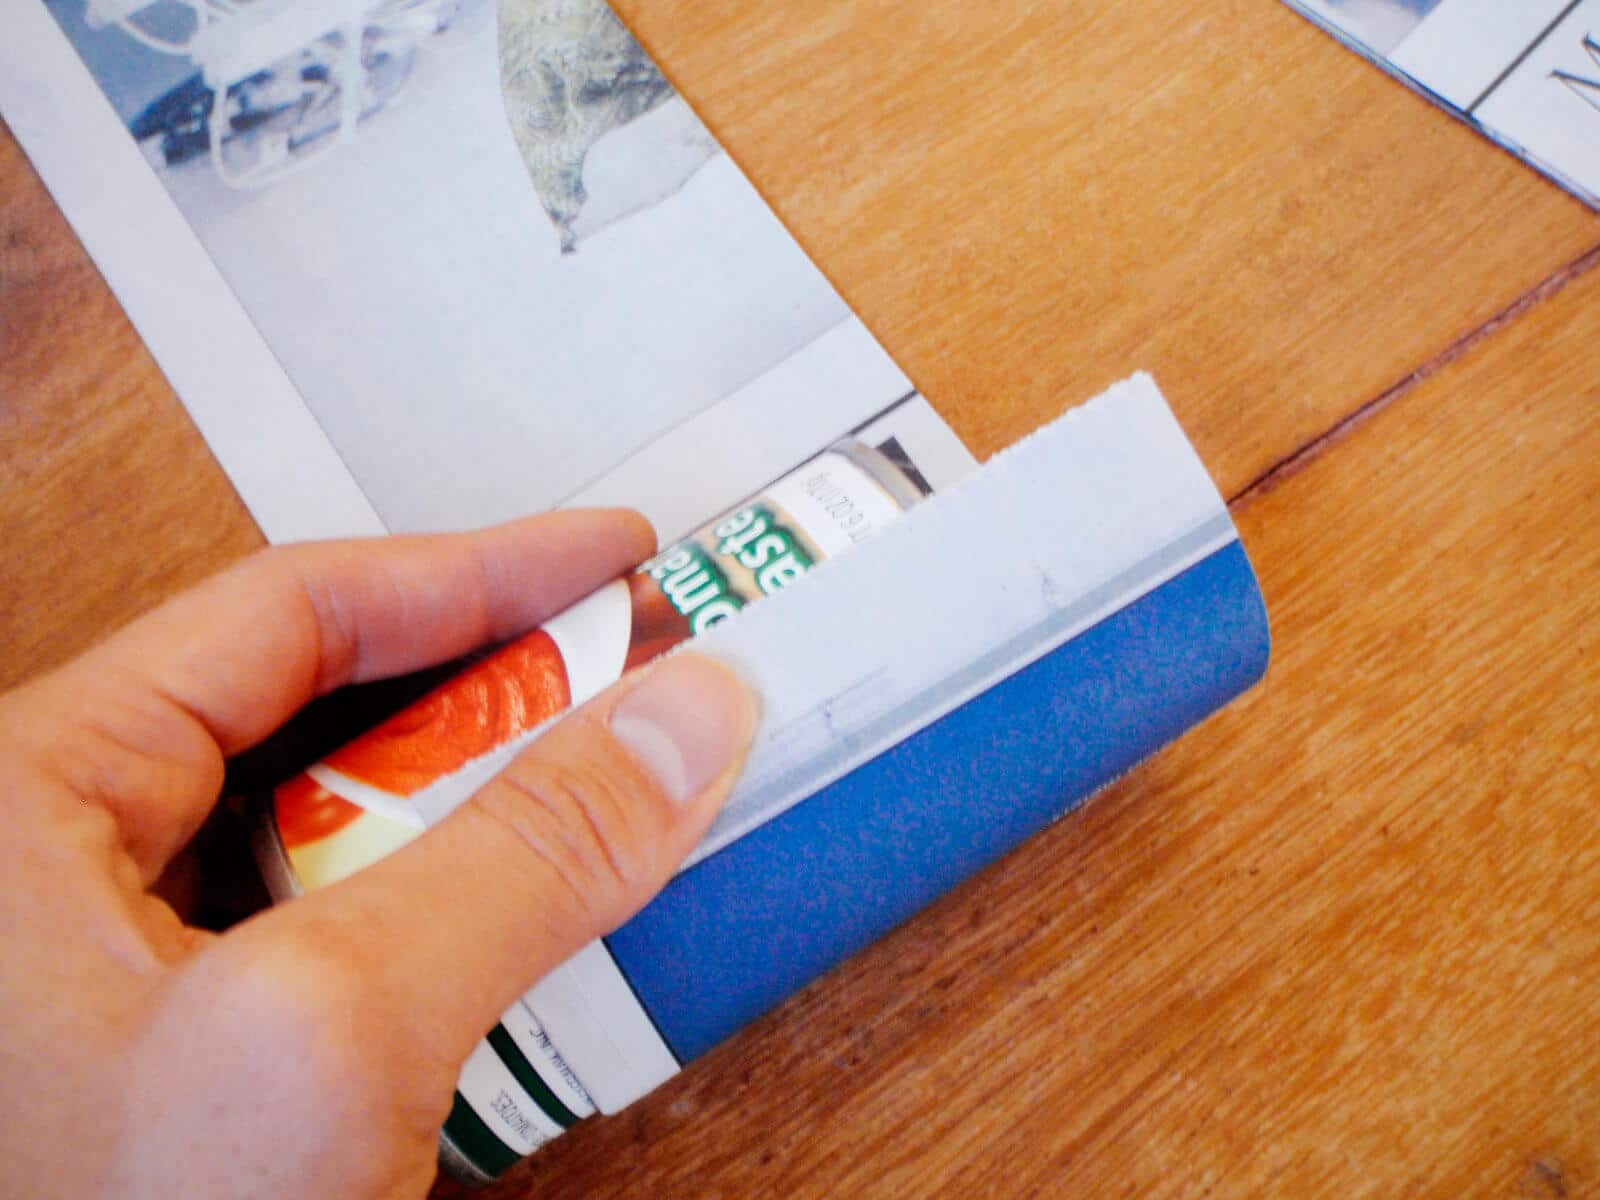
Step 4: Start rolling the can away from you.
Roll the can along the newspaper until it’s loosely wrapped all the way around. (Loose being key for easy removal of the can later.)

Step 5: Fold the edges of the newspaper down to form the bottom of the pot.
Fold the edges of the newspaper down over the can, and work your way around in a circle until all the edges are folded over firmly.
They don’t have to be perfect; you can just smush the paper down with your fingers. It’s also fine if there is a small hole where the folds meet in the middle — that just provides extra drainage.
Step 6: Flip the can over so your pot is right side up.
Flip the can over so the folded edges are now on the bottom. I like to press the can down on the folds to really crease the edges against the bottom of the can.
Step 7: Slide the can out to finish the pot.
Slide the can out and you’ve got a thrifty and biodegradable seedling pot!
Repeat the process to make as many seed starting pots as you need.
Don’t worry if it seems like the pot is flimsy or unraveling, especially at the bottom. Once filled with seed starting mix and moistened, the pot is surprisingly sturdy and holds it shape well.
The benefit to making recycled newspaper seed starters is that you can transplant your seedlings right into the garden, paper pot and all, and the newspaper will decompose naturally in the soil.
Or, simply unwrap the pot before you transplant the seedlings. Since you don’t have to dig them out of a plastic container, you won’t disturb the young roots.
Take care not to overwater, drench the bottoms, or let your seedlings live in the seed pots for more than three to four weeks, as the newspaper could disintegrate or mold.
You can toss the used newspaper into your compost pile, or repurpose it as bedding for your vermicompost bin.
See? That stack of aging newspapers in the garage can be good for your garden — in more than ways than one.
How to Make Recycled Newspaper Pots for Seed Starting

If you've got time on your hands and a rainy day ahead, these recycled newspaper pots are the perfect project to give you a head start on the gardening season. Get the kids involved and crank out dozens of cheap seedling pots in a single afternoon!
Materials
- Stack of old newspapers
Tools
- Scissors
- 1 (6-ounce) can tomato paste
Instructions
- Grab two pages of newspapers (so you have a four-sheet stack). Cut them into thirds lengthwise, giving you three long strips.
- On the end closest to you, lay the can on its side across the strip of
newspaper. Leave about 1 inch hanging off the end of the can. - Roll the can along the newspaper until it's loosely wrapped all the way
around. (Loose being key for easy removal of the can later.) - Fold the edges of the newspaper down over the can, and work your way
around in a circle until all the edges are folded over firmly. They don’t have to be perfect; you can just smush the paper down with your fingers. It’s also fine if there is a small hole where the folds meet in the middle — that just provides extra drainage. - Flip the can over so the folded edges are now on the bottom. I like to
press the can down on the folds to really crease the edges against the
bottom of the can. - Slide the can out. You now have a thrifty and biodegradable seedling pot!
- Repeat Steps 1 through 6 to make additional pots.
Notes
For seedlings, I find that a 6-ounce can (the kind that tomato paste
usually comes in) is the perfect size. A shot glass also works well, or
even a small jar (what you might find capers or curry paste in).
More seed starting tips:
- 6 Foolproof Tips to Germinate Hard-to-Start Seeds—Fast!
- Germinating Seeds in Paper Towels: A Quick and Easy Way to Start Seeds Without Soil
- How to Soak Seeds and Speed Up Germination Time
- The Best Seeds to Plant in Spring for Instant Gratification
- Damping Off Disease in Seedlings: Best Tips for Treatment, Control, and Prevention
- Leggy Seedlings: What Causes Them and How to Correct Them
This post updated from an article that originally appeared on March 12, 2011.
View the Web Story on DIY recycled newspaper pots for seed starting.


it is a very good idea for the plastic cup. but do not hide it with paper . the best way to see the rots of your seeds when they starts
I don’t find this to be necessary. If you overwater and the seeds end up rotting, you’ll know because they don’t germinate. Or do you mean the roots? I don’t think that’s necessary either. Just look for a couple sets of true leaves to appear on your seedlings; that’s when they’re good and ready for transplanting.
Hi Linda. Be sure when telling people about “sets of true leaves” they know the difference between cotyledons and leaves. 🙂 Sounds odd, if you never had plant bio or were new to growing from see, you wouldn’t know the difference. 🙂
I do the same with toilet paper rolls. I cut and fold the bottom and then just unfold it before putting the plants in the soil. I love it. Yours look a bit nicer though 🙂
I was wondering you did not speak of the color ink in the newspaper and/or soy ink preferred regarding it being biodegradable and for those of us who prefer to stay organic? thanks
You would have to call your newspaper office and ask what kind of black and color inks they use. Petroleum and soy-based inks are both biodegradable, but if you’re striving to stay organic, you might not want to put petroleum in your soil. (Though in a compost pile, microbes are able to break down petrochemicals.)
Oh didn’t know that the microbes will break it down, thanks
Hi Linda! Would you recommend using any type of clear plastic cover when starting seeds in these cups? I usually use the store bought kits that come with a clear lid, mini greenhouse style, but I’d rather try this method this year. Love your blog!
Hi Jess, if your environment is fairly cool, I do recommend a cover of some sort to speed up germination. You can place all your newspaper pots in the black trays that come with dome lids (your kit should be reusable), or you can cover them with plastic wrap until the seeds sprout. These days my kitchen stays around 68F and gets all day sun, which is sufficient for starting seeds without a lid.
Thanks for reading!
What is the fastest way to fill these cups?
Hold the bottom and use it like a scoop.
Petroleum based ink doesn’t harm your garden.
http://articles.chicagotribune.com/2001-11-11/news/0111110385_1_flint-ink-color-ink-soybean-oil
What’s the problem with petroleum-based ink? Will it actually harm my plants (keep them from sprouting or kill them) or is it just because petroleum-based ink isn’t organic?
Petroleum will leach into the seed starting mix and potentially weaken the seedling. And if you let the paper pots biodegrade in the soil when you transplant the seedling, that petroleum will taint your garden soil as well, defeating the purpose of an organic garden. I wouldn’t say it’s disastrous for your garden, but it’s something to think about if you’re striving to be as pure as possible.
Thanks for the quick response! I try to be as organic as possible, but I think that my paper uses petroleum ink. It seemed more wasteful to buy a paper specifically with the intent of slicing it into pots, so I wanted to make sure there were no serious harms from the ink. I think I’ll start my seed in the pots, but not plant the pots in the soil. Thanks for your help!
Note to anyone interested in trying this:
I spent hours making newspaper pots and planting seeds in them today (47 pots in all!). After I finished I received an email from the Denver Post (Colorado’s main newspaper) telling me that they use petroleum-based black ink. Now all of my veggie starts are ruined. You will want to check with your newspaper company to make sure they use soy-based, which can be used for veggies, before you spend the time.
I hope you’re able to salvage those seedlings by moving them into different pots! I’m surprised a large newspaper would still use petroleum-based ink these days.
Thanks for this info, AE. I live in Denver and have an enormous stack of the Post that I was planning to use.
ooo! Fantastic!
Hi again,
May I translate this post for my greek blog and of course upload your link?
Hi there, you can summarize this post in Greek, but you must upload your own pictures to your blog with a link back to my original post. Thanks for reading!
Ok!Thanks a million!Great work!
Excellent work!
Greetings from Greece
love this post and following posts on starting seeds indoors… i am going to bookmark for when we are in one place again, as a vegetable garden is on top of our list!