What if I told you there was a faster way to germinate all your seeds, without the need for seed starting mix, perlite, or vermiculite; without wrangling a bunch of seed starting trays, flats, and domes; and without any special equipment like heating mats, temperature sensors, and indoor seed starting systems?
The secret is as low-tech as you can get, and relies on only two things you likely already have in your kitchen: paper towels and Ziploc bags.
This seed starting trick is sometimes known as the baggie method, and it works with paper towels, coffee filters, or even just newsprint.
But first, you might be wondering… why start seeds with the baggie method instead of just starting them in soil? Keep reading; I’ve got all your answers below.
3 reasons you should use paper towels or coffee filters for seed germination
Now why would you want to germinate seeds in paper towels or coffee filters first, rather than germinating seeds indoors in seed starting mix?
1. It’s a good way to gauge if your seeds are viable to begin with, before you put them in pots.
Maybe you aren’t sure how old your seeds are (especially if the seeds were saved from your own plants).
Or, maybe you bought your seeds from a new seed catalog and want to check how healthy or accurate their germination rates are. (See the next section below on how to do a quick and simple germination test.)
2. You can start a lot more seeds this way and use only a minimum of space while they get going.
Germinating seeds in paper towels is very small-space friendly. You don’t need a bunch of trays or pots, a seed-starting shelving unit or even a wall of south-facing windows to make it happen. (Just a windowsill will do.)
Plus, the baggie method helps you pick out the fastest and most vigorous seeds to plant because you can actually see them germinate (a process that’s pretty mysterious to most of us since it happens underground).
Read more: This Is What Happens When a Seed Germinates
3. Many seeds germinate much quicker in paper towels (versus seeds that are started in soil).
The heat, moisture, and controlled conditions inside a plastic baggie help them germinate in only a few days (or less, depending on the seed).
How to test germination with the baggie method
Every once in a while, especially if your seeds are about to reach their expiry date, it’s a good idea to do a germination test and find out if the seeds are still worth planting.
Try this quick germination test when you’re unsure about your seeds
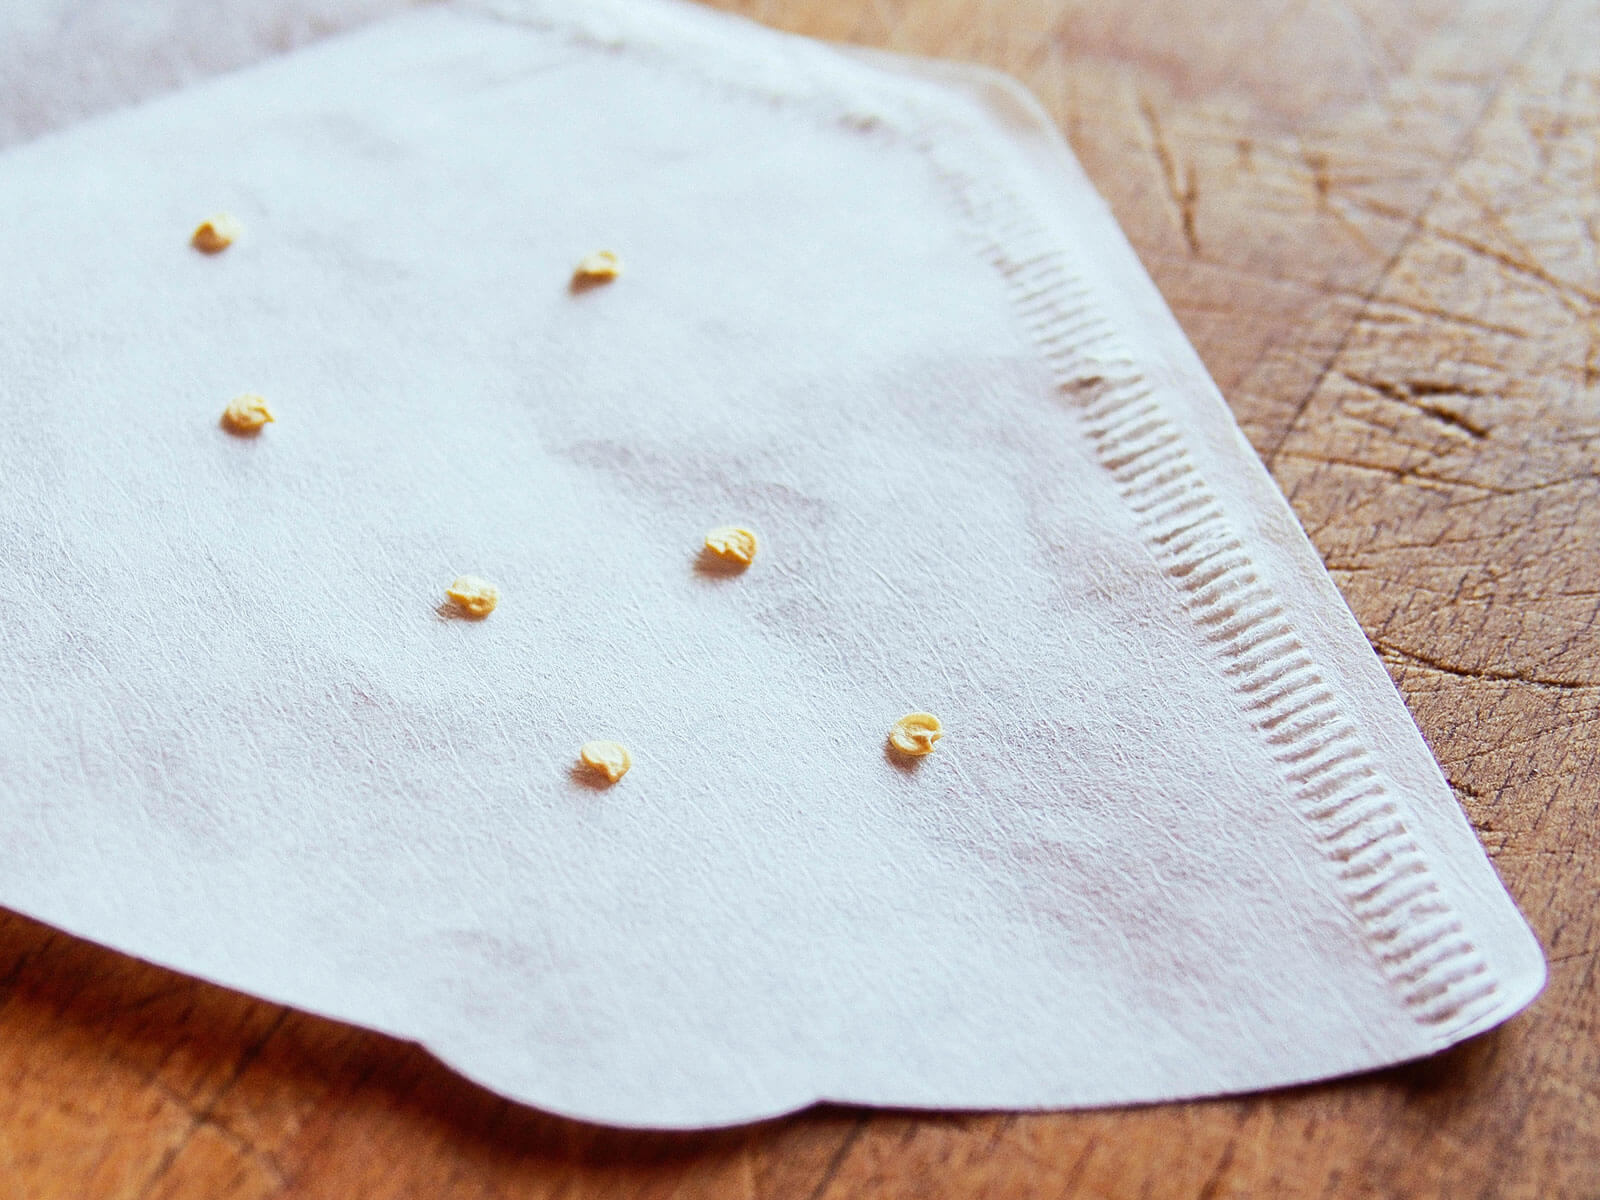
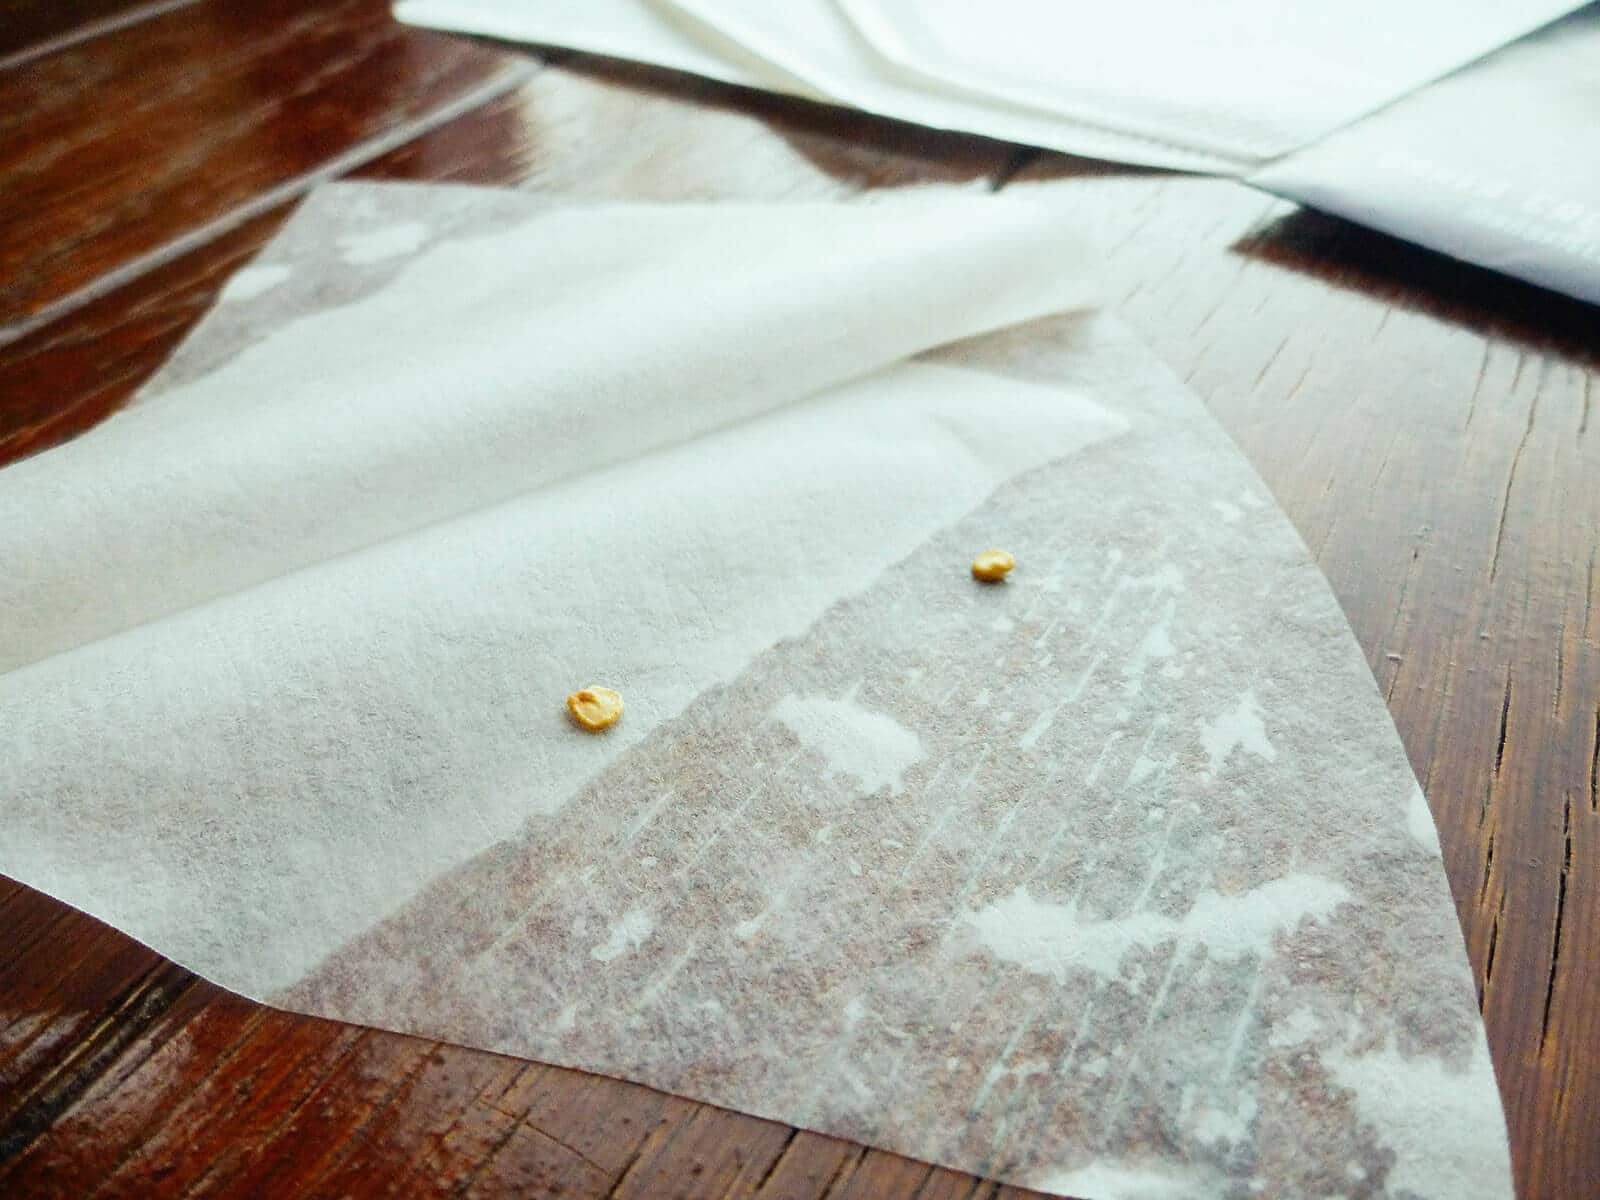
- Count out 10 random seeds from the packet you want to test.
- Follow the instructions below to germinate the seeds in a paper towel or coffee filter, and label the baggie with the date you started them.
- Look on the seed packet or in any seed catalog for the expected number of days to germination for the seeds you’re testing. Wait that number of days, then count how many seeds have sprouted in that time.
If 8 out of 10 seeds germinated, that gives an 80 percent germination rate, which is pretty good for most vegetables. If only 4 out of 10 seeds germinated, then you have a 40 percent germination rate and the seed is, for all intents and purposes, useless.
When I find these, I throw the old seeds in the compost pile or feed them to my chickens. I might play around and put them in a random “salad blend” to sprout on my kitchen table, but I won’t bother planting them in the garden as a primary crop.
It is not wise to sow the seeds more thickly to make up for low germination. Weak seeds that struggle to even sprout will just result in weak plants that are likely to suffer from aphid infestations, fungal diseases, or other problems anyway.
But notice how I said primary crop: Older seeds that are borderline expired are actually useful in the garden as a secondary planting. I broadcast these seeds over my garden beds and let them grow in as a living mulch. I harvest (or cut them back) periodically to keep the plants low to the ground, but find they’re highly beneficial for suppressing weeds and improving soil tilth.
(In fact, this is one of the methods I teach in my online course, Lazy Gardening Academy, that mimics natural systems and helps your garden become more self-sustaining.)
Read next: Lazy Gardening: 11 Time-Saving Tips for Getting More Out of Your Garden By Doing Less
What types of seeds can be germinated with paper towels?
All vegetable, herb, and flower seeds can be germinated in a paper towel or coffee filter, but personally, I find the baggie method to be most effective for seeds that take a long time to germinate.
Certain seeds that need a warm start (like chile peppers) are stubborn, taking up to three weeks to germinate. They need juuust the right conditions present before they sprout: the perfect balance of heat, moisture, and time.
In most seed starting scenarios, one or two of these requirements are usually lacking, which delays germination.
The baggie method speeds up the process by providing these conditions consistently with minimal effort on your part.
You can also germinate tomato seeds in paper towels or coffee filters, as well as cucumber, squash, muskmelon, and watermelon seeds.

Can you germinate kale, cabbage, broccoli, onion, or turnip seeds with the baggie method? Sure you can.
But cool-season seeds like these aren’t as finicky about heat, and seeds from the brassica family germinate quickly on their own anyway (usually within a couple days).
The baggie method isn’t necessary unless you want to test their germination rates; you can start them more easily just by sowing the seeds directly in the ground.
The same can be said for flower seeds. While you can sprout them in paper towels or coffee filters first, germination speed isn’t that important for flowers the way it is for vegetable seeds.
How to germinate seeds in paper towels or coffee filters
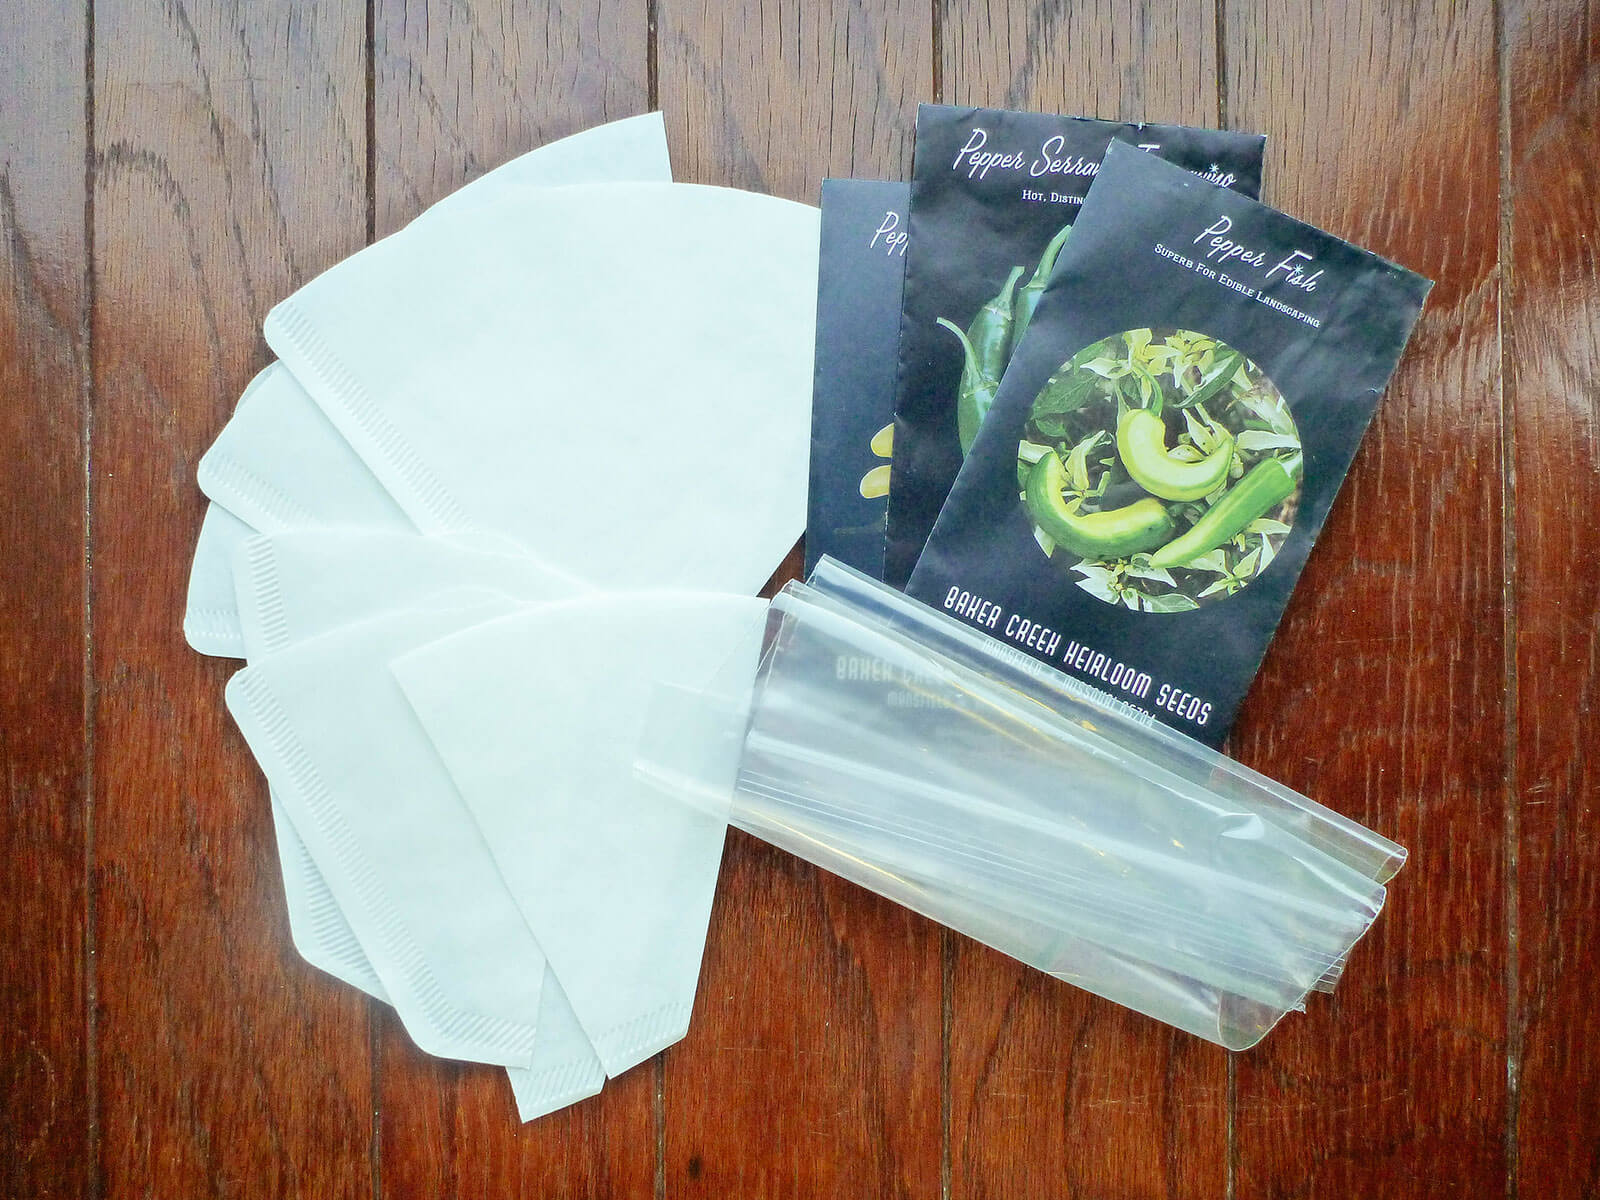
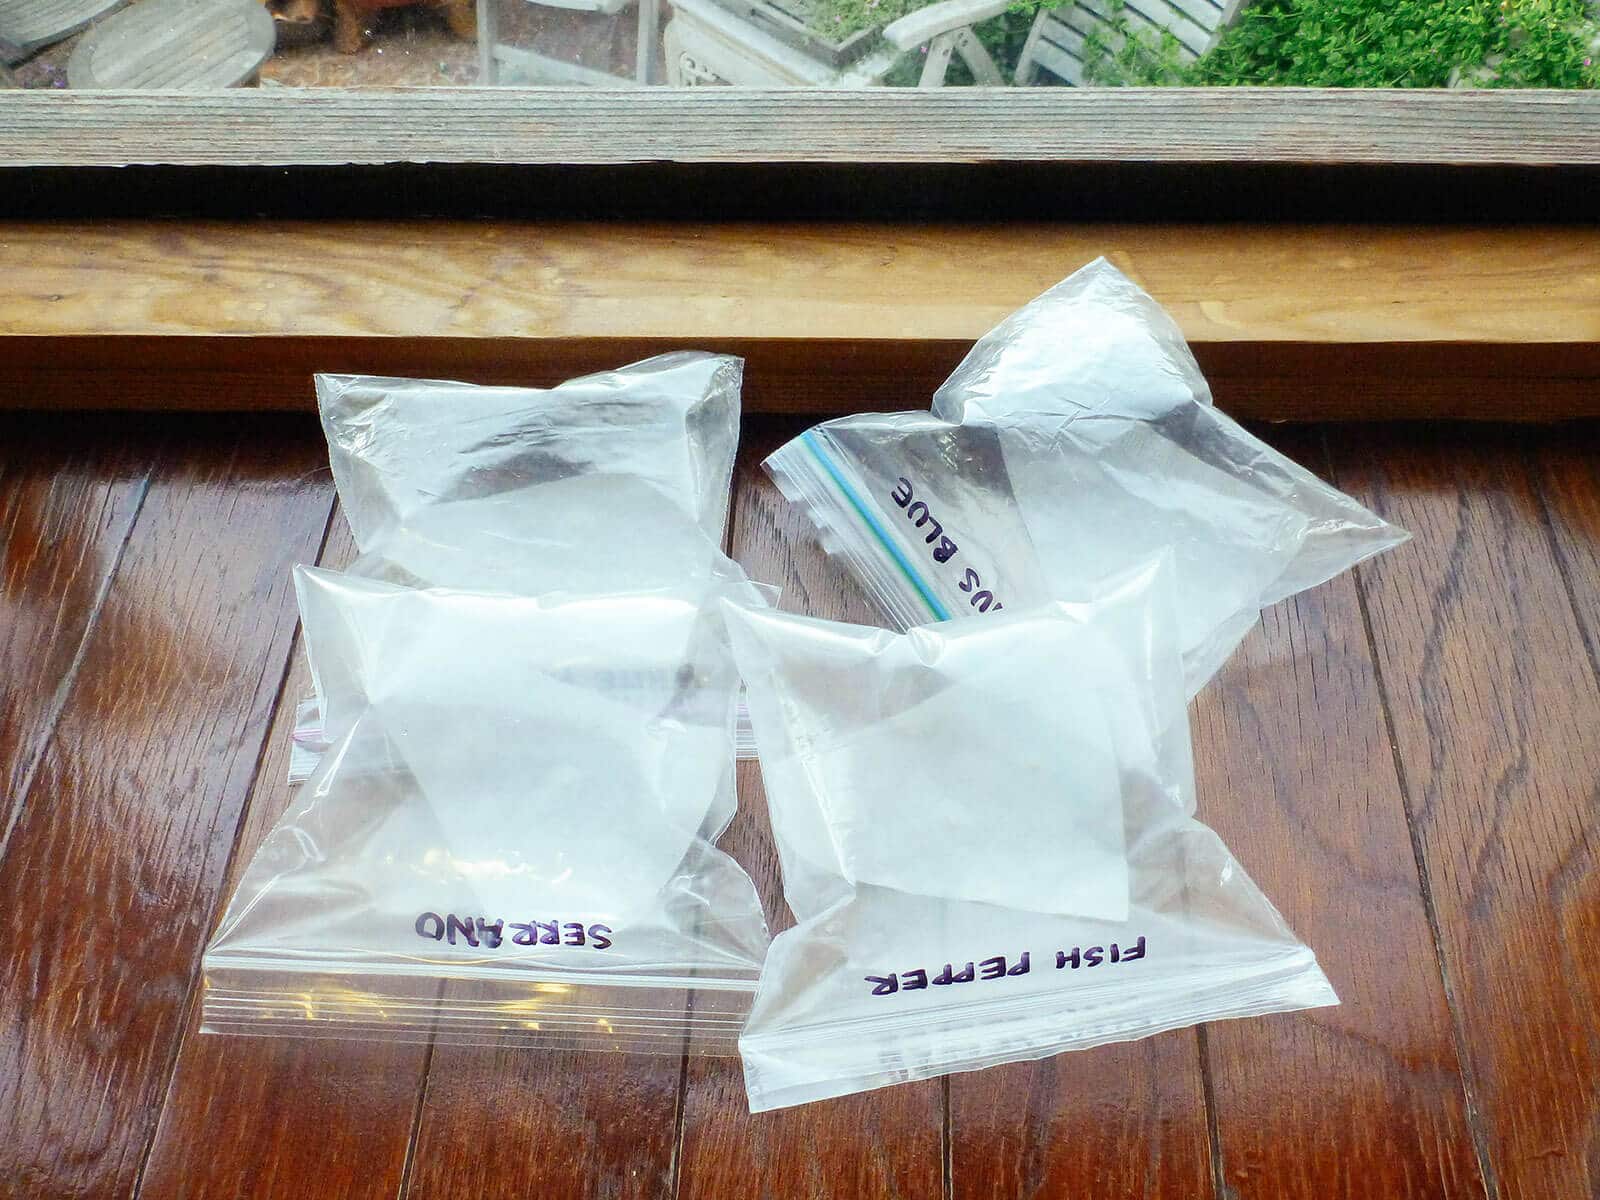
Step 1: Gather your supplies.
- Paper towels, coffee filters, or newsprint (use whatever you have around the house)
- Ziploc (resealable zip-top) bags
- Seeds
I personally like to use coffee filters because the paper has a denser weave, which keeps the roots from growing into the fibers and making them difficult to separate when you’re ready to plant.
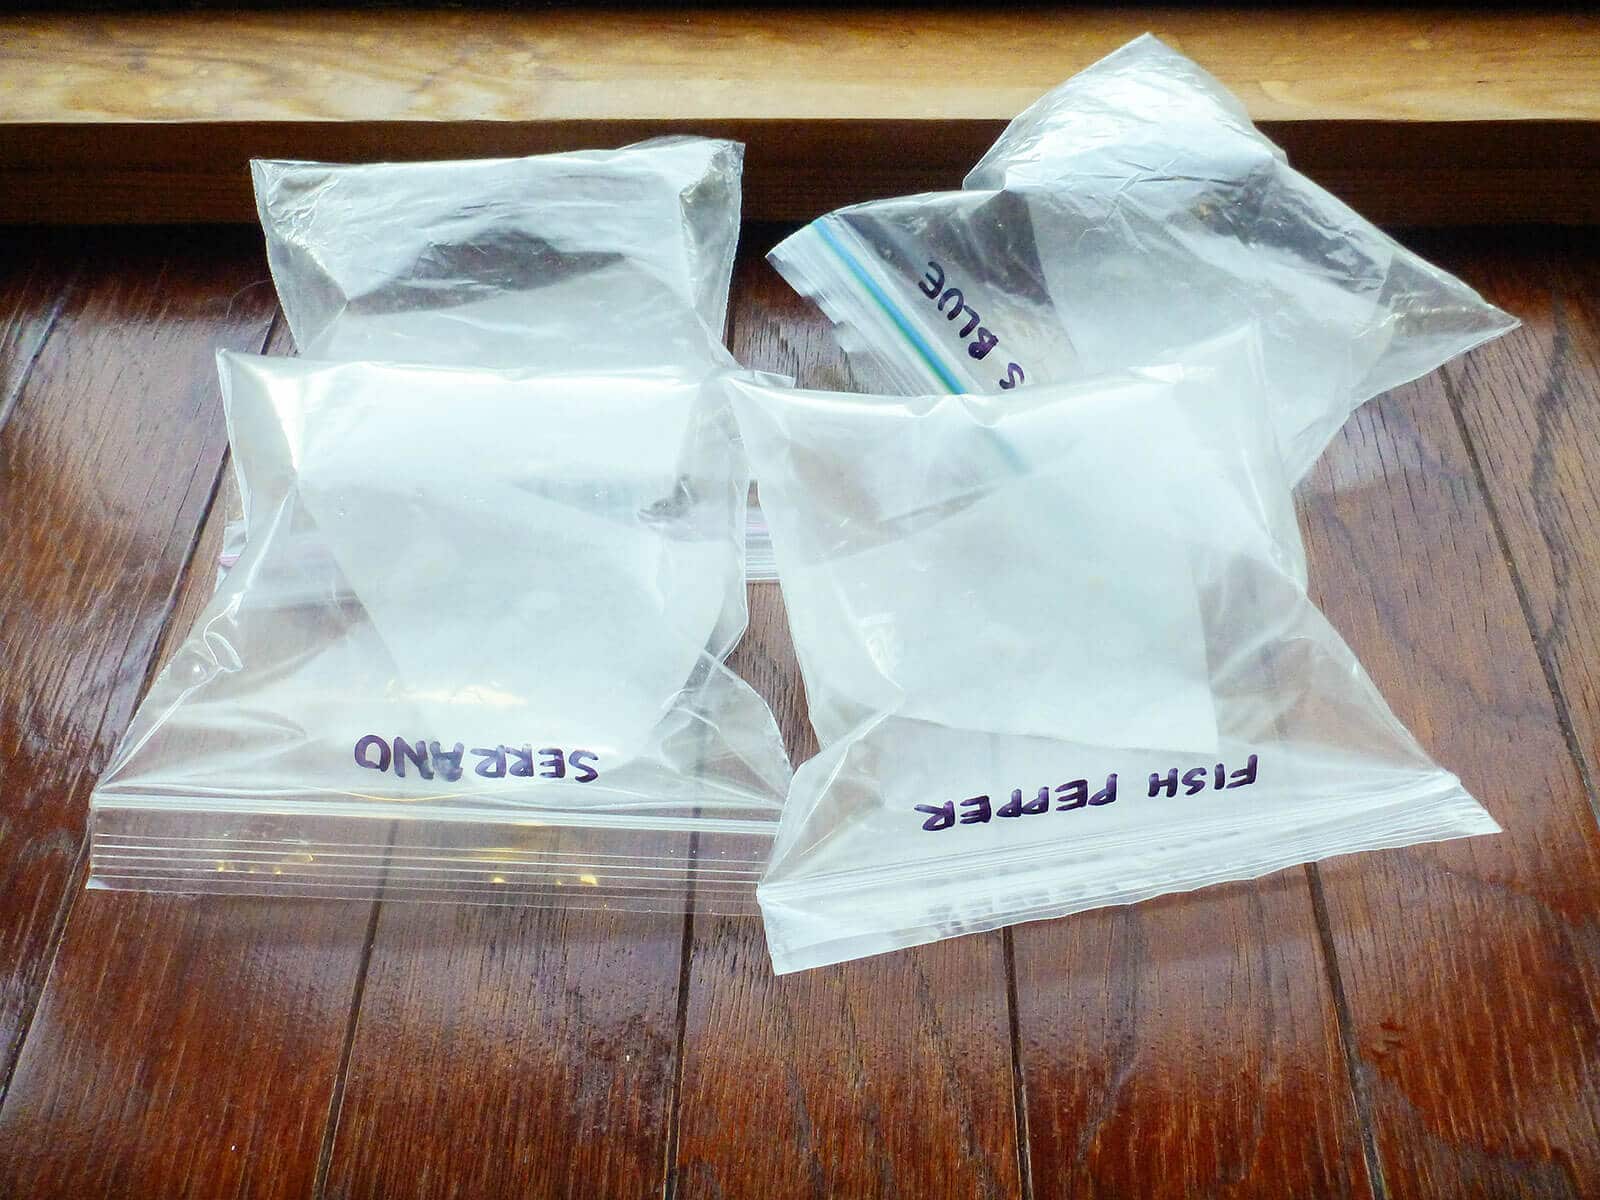
Depending on how many seeds you want to germinate at a time, cut the coffee filters as needed. (I cut mine in half to fit inside standard sandwich baggies.)
Step 2: Moisten the coffee filters.
Wet the coffee filters and wring them out, so the paper is damp but not drowning in water.
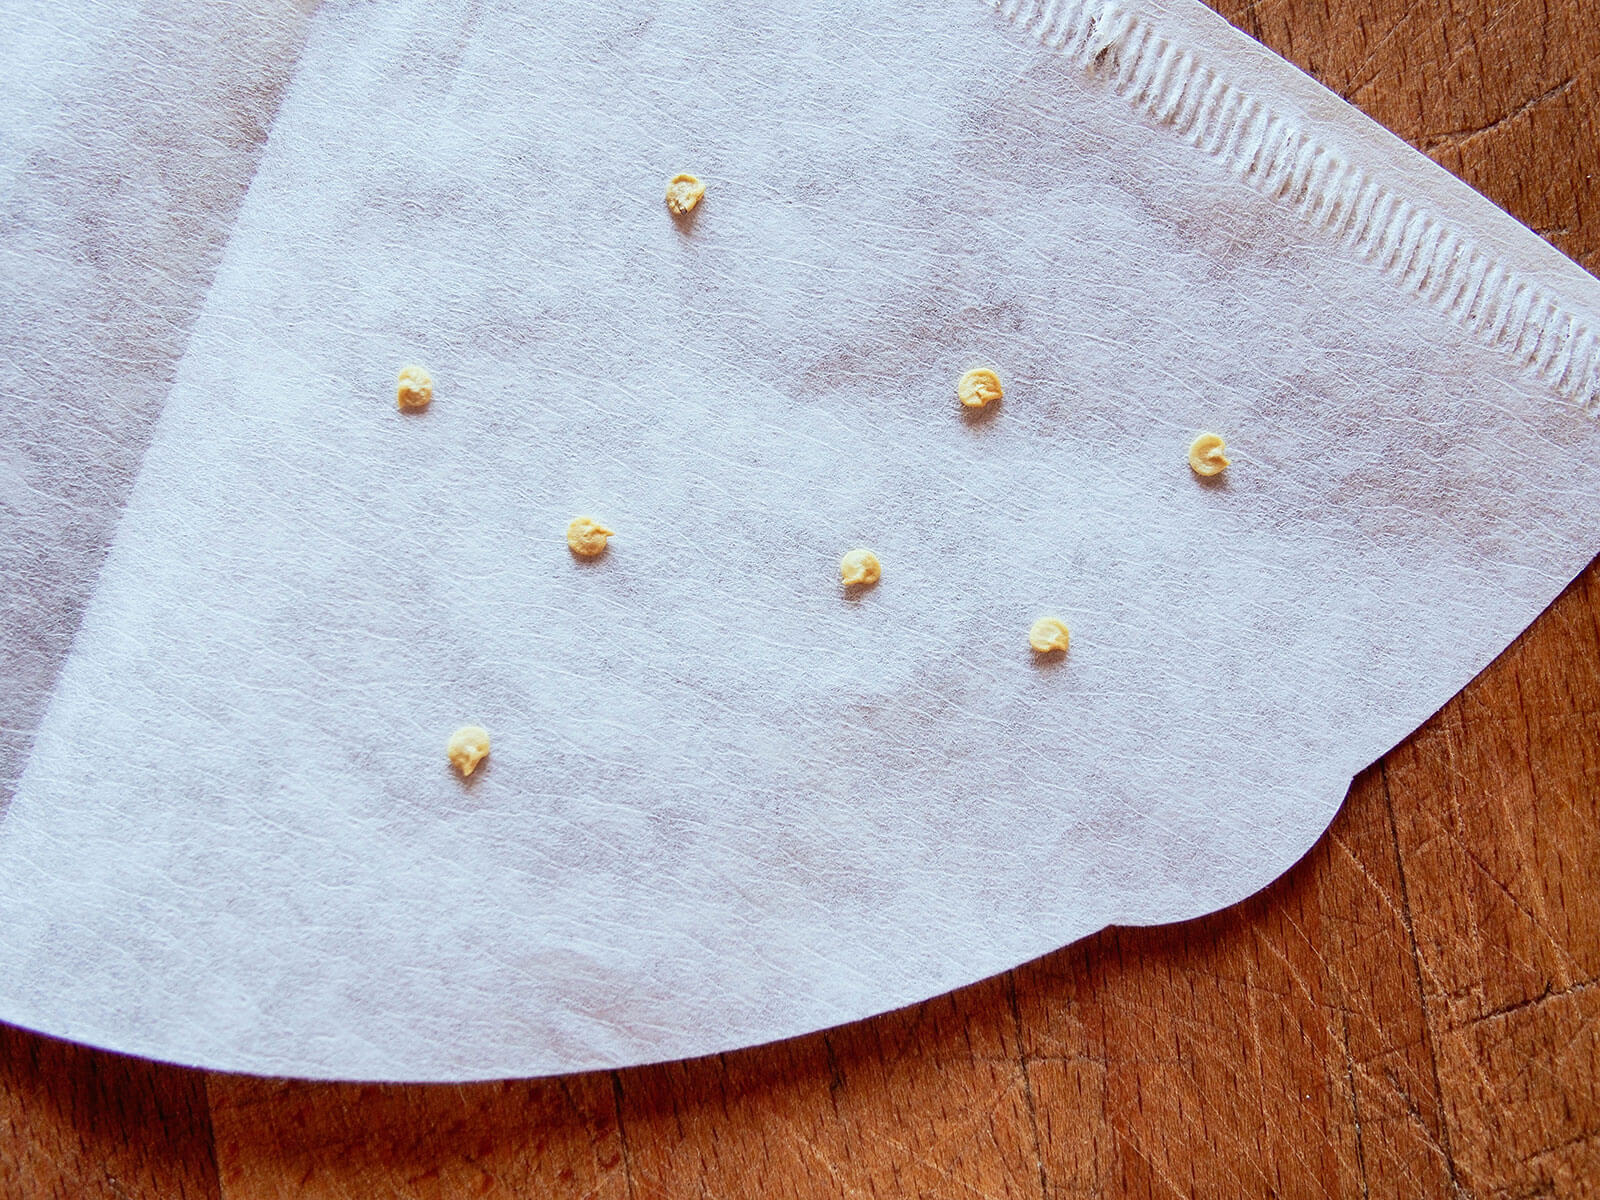
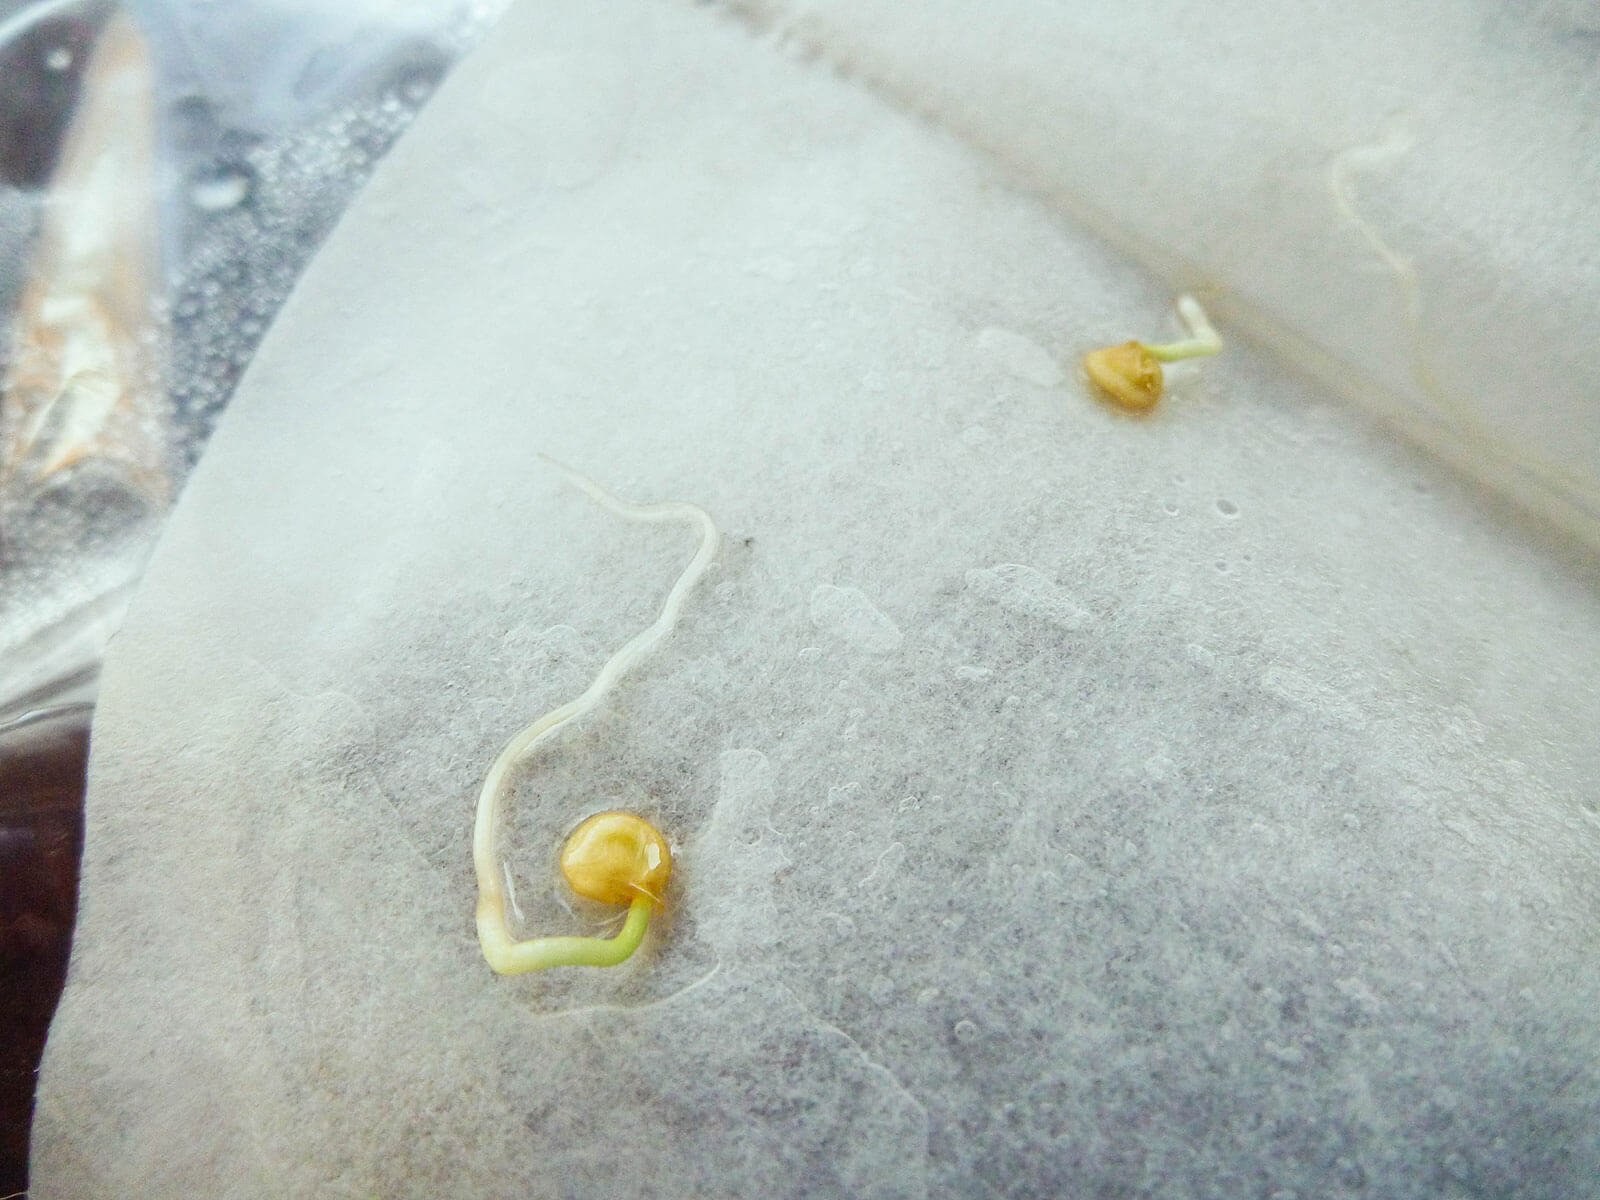
Step 3: Place your seeds on the coffee filter.
Place your seeds on the bottom half of the paper, leaving an inch between seeds to give their roots room to grow. Fold the top half over the seeds to sandwich them.
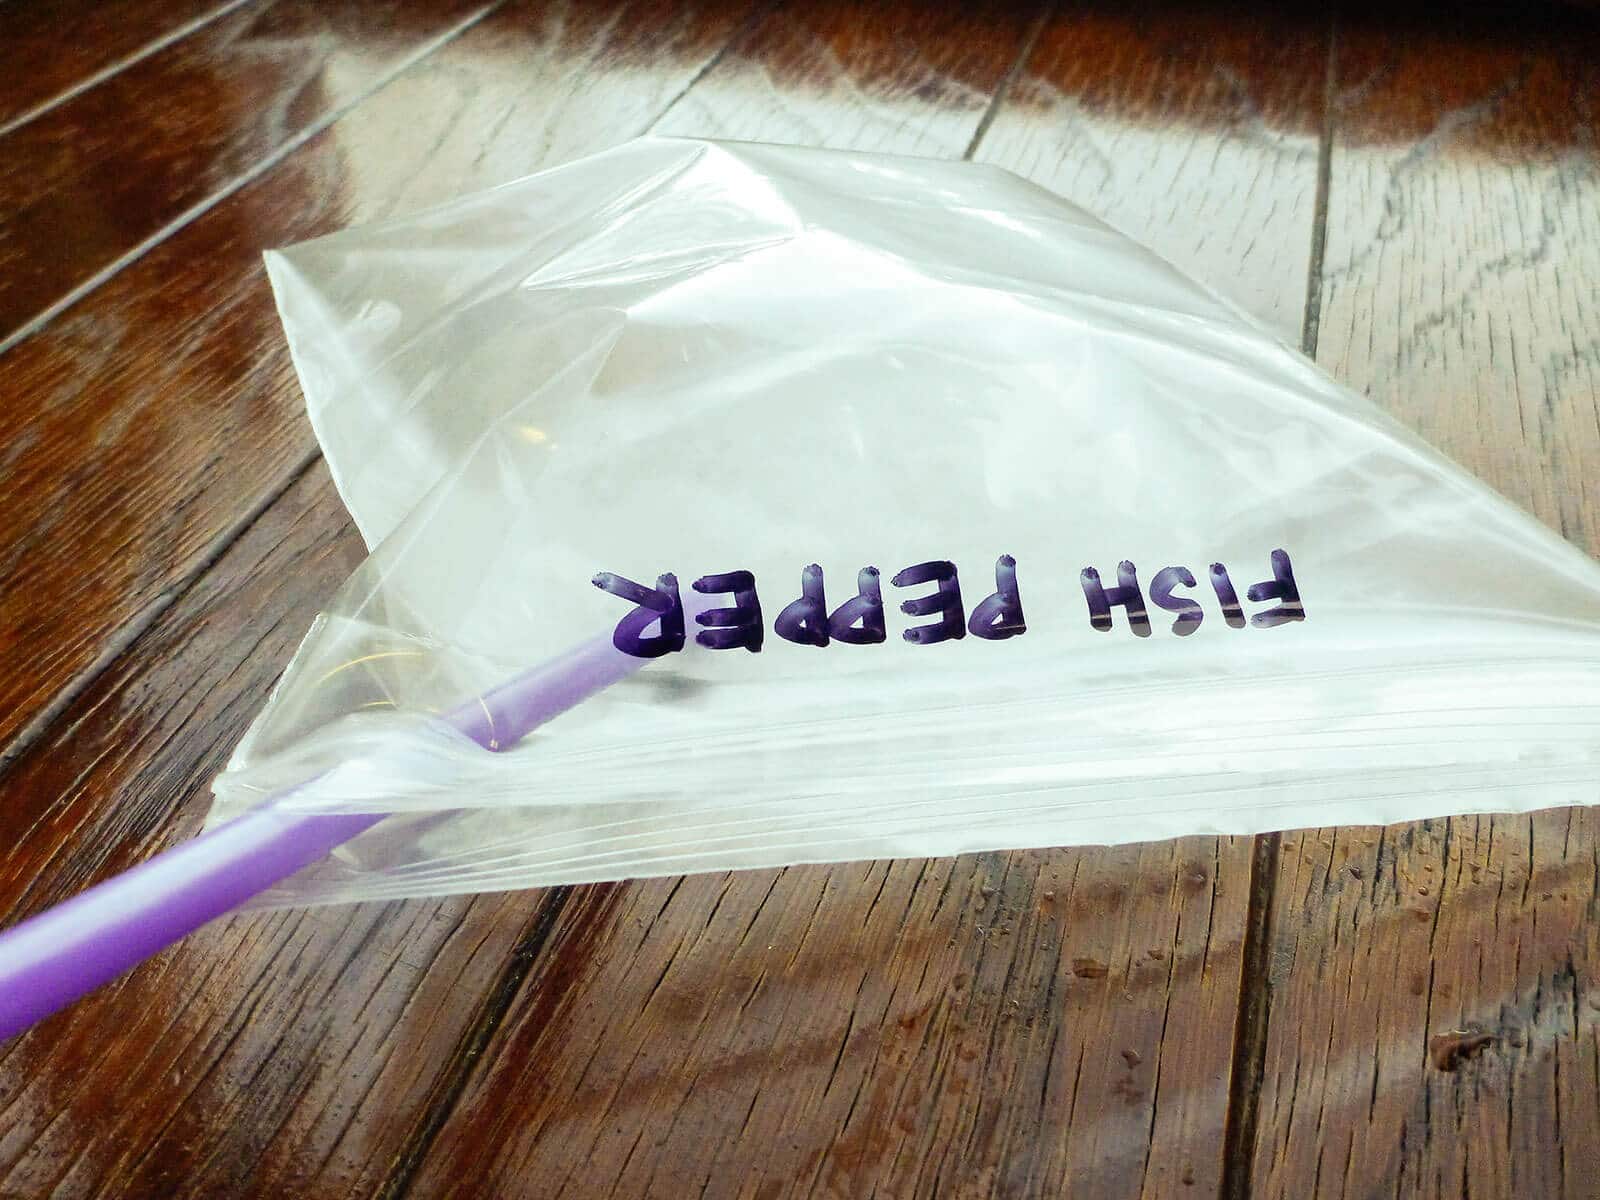
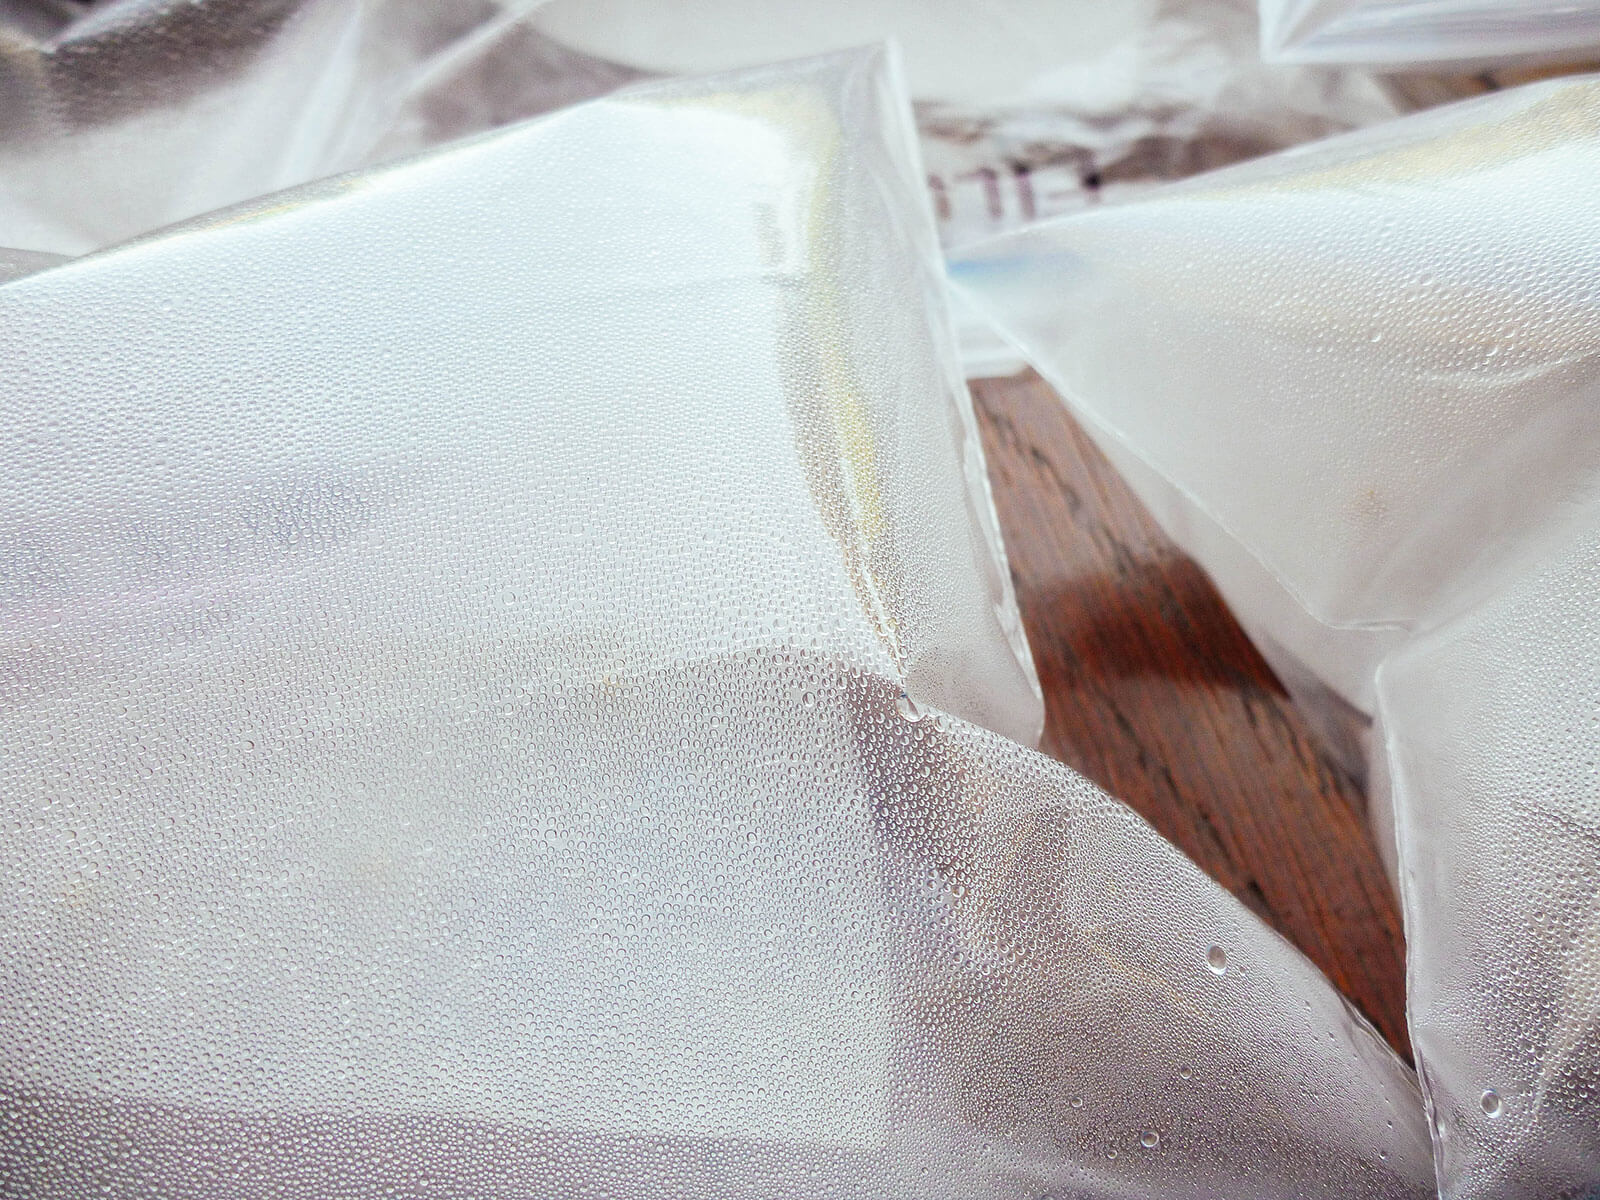
Step 4: Place the coffee filter inside a baggie.
Slide the coffee filter (with seeds) inside the baggie.
I like to blow air into the bags using a straw and then seal them tight to speed up germination. You can also leave your bags flat, but the air creates more of a greenhouse effect (which is especially helpful for chile peppers and other heat-loving seeds).
Step 5: Wait for the magic of germination to happen.
Place your baggies in a warm area of the house. For me, that’s a south-facing window, but you can leave them anywhere with a decent amount of heat and humidity, such as a bathroom or laundry room.
Just don’t keep them too hot (like on top of a heating pad), as you risk cooking the seeds before they ever sprout.
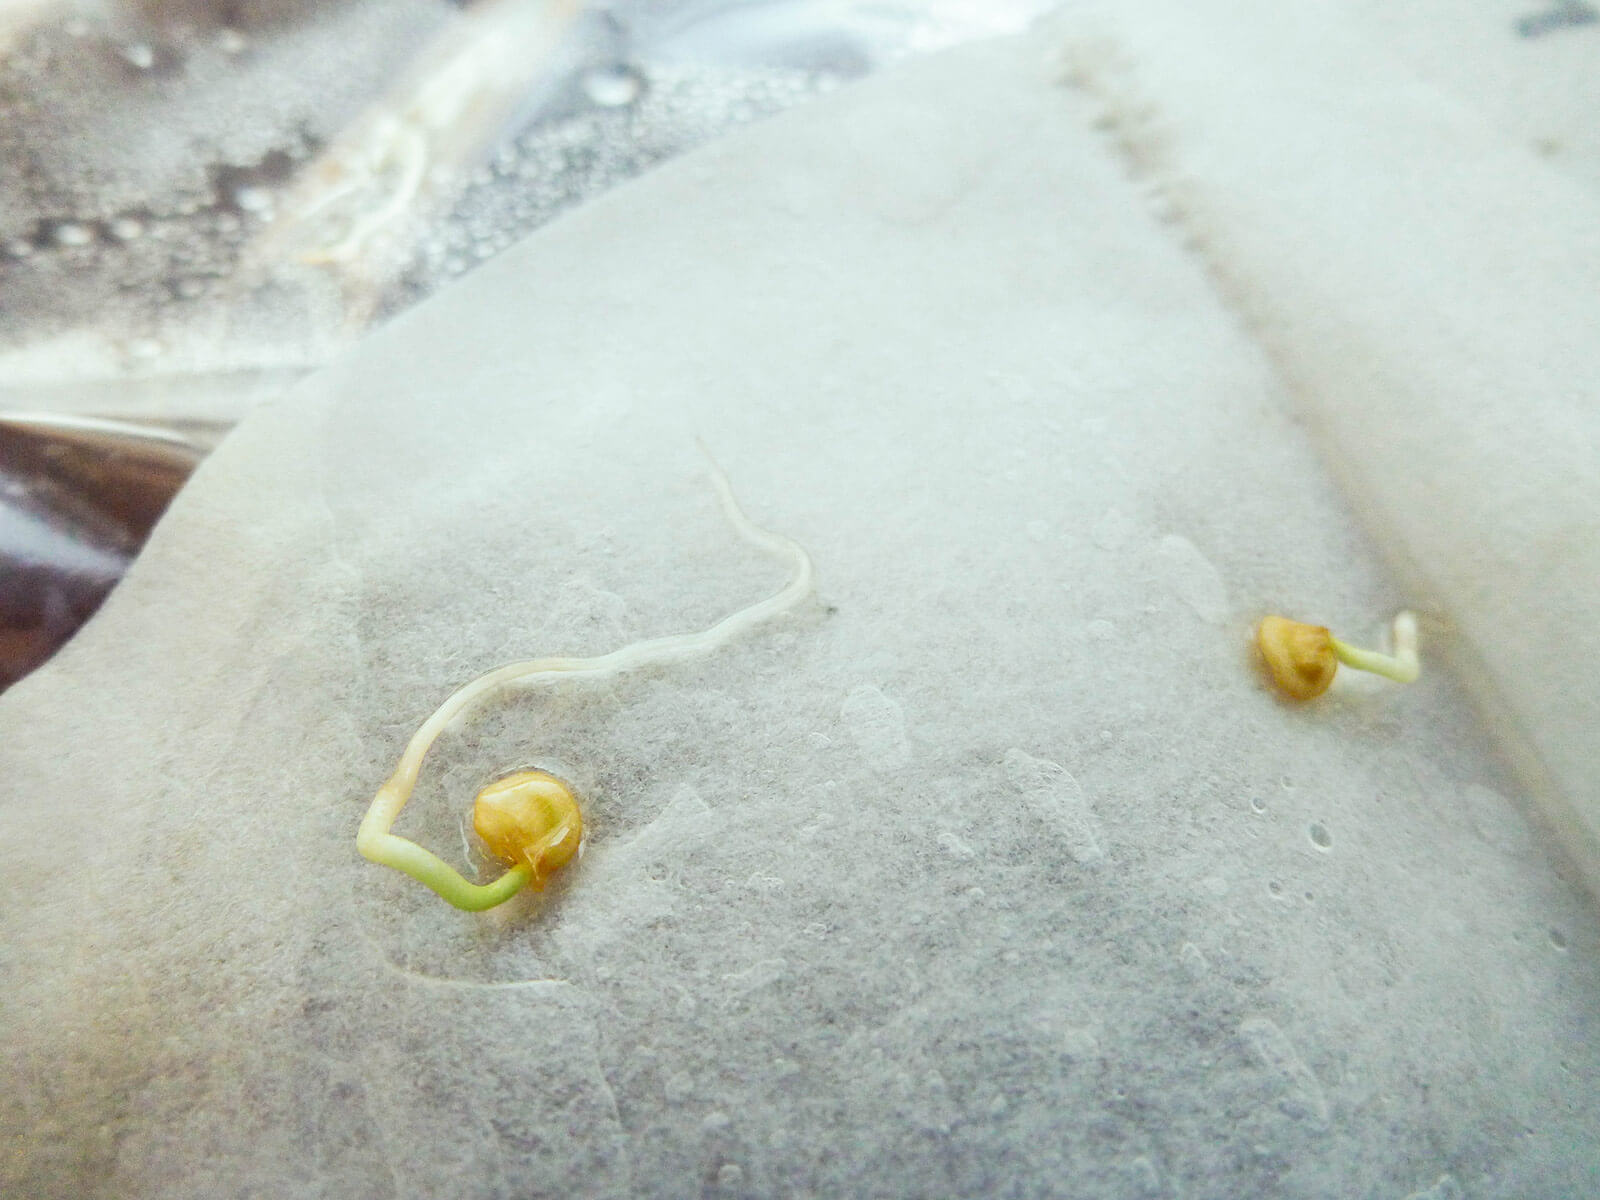
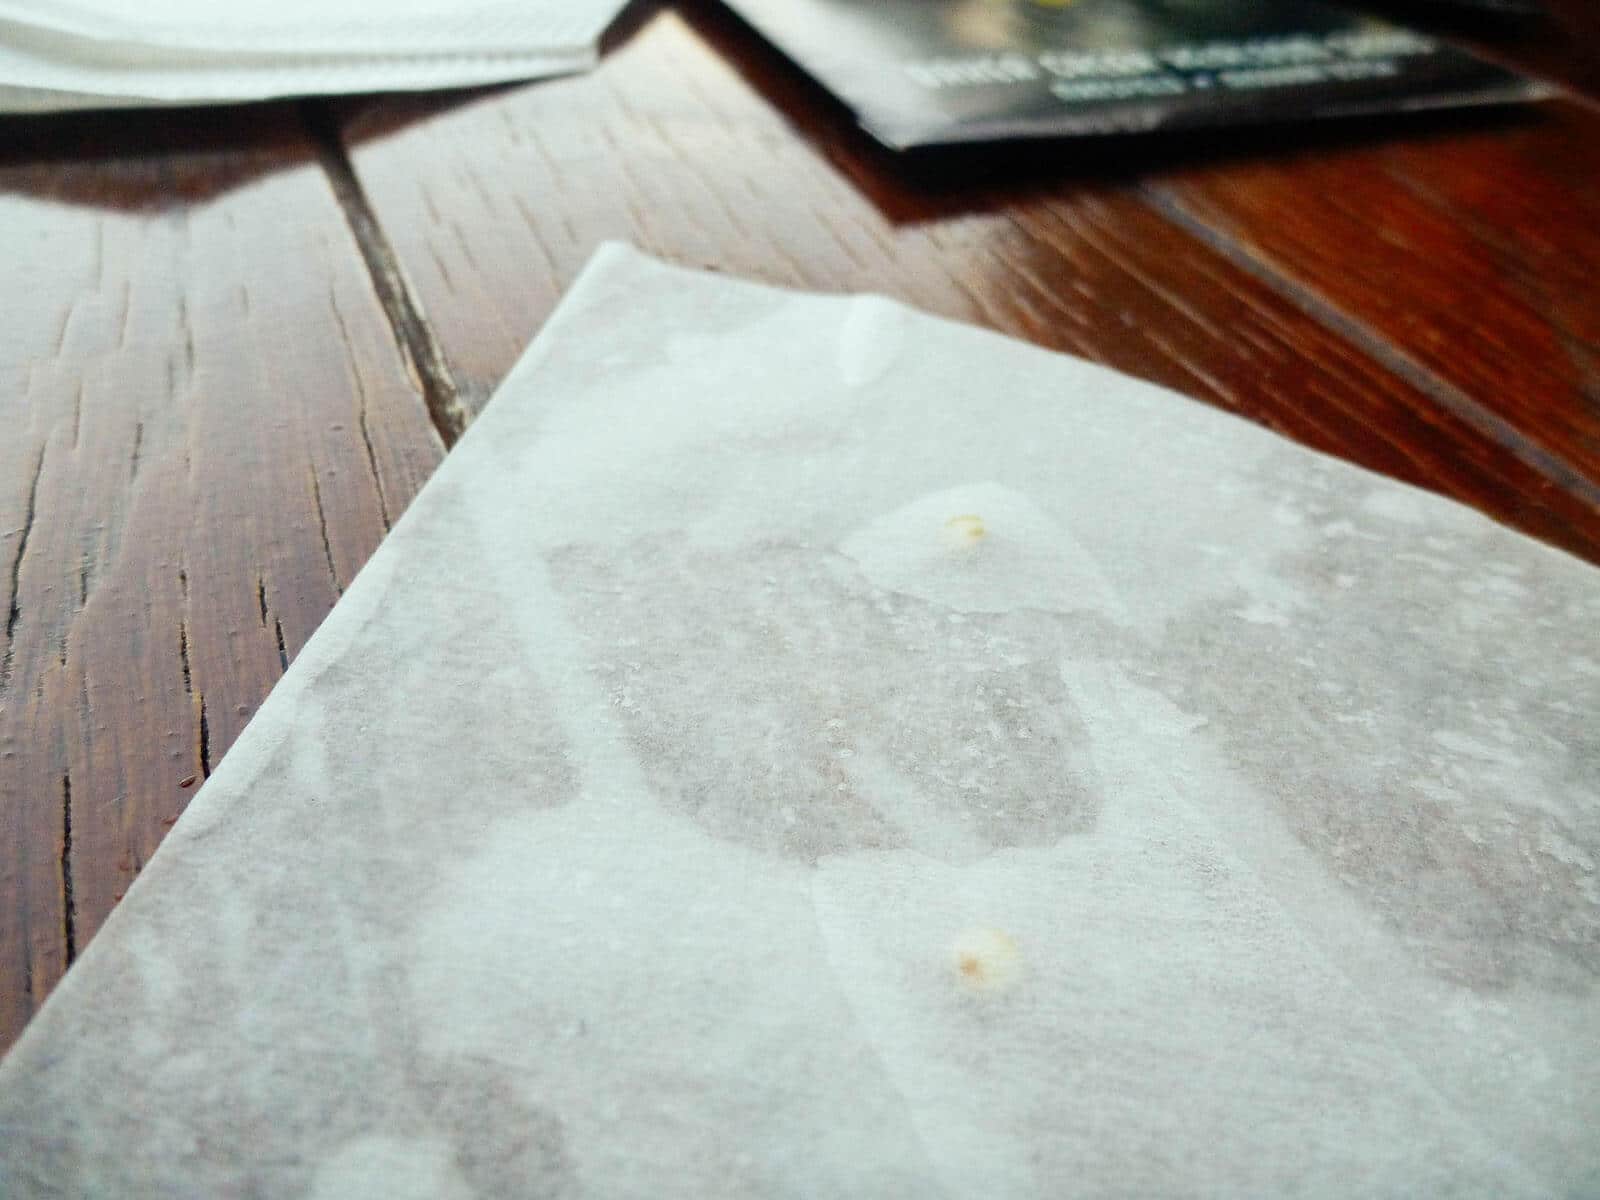
You can see the greenhouse effect created by the baggies here, which aids in germination. Because of this, you shouldn’t have to re-moisten the coffee filters while waiting for the seeds to germinate.
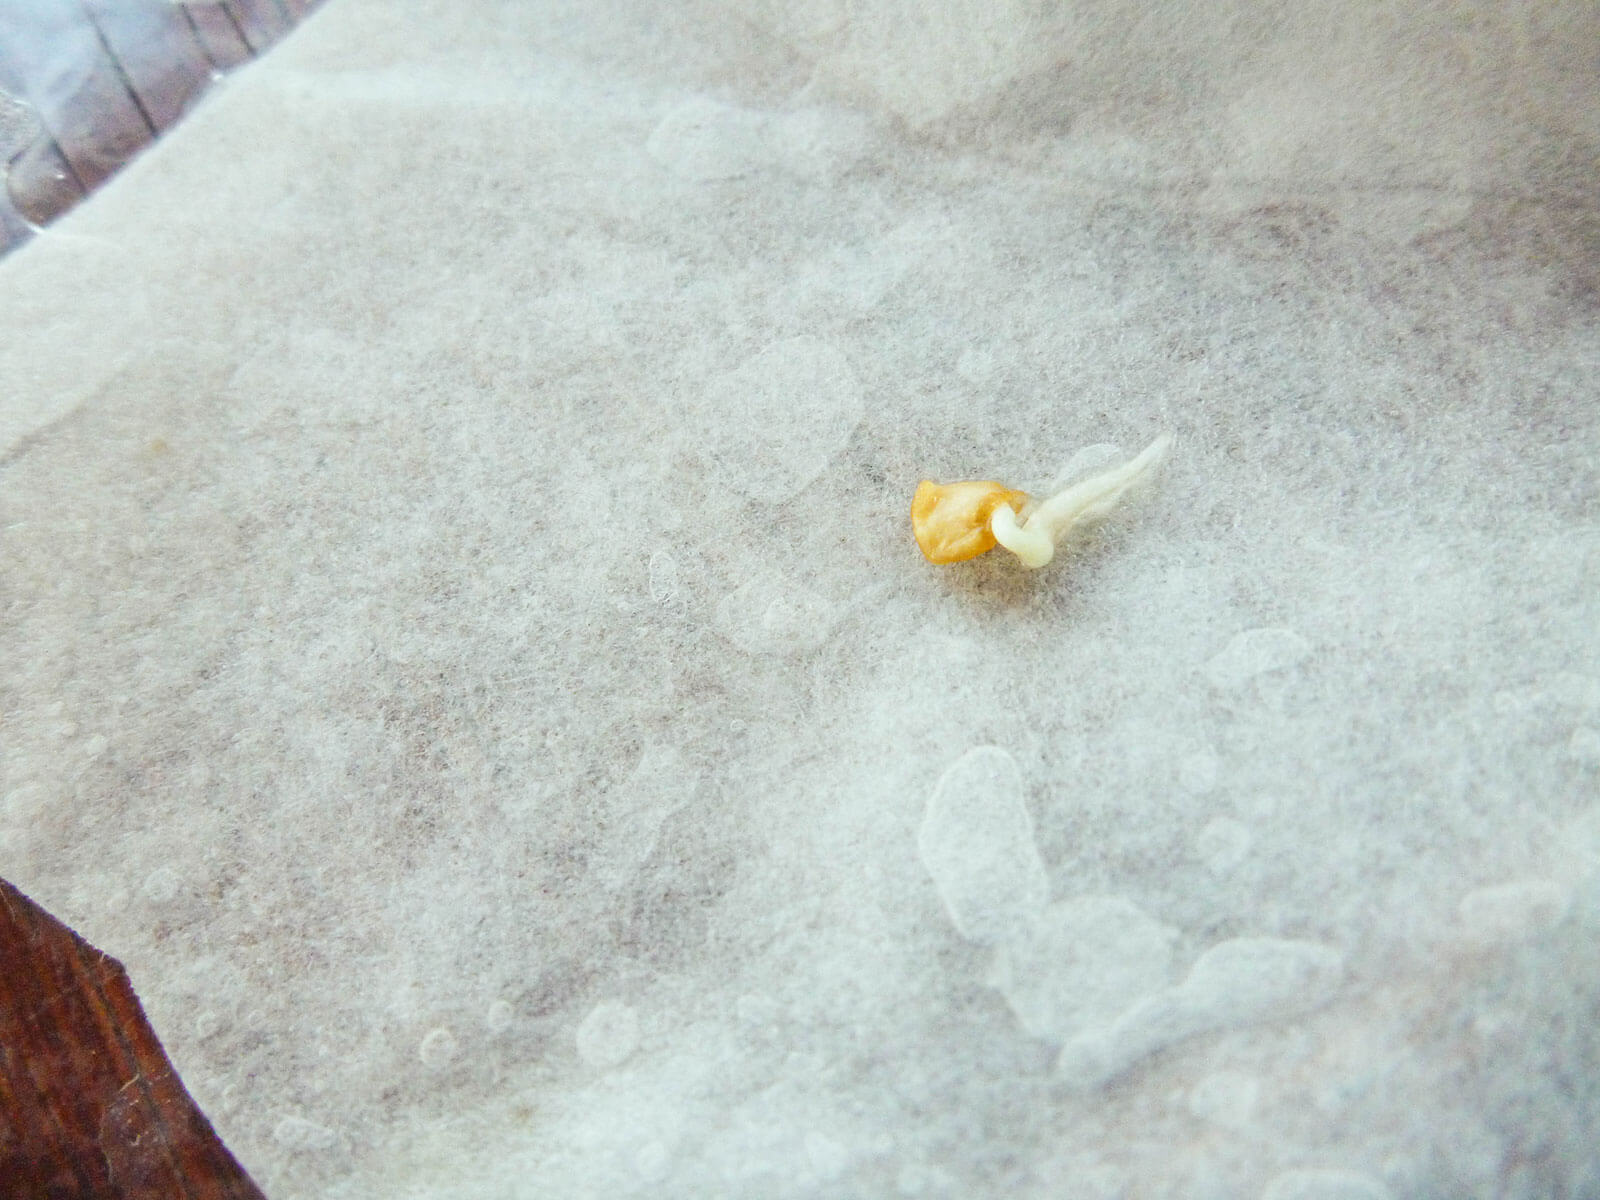
Within a few short days, you should see your first sign of life—a radicle emerging from the seed coat. This is the primary root and develops from the embryo of the plant.
Step 6: Transplant the germinated seed.
Once the radicle reaches an inch or two in length, carefully transplant the germinated seed in potting mix, burying only the radicle (the white part) and keeping the stem and seed coat above the soil line.
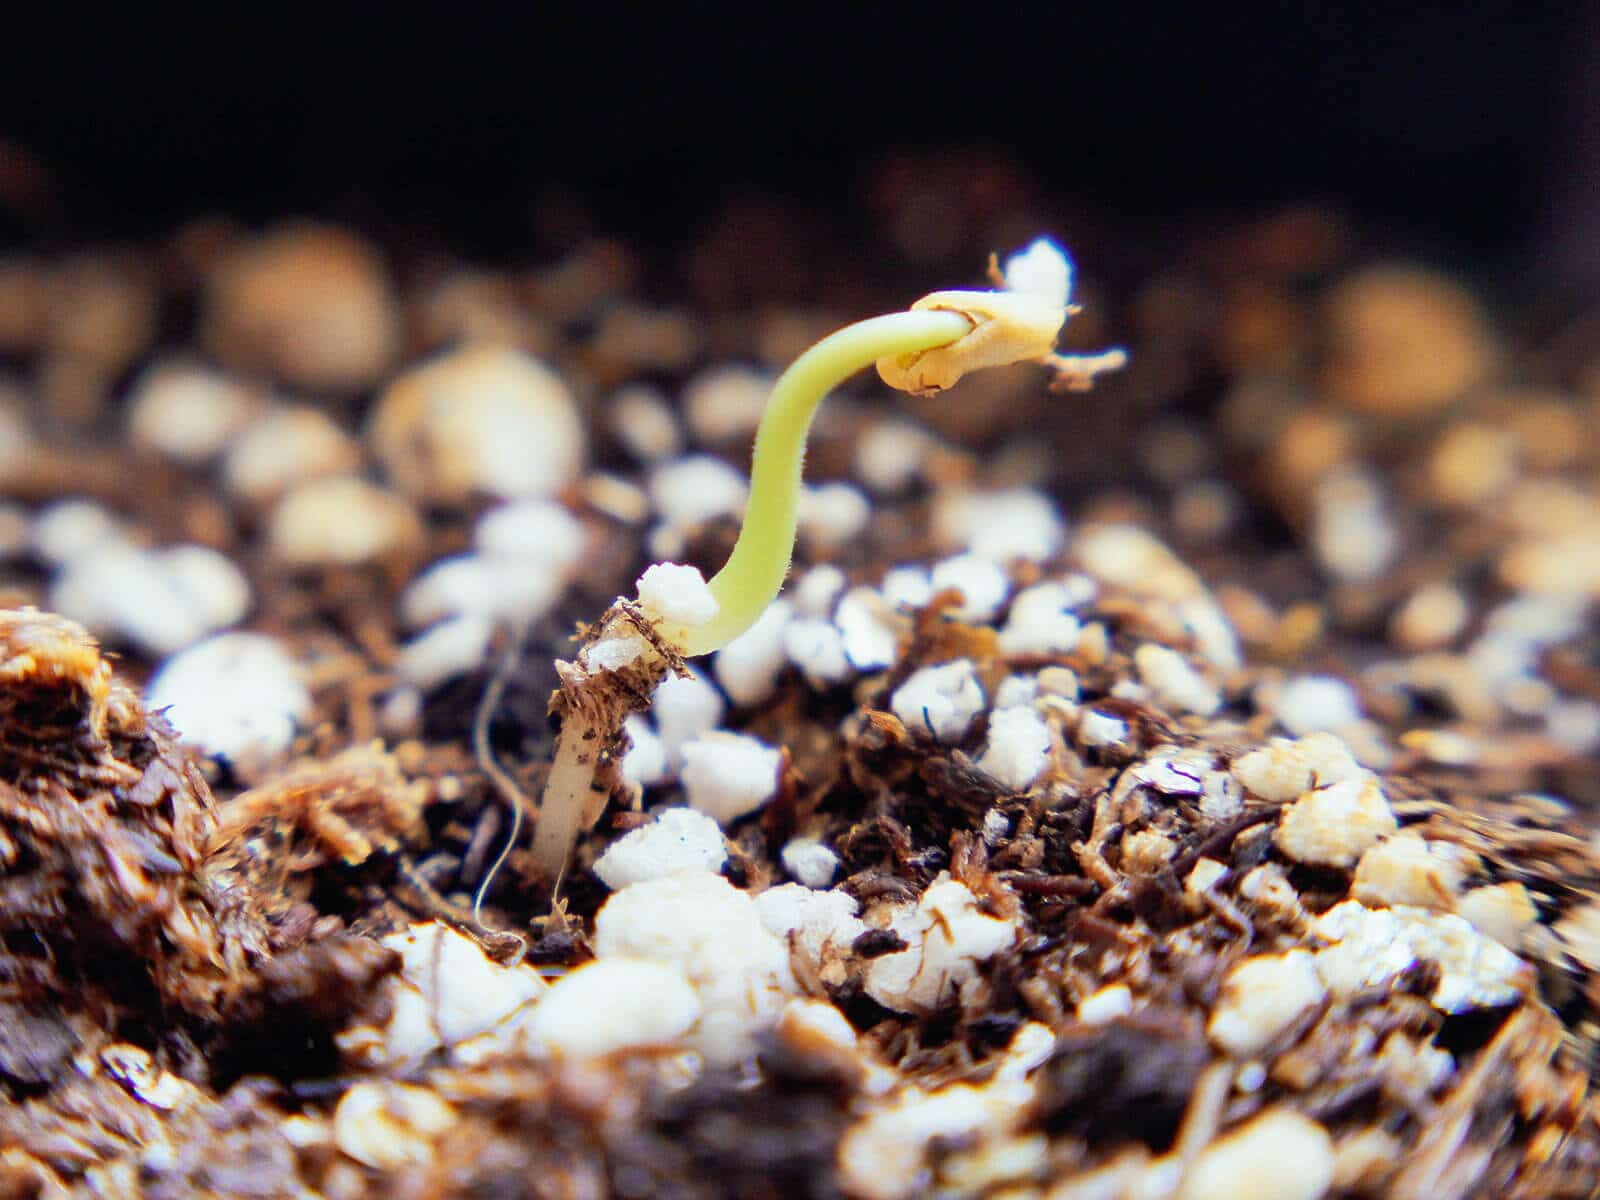
Handle the seed by its seed coat, as the radicle is very delicate (as well as the life line of your soon-to-be seedling).
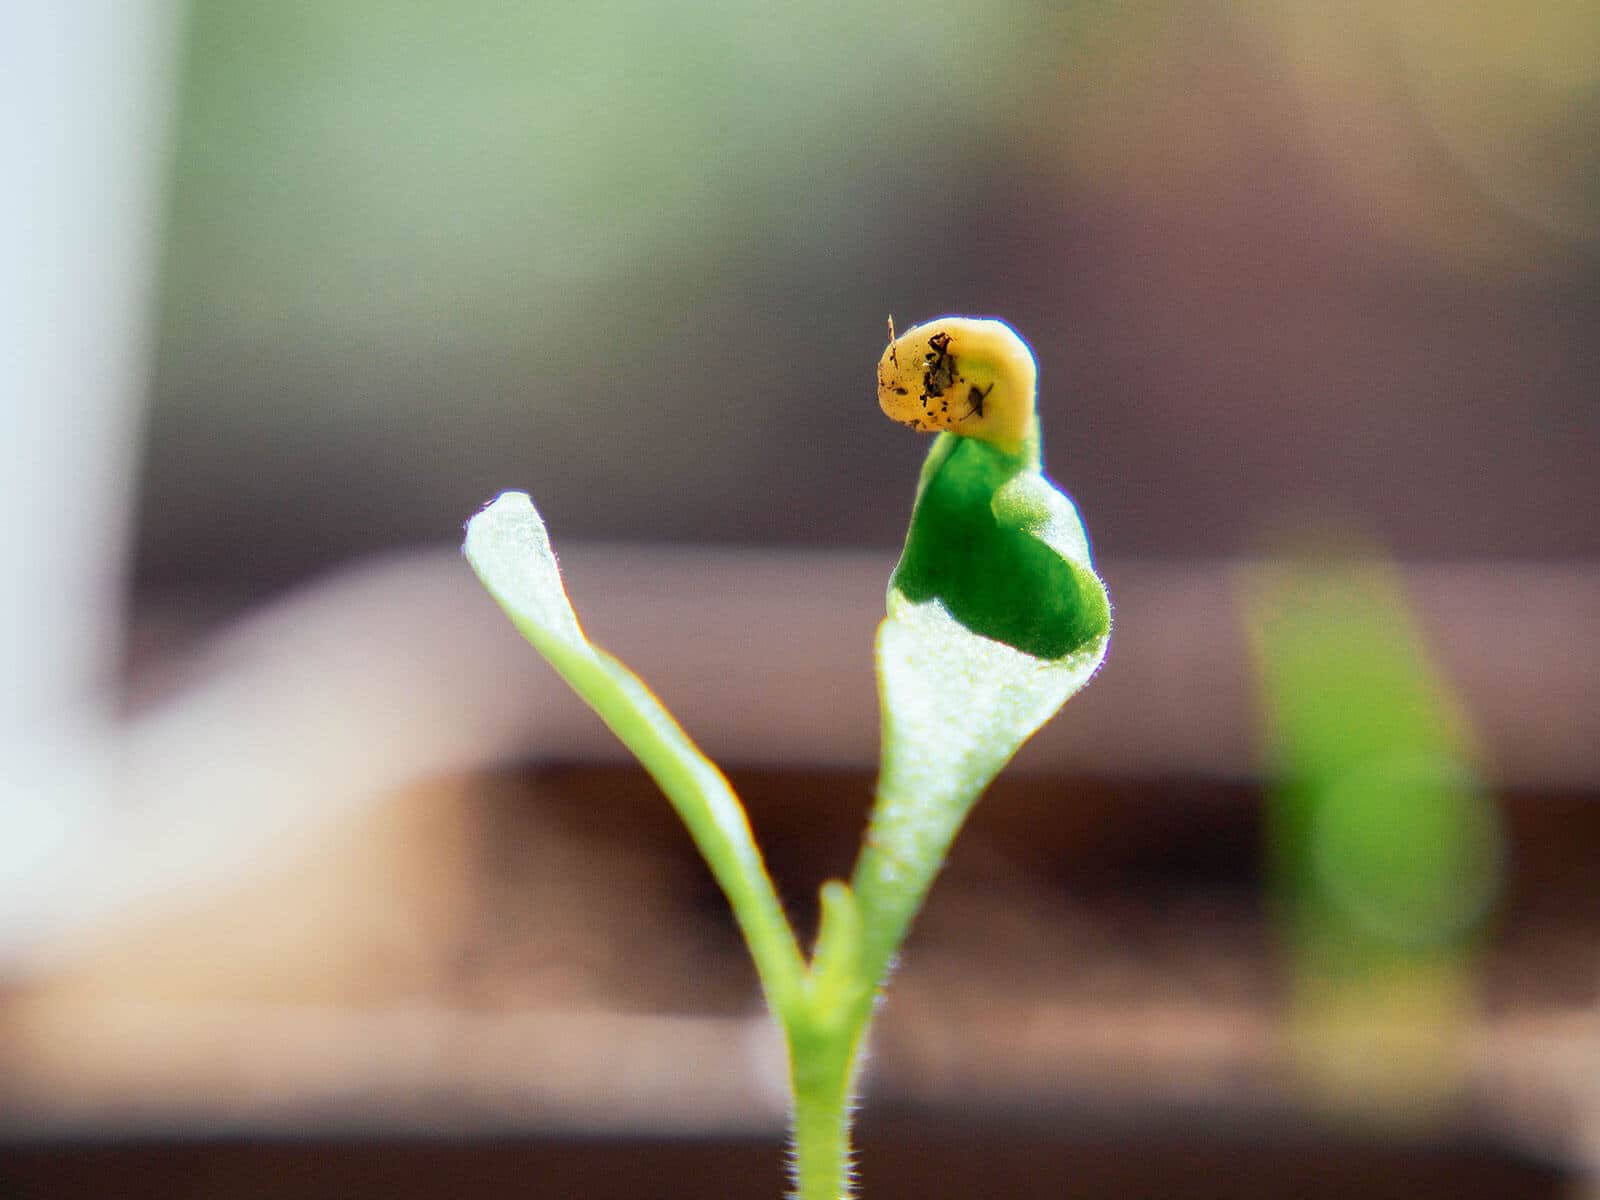
Don’t try to remove the seed coat before transplanting; it’ll fall off on its own when the first leaves (cotyledons) start to unfurl.
If any part of it is enmeshed in the paper, cut around the root and plant the whole thing in a pot, paper and all. The roots will grow around the paper and the paper will eventually disintegrate.
I try to transplant the seed as soon as it’s germinated so it doesn’t rot inside the baggie.
Sometimes you can wait until the first leaves appear if you need a guide as to how deep to bury the stem, but definitely keep an eye on the moisture level inside the baggie and provide plenty of ventilation at this stage.
After you’ve transplanted all your seedlings in small pots, keep the potting mix evenly moist with good airflow around the plants to prevent damping off disease.
You’ll need to harden them off for a few weeks before moving them outside, but once the seedlings develop their second set of leaves (the true leaves), they’re ready for their final place in the garden.
Troubleshooting: why are my seeds not germinating?
Sometimes the paper towel trick doesn’t work, or you run out of patience waiting for seeds to sprout. Here are a few reasons why your seeds aren’t germinating despite your best efforts:
- The paper towel is too wet: Seeds swimming in water may rot before they sprout, especially if they require a longer germination period.
- The paper towel is too dry: Seeds need consistent moisture to germinate, and you may need to mist the paper towel periodically to keep them moist.
- Seeds need more exposure to sun: Certain seeds require light to germinate, so if your baggies are tucked away in a room that sees little to no light, try moving them closer to a window.
- Seeds are too old: All seeds have an expected shelf life, and that shelf life typically diminishes after the first year or two. Use this seed viability chart to find out how long your seeds should last in storage, and make sure you’re storing your seeds properly to begin with.
- Seeds require scarification or stratification: If it seems like your seeds are especially stubborn, they might need special treatments in order to germinate. Check out these six tips for germinating hard-to-start seeds.
This post updated from an article that originally appeared on February 1, 2013.
View the Web Story on germinating seeds in paper towels.


Will this work for foraged herbs such as golden rod?
Linda,
This was a great read on germination of seeds. I have some Piggy-back seeds that require “cold moist stratification” that I have never tried before.
Have you a moment to reply and enlighten me on this process or have you already done a previous post on this subject?
I have enjoyed and increased my knowledge on plants and gardening through your newsletter for over a year and look forward always to the next post. Thank you for any feedback you might provide.
Peace & good health,
Bill Paris
Hi Bill, I wrote more about cold-moist stratification here: https://gardenbetty.com/seeds-need-cold-stratification/
I’m so glad you’re finding my newsletter and posts helpful!
Thanks for the info, but what’s with all the ads, every other page is a new ad. Very distracting.
I can’t figure out the problem in my side
the primary root is merging from the seed
but the seeds are dying, the roots become pale after when i transplant it to soil
have i need to give them more time in paper towel ?
i am using a regular potting soil mix
Wow!
I have seen this technique before. Your explanation is simple and to the point.
Can’t wait to try this in February in my 8 x 12 greenhouse where temp may dip to 50-60 degrees.
I am gonna try this with my bleeding heart seeds that haven’t sprouted from the pot for 2 months. Is it ok to leave the pot/flower indoors after you transplant the sprout?
Wow, so much great info on this site. I have sprouting seeds that are a few years old and this is perfect for determining whether or not I should try sprouting. Thanks!
Does this work well for spinach seeds? I have had trouble getting them to germinate in soil.
Yes, this trick works for all seeds!
My kalamansi seeds had molds on them by the second day. My mom told me I should have dried them out first before trying this method. Is this true? Btw,I used recycled take out containers.
It worked on one of the 16 Four o’clock seeds that I bought from the supermarket.
It’s possible your kalamansi seeds weren’t fully mature yet, or there were existing fungi on the seeds that grew under very moist and humid conditions. If you tried to start your seeds in soil, here’s a post I wrote about damping off: http://gardenbetty.com/2015/03/what-is-damping-off-disease/
i put mine in a shallow tupperware with a red lid and left it in the laundry room, but left a gap for just a little bit of air. There’s no light there either as its in a dark corner but very warm, tropical-like. it’s been there for a few days but nothing growing. i have to moisten the coffee filter every day. should i just seal it?
It depends on the seed varieties. Some can take up to 3 weeks to sprout.
Can I use this method on seeds that I want to eat as sprouts? Seems a lot easier than the jar method where I have to wash them off every day. ???
I don’t recommend it, as the warm and humid conditions needed for the seeds to germinate using this baggie method can also breed bad bacteria.
Can I use this method on seeds that I want to eat as sprouts? Seems a lot easier than the jar method where I have to wash them off every day. ???????????
I see you use Baker Creek seed. Have you ever gone to one of their festivals?
Yes, I’ve been a presenter at both their Missouri and California festivals! (And will hopefully speak again in Santa Rosa this year, if my schedule allows.)
sprouts provide better nutrition , if being grown in the dark, are healthier and cleaner with sterilized paper or sprout material. sprouts need clean water twice daily. fail, lazy article.
Fail, lazy reader. This article is about germinating seeds for gardening, not sprouting microgreens for food.
fu ho
No need to be a douche.
Couldn’t have said it any better myself. Great article and thank you!!
Go away lazy reader…no one likes you here, LOL…just kidding….write whatever makes you happy lazy reader loser. 🙂
What ? What is your problem. She replied to a question about raising micro greens in filters and baggies. You assume she doesn’t know how to raise micro greens. You fail.
does this work for flower seeds as well??
Yep!
If you need to sprout some especially stubborn seeds (like chile peppers, which take a notoriously long time) or… http://t.co/pnXLfSs9Zx
brilliant!
DOES THIS WORK ON ALL SEEDS?
Yes, but it works best on seeds that are slow to germinate, slow to grow in the seedling stage, or need to be kept moist at all times.
A little flawed any paper media contains bleach in the paper. Bleach not great for plants. Second, the small containers you use, grow will be stunned transplanting. A quart pot there is no need to transplant. The recipe for seedlings soil sounds interesting worth a trial.
Can I take the seeds from a Jalapeno right into the paper towel? or do I need to dry the seeds for days?
Assuming you picked a jalapeno pepper while it was ripe and has mature seeds, yes you can plant them right away. The only reason seeds need to be dried is to prepare them for storage (to prevent rotting).
Thanks! Really most useful site on this method of starting seeds!
Fabulous tips. Thank you.
Saw this video on Mother Earth News and immediately thought of your post. http://www.motherearthnews.com/organic-gardening/seed-viability-zv0z1306zrob.aspx
Very nice idea.
Thanks for sharing
Oh, this is great! Definitely going to do this, thank you for the idea!
I love my pet TickleMe Plant
Do you use lights/grow lights at all when starting indoors?? I have had no luck starting seeds in windows – so am thinking of trying lights for the first time but I am NERVOUS. 🙂
I don’t, but I put all of my seed trays in front of a south-facing window so they get plenty of sun every day. If your seedlings are in a space with little to no sun, I do recommend grow lights to keep them from getting leggy.
My apartment has no south facing windows, or any that get much sun–so in my place specifically, grow lights are a must to get my mint seeds to germinate and keep my existing mint plants healthy. Loved the article!
Thanks!
Kerie Dunn liked this on Facebook.
Ahhhh…. Good to know. Thanks.
Tomatoes, peppers, eggplants, salad greens, brassicas… all the plants that take a while to get going.
What kinds of seeds are you starting this way, Betty?
What is soilless mix? I start my seeds in starter soil.
It’s a potting medium for seedlings. I make my own here: http://gardenbetty.com/2011/03/how-to-make-your-own-seed-starting-and-potting-mix/
I’m in Canada so this won’t be happening anytime soon but I’ll definitely be trying this in May. Love the tips.
In May?? That sounds… very cold up there. 😉
You should start them now, in mid March. May is for transplanting outdoors. (I’m in Winnipeg)
Agreed! I’m here in Alberta and starting today! Excited to try this method.
Amy Goo liked this on Facebook.
Jean Turman liked this on Facebook.
Christopher Stinnette liked this on Facebook.
Christi Stout liked this on Facebook.
This is fantastic. I will be using this technique this weekend to sprout my garden. I’m always leery of the little homegrown seeds I buy from farms because I feel like most of them never germinate. This is the perfect way to test their viability and be sure that my egg crate seedlings are all growing and no space is wasted. Thank you again! I live by your posts and tips now. 🙂
Nancy Townsend liked this on Facebook.
Diana Heffernan-Schrader liked this on Facebook.