
You can start seeds in almost anything these days… peat pots, seed trays, toilet paper rolls, newspaper rolls, paper towels, perlite, vermiculite, or even that good old-fashioned thing called the ground.
But have you tried starting seeds in eggshells?
It almost seems like an urban myth, with rumors that it’s possible, but little proof of people who have actually done it successfully.
Well, I can say with absolute certainty that it works, it’s ridiculously easy, and yes, it’s even practical. It’s also a fun way to save money and repurpose kitchen scraps before they go in the compost heap.
What types of seeds to plant
Kids love this activity. It’s crafty yet constructive, and it won’t turn into another one of those artistic masterpieces you need to figure out what to do with.
If your kids are curious about gardening, starting seeds in eggshells is a good way to teach them how to plant and water seeds so they can nurture their very own garden.
Make it themed and get them excited about growing their food!
Here are a few ideas for garden themes you can try with your family:
- Pizza garden (tomato, bell pepper, onion, basil)
- Salsa garden (tomato, hot pepper, onion, cilantro)
- Burrito garden (black bean, tomato, onion, cilantro)
- Herbal tea garden (chamomile, lavender, echinacea, lemon balm, mint, stevia)
- Single-color garden (I’m a fan of purple, so I’d do purple basil, purple kale, purple bok choy, or a variety of purple flowers)
While you can’t feasibly start a whole season of vegetable seedlings in eggshells, it’s perfect if you just want to start a few plants indoors (especially herbs and flowers) and you have limited space in your house.
Related: Find First and Last Frost Dates Accurately with This Custom Planting Calendar
Small seeds work best. Don’t try to tuck a pumpkin seed in there—the seedling and its roots will outgrow the eggshell “pot” too quickly.
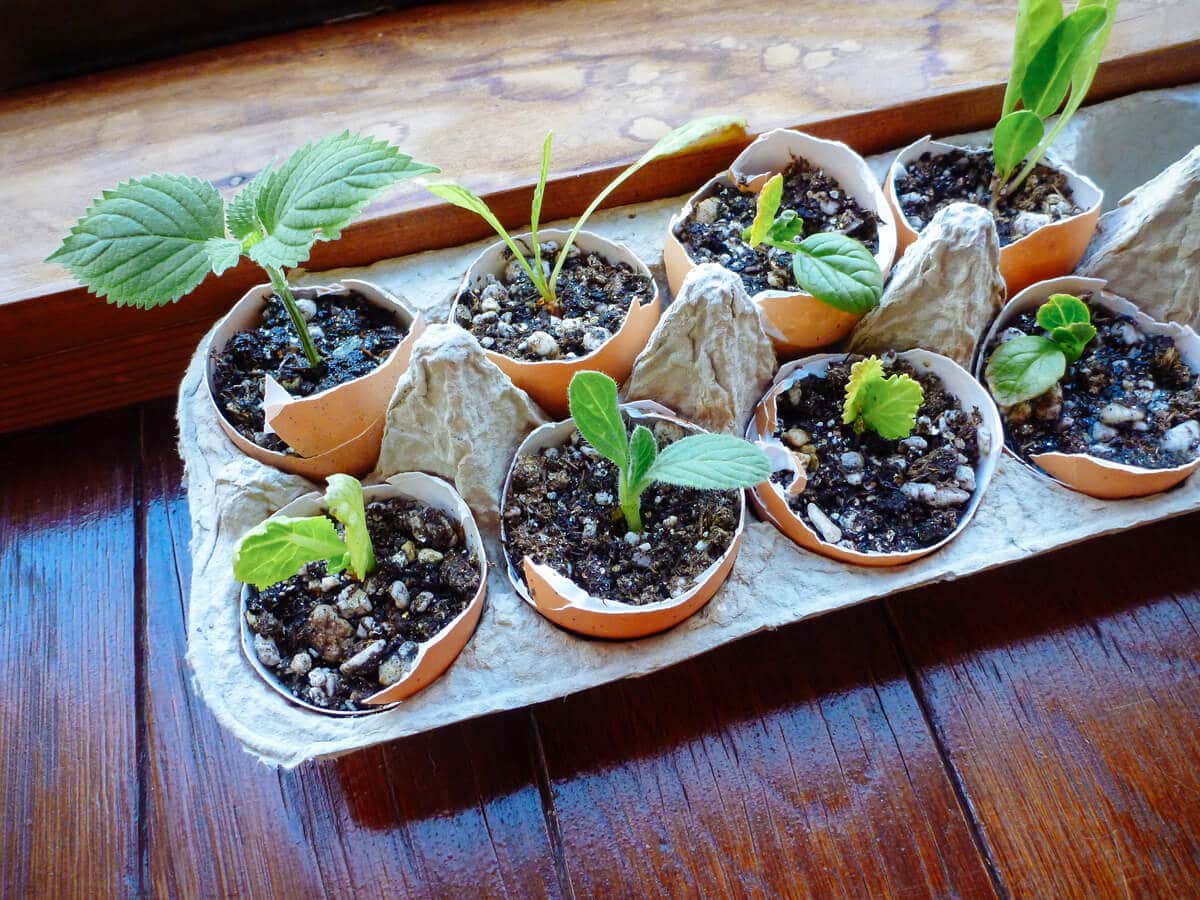
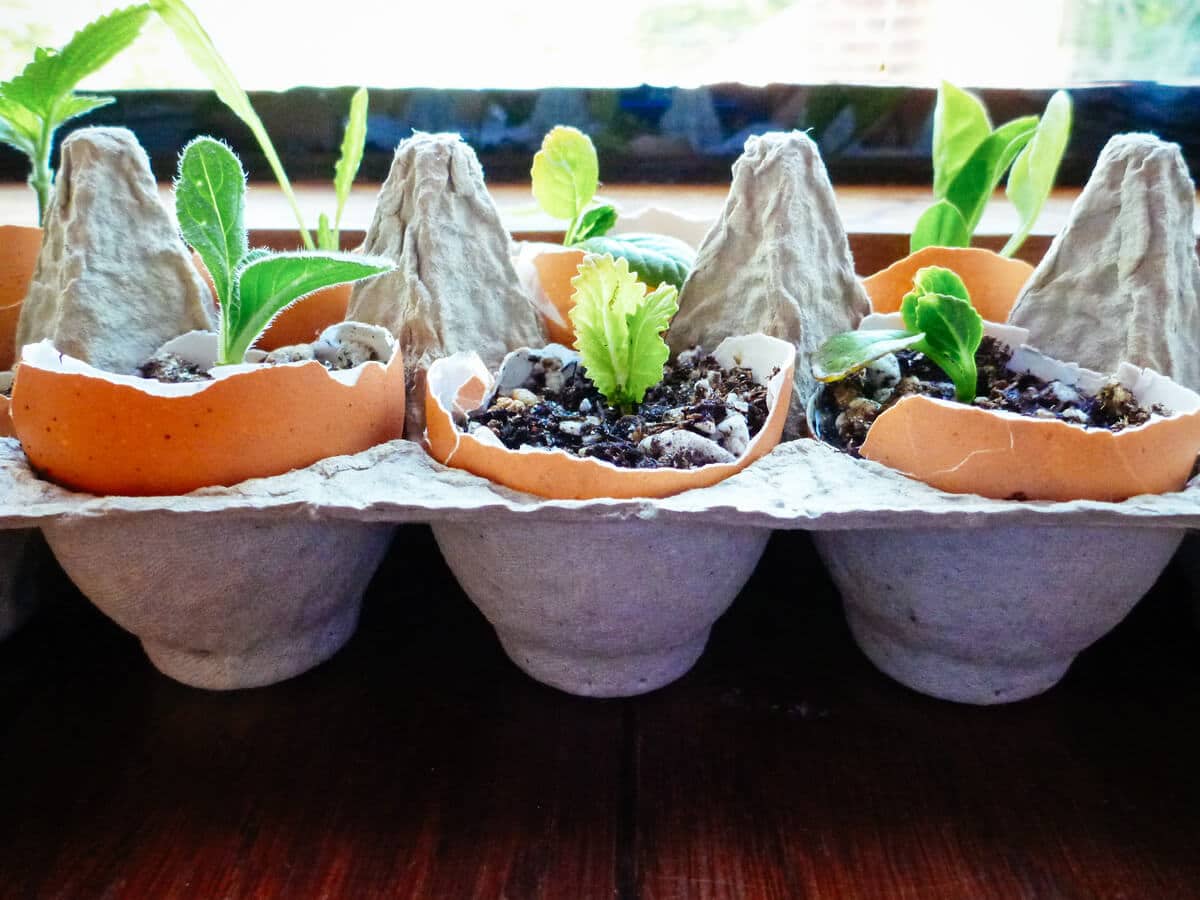
Each egg goes right back into the egg carton, which is just the right size to place on a sunny windowsill. By the time you’re ready to transplant the seedlings, everything goes back into the earth by way of planting, composting, or recycling.
How to start seeds in eggshells
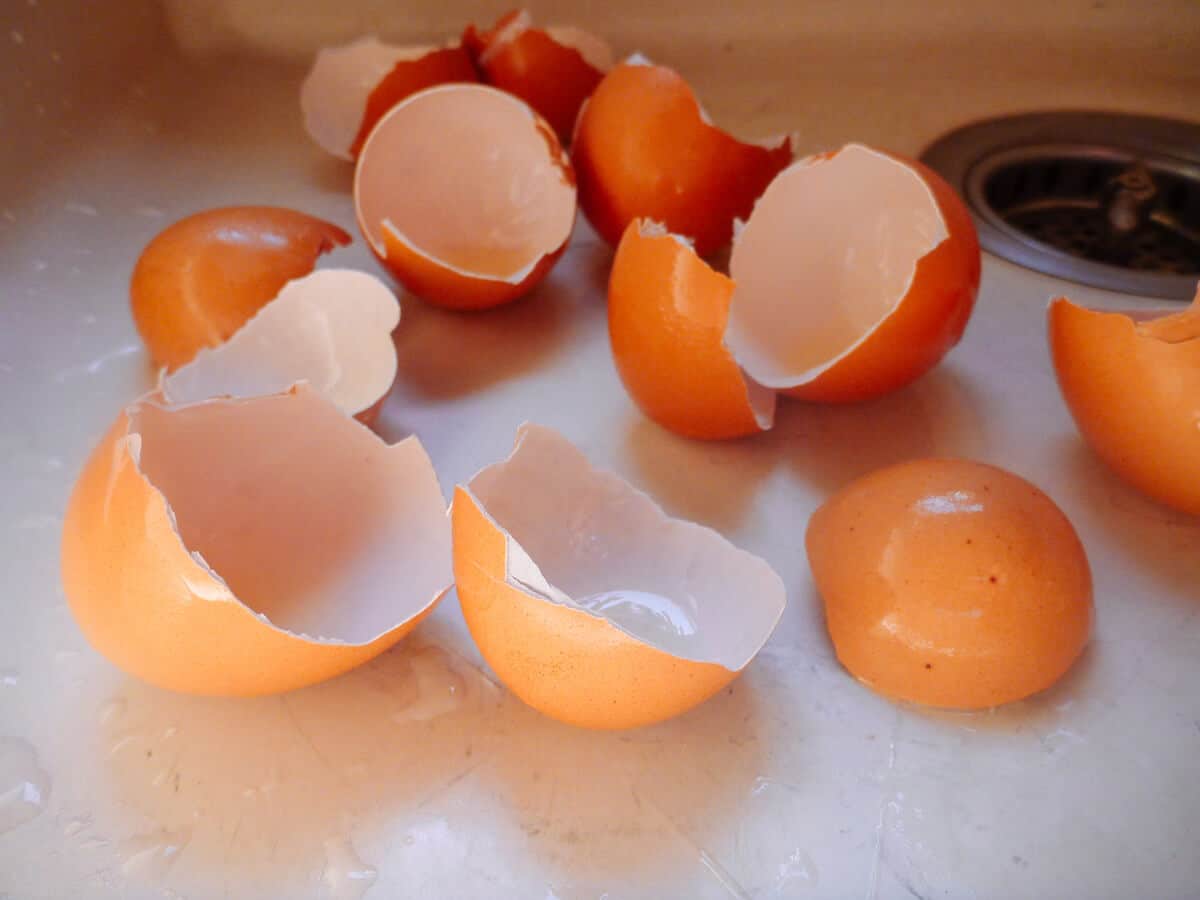
Step 1: Gather your cracked eggshells.
Rinse the cracked eggshells before using them. It’s perfectly okay to use unevenly cracked shells, as long as you have at least half the shell intact.
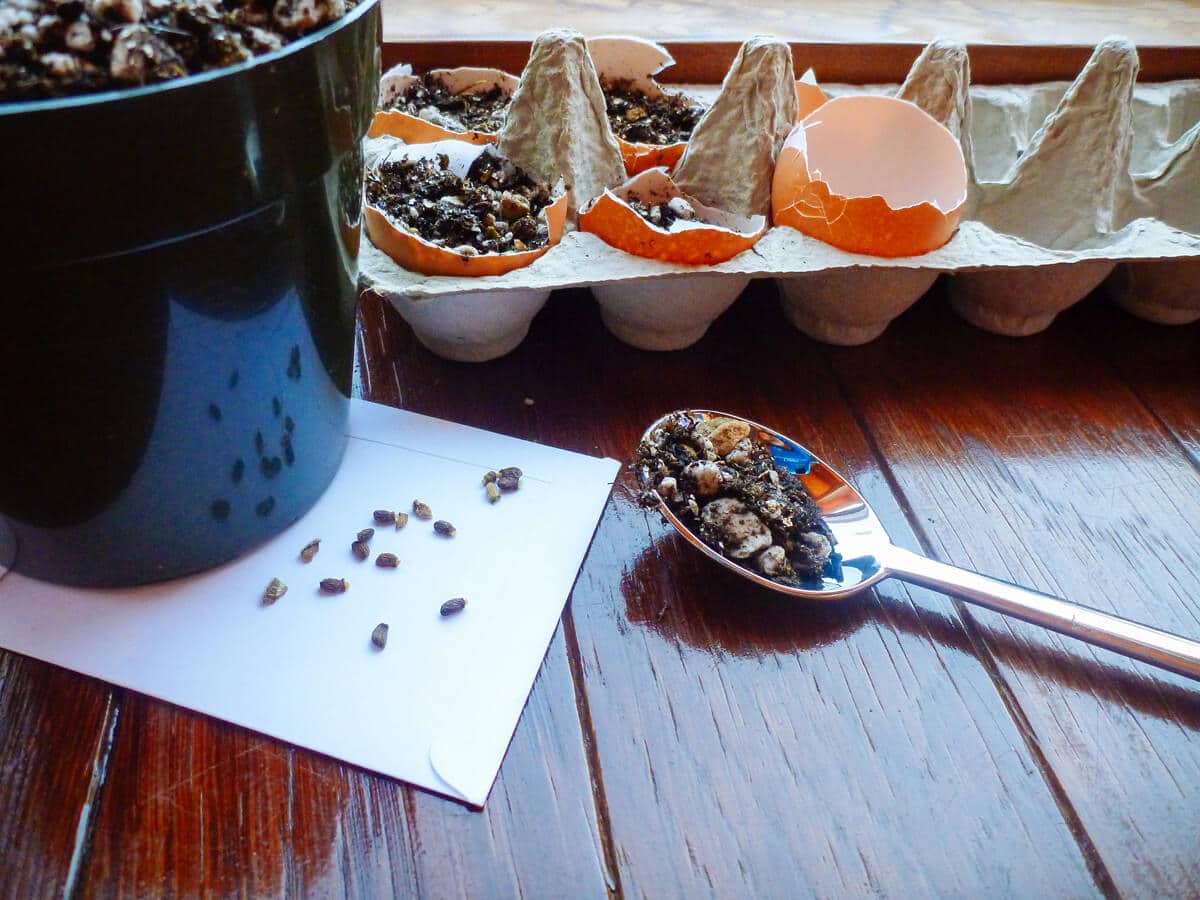
Step 2: Fill each eggshell with seed starting mix.
Arrange your eggshells in a paper egg carton. Using a spoon or mini trowel, fill each eggshell pot with pre-moistened seed starting mix.
Place a couple of seeds in each “pot” according to your seed-sowing instructions.
Leave the egg carton in a sunny south-facing window in the warmest room in your house.
Step 3: Keep your seed starting mix moist.
Lightly mist the soil with a spray bottle every couple of days as needed.
Since there are no drainage holes, take care not to overwater. A fine mist is all that’s needed for seed germination and new growth.
Step 4: Thin your seedlings.
Once all your seedlings have emerged, snip the weakest or smallest ones to allow the largest seedling room to grow.
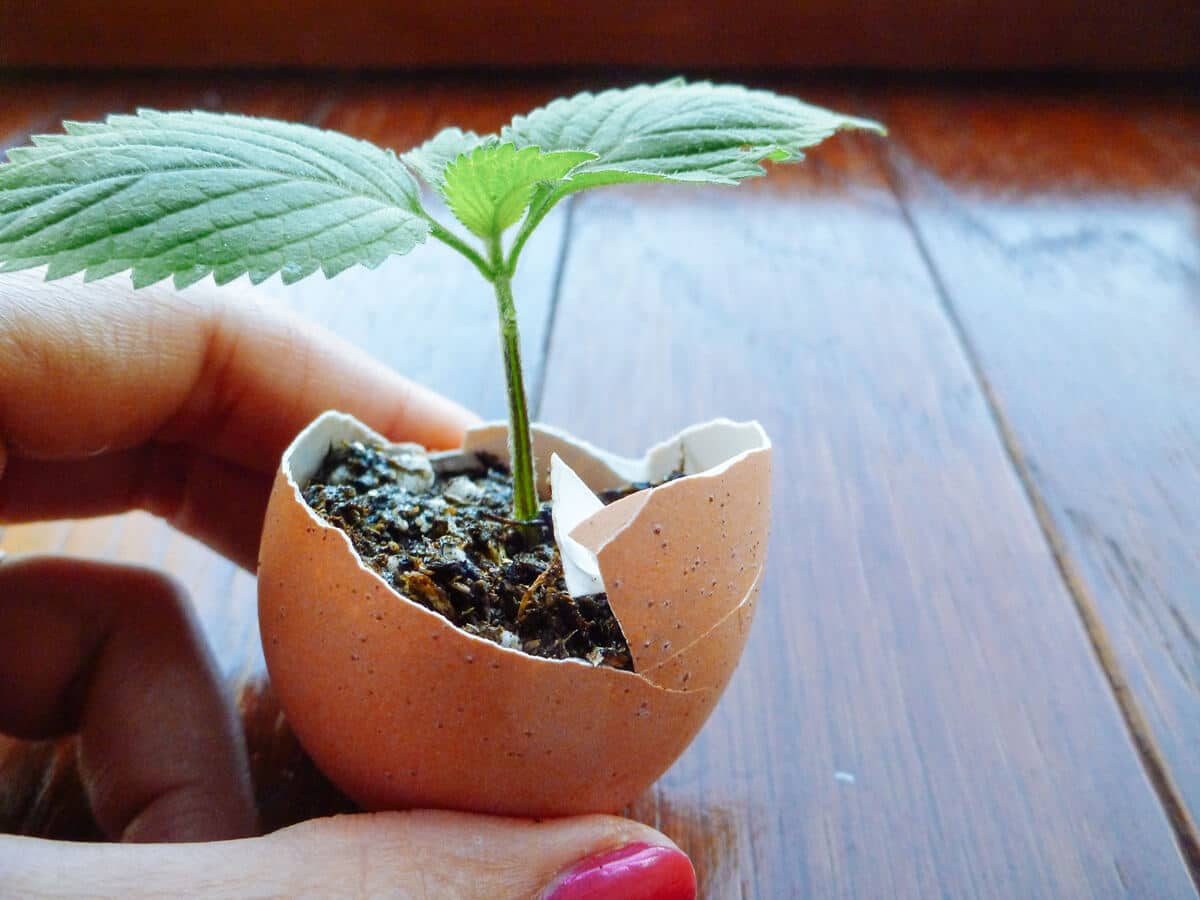
After your seedling develops its first set of true leaves (these are actually the second set of leaves to appear, after the cotyledons—learn more about seedling anatomy here), you can transplant the seedling into a larger container, or directly in your garden after a period of hardening them off.
Related: Leggy Seedlings: What Causes Them and How to Correct Them
To transplant, gently crush the shell with your fingers and remove a few shards around the bottom. You can plant the whole thing this way, and the eggshell will decompose in the soil, feeding extra nutrients to your seedling.
Tear apart the egg carton and toss it into your compost pile, or add it to your recycling bin.
Then… start your next batch of seeds with your next empty egg carton!
How to Start Seeds in Eggshells

Learn how to start your seeds in eggshells! This easy DIY is a fun project that gives you a head start on gardening and gives the kids something crafty to do.
Materials
- 12 cracked eggshell halves
- Empty paper egg carton
- Seed starting mix, pre-moistened
- Seeds
Tools
- Medium-size spoon or mini trowel
- Spray bottle of water
Instructions
- Rinse the cracked eggshells before using them. It's perfectly okay to use unevenly cracked shells, as long as you have at least half the shell intact.
- Arrange your eggshells in a paper egg carton. Using a spoon or mini trowel, fill each eggshell pot with pre-moistened seed starting mix.
- Place a couple of seeds in each "pot" according to your seed-sowing instructions.
- Leave the egg carton in a sunny south-facing window in the warmest room in your house.
- Lightly mist the soil with a spray bottle every couple of days as needed. Since there are no drainage holes, take care not to overwater. A fine mist is all that's needed for seed germination and new growth.
- Once all your seedlings have emerged, snip the weakest or smallest ones to allow the largest seedling room to grow.
Notes
Small seeds such as herbs and flowers work best. Don't try to tuck a bean or squash seed in there — the seedling will outgrow its eggshell "pot" too quickly.
This post updated from an article that originally appeared on August 3, 2011.
View the Web Story on starting seeds in eggshells.


Sounds an interesting project. Do I need to make a tiny hole at the bottom of the eggshell pot?
I personally never did since I watered very sparingly, but you certainly can to help with overwatering.
Just started my egg shell garden! Curious to see the results in a couple of days! Thanks for the guidance!
What did you plant specifically fruits , vegetables, herbs etc?? Demographically how’s your climate?
Thanks so much
brilliant. Liked the idea so much I ran down to the local garden center and got some neutral grow medium to start my seeds that are, hopefully, arriving today.
I like the fact that you can gently crush the shells as you put the girls into the final medium. I’ve always been a bit nervous about the solo cup etc methods because I don’t want to shock my girls. Also as I bottom feed with an aquavalve system this gives me very good control of moisture for the first few weeks until the roots are strong enough to go hunting for food and water.
Looking forward to this experiment.
Good luck Albus! Your plants will do great with this method!
I use the paper egg carton instead of the shells. That works fine too. You need to place it on a tray, though, since it is not waterproof.
The instructions state to use a paper carton. All we have are the styrofoam ones. Would that be okay, especially if I intend to poke drainage holes in the bottom of each she’ll?
Yes, styrofoam works—just don’t plant it in the ground with your seedlings. 🙂
Do you boil or bake the shells first to sanitize? What about disease from the raw egg?
I only rinse the shells with water. Salmonella is already present in the environment (including your soil) and any trace amount that may remain on the shell does not pose a threat to your seedlings.
Well, I would never have thought of this. What a great idea!…thanks!
I start my tomatoes in them all the time and swear by it.
can you do cucumbers this way too?
Cucumber seedlings will outgrow the eggshells pretty quickly, so I recommend just direct sowing them if you can.
I want to try this & then using my dogs old kiddie pool since it has holes now not just for tomatoes etc I figure planting vegetables & fruits in the kiddie pool I could always move it just in case torrential downpour, intense sun &/or freeze ( wishful thinking this rarely happens here ) !! Any suggestions!! Thanks so much
I added drainage holes to mine with a small nail I attached to a Popsicle stick using a rubber band -. It took all of 10 seconds to make and really worked well! Best to poke hole with a light tap from the inside going out!
Fantastic! Totally going to try this.
linking to this post. thanks!
So ridiculously clever.